🎨 17. Tone Mapping For Cel-Shading Characters
ASP offers two additional Tone Mapping algorithms: Filmic and Khronos PBR Neutral.
Furthermore, the intensity of Tone Mapping on character pixels can be adjusted using additional parameters.
💡 In some cases, you may want to apply a weaker tone mapping strength to character pixels compared to other parts of the scene. This is because using Filmic tone mapping can result in loss of saturation on characters’ pixel color. ASP provides additional parameters to reduce the impact of tone mapping on character pixels, helping to preserve color saturation.
1. Adding the ToneMapping Renderer Feature and Volume Override
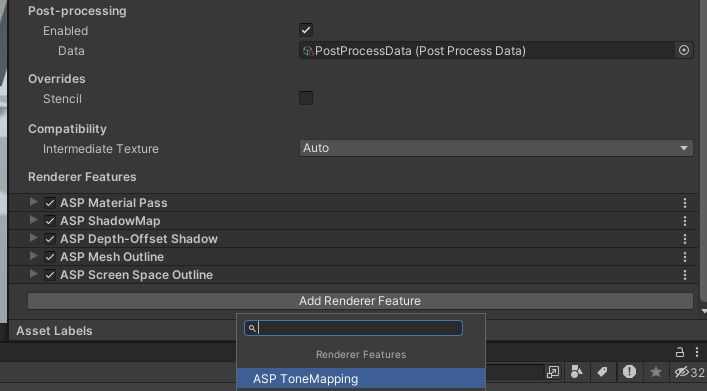
- In the Universal Renderer Data asset used by your project, add ASP ToneMapping.
In the scene, add a new Volume (or use an existing one) and set it to Global Mode.
In the Volume's inspector, select Add Override, search for ASP ToneMapping, and add it.
Your Volume should now look like the screenshot below, with ASP ToneMapping now visible.
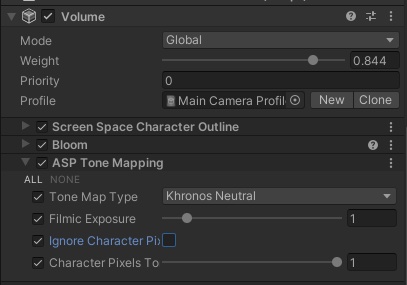
What does all those toggles on the left mean?
Unity's Volume uses a framework called Volume Override.
To make the toggle options on the right take effect, you must first check the override toggle on the left. Otherwise, the default values of the post-processing effect will be used.
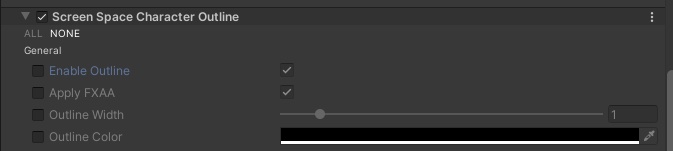
Use above figure as example, the default value of Enable Outline for screen space outline feature is true. Therefore, when this outline's renderer feature is enabled in the renderer data, the outline is already turned on.
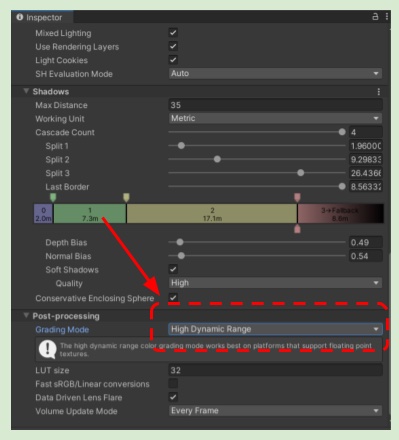
2. Set the project's Grading Mode to High Dynamic Range (HDR)
In order to correctly apply a custom Tone Mapping, the Unity project must set the Grading Mode of the URP Asset to HDR.
The reason is:
If it is set to LDR, Unity will perform an internal color LUT in the middle of Post Processing stage, resulting in an incorrect coloring for custom Tone Mapping shader.
If it is set to HDR, Unity will perform the color LUT after Tone Mapping is applied.
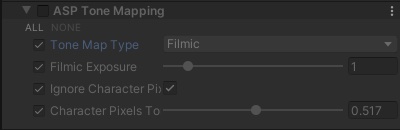
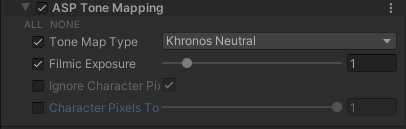
Set the Tone Mapping parameters
3. Tune the Tone Mapping parameters
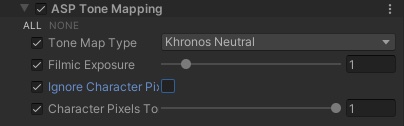
| Parameter Name | Description |
|---|---|
| Tone Map Type | The selected Tone Mapping model (Filmic or Khronos Neutral) |
| Filmic Exposure | The exposure of Filmic Tone Mapping |
| Ignore Character Pixels | Whether to skip(or tune down) the tone mapping effect for pixels occupied by ASP/Character and ASP/Eye materials. |
| Character Pixel Tone Map Strength | If Ignore Character Pixels is set to true, the impact of the Tone Mapping effect on the ASP/Character and ASP/Eye materials. |
Enabling Tone Mapping
Set the toggle next to "Tone Mapping Type" to
trueto enable Tone Mapping.Choose your preferred Tone Mapping algorithm.
💡 Starting from 2024/08/10, the Khronos Neutral algorithm has been added. For toon shading scene, it is recommended to use Khronos Neutral.
Ignore Character Pixels
- Set the toggle for "Ignore Character Pixels" to
true.
- This setting will remove the Tone Mapping effect from character pixels.
Control the Influence of Tone Mapping on Character Pixels
- Adjust the "Character Pixel Tone Map Strength" parameter at the bottom.
A value of
0means Tone Mapping will not affect character pixels at all.A value of
1means Tone Mapping will fully affect character pixels.Recommended Range: When using the Filmic, a value between
0.25and0.7is ideal.Recommended Range: When using the Khronos Neutral, it is not recommended to use "Ignore Character Pixels" or additional parameters to control the impact on character pixels, as this algorithm already preserves color saturation by default.
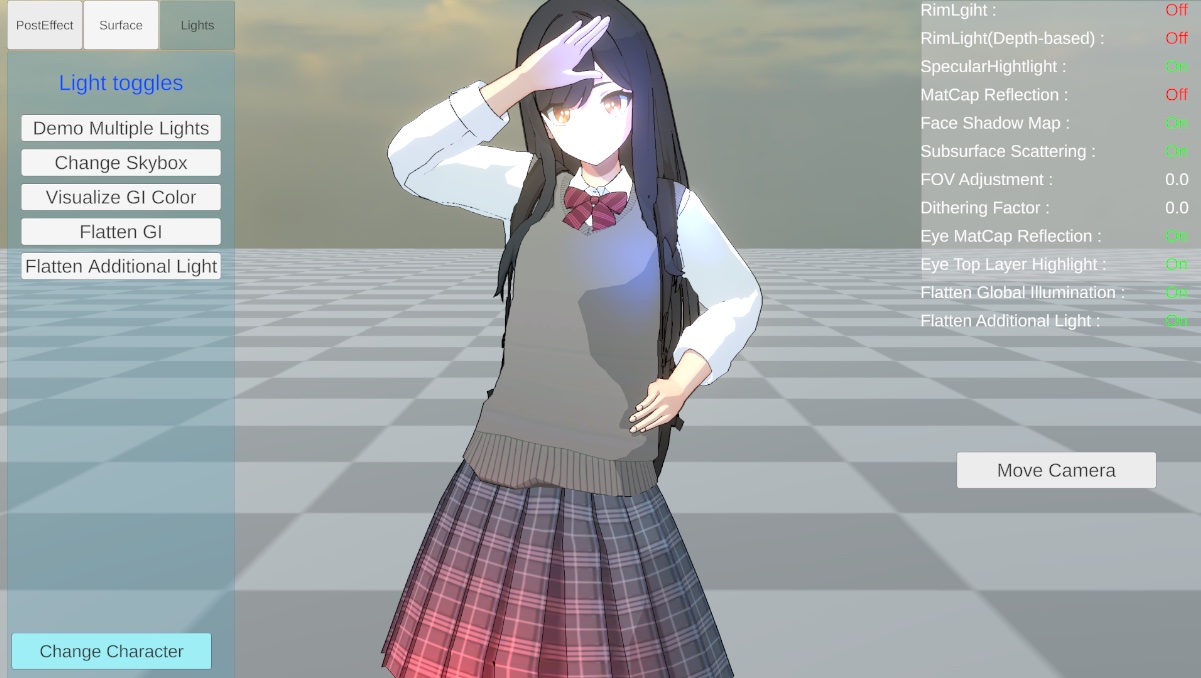
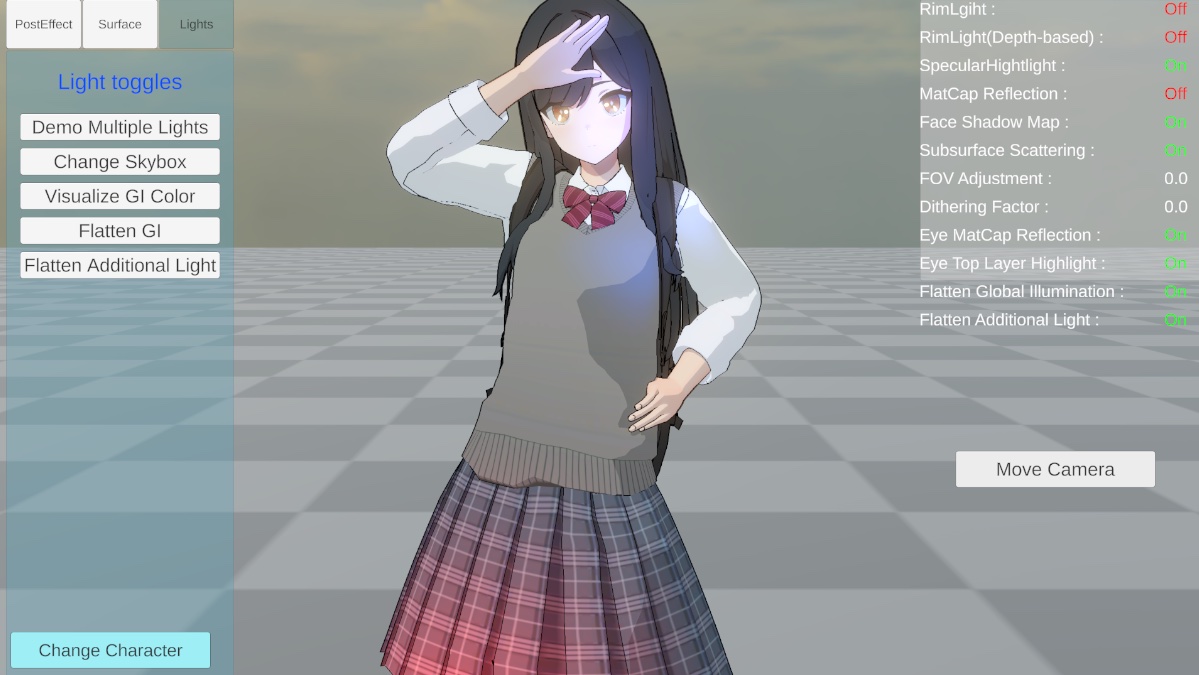
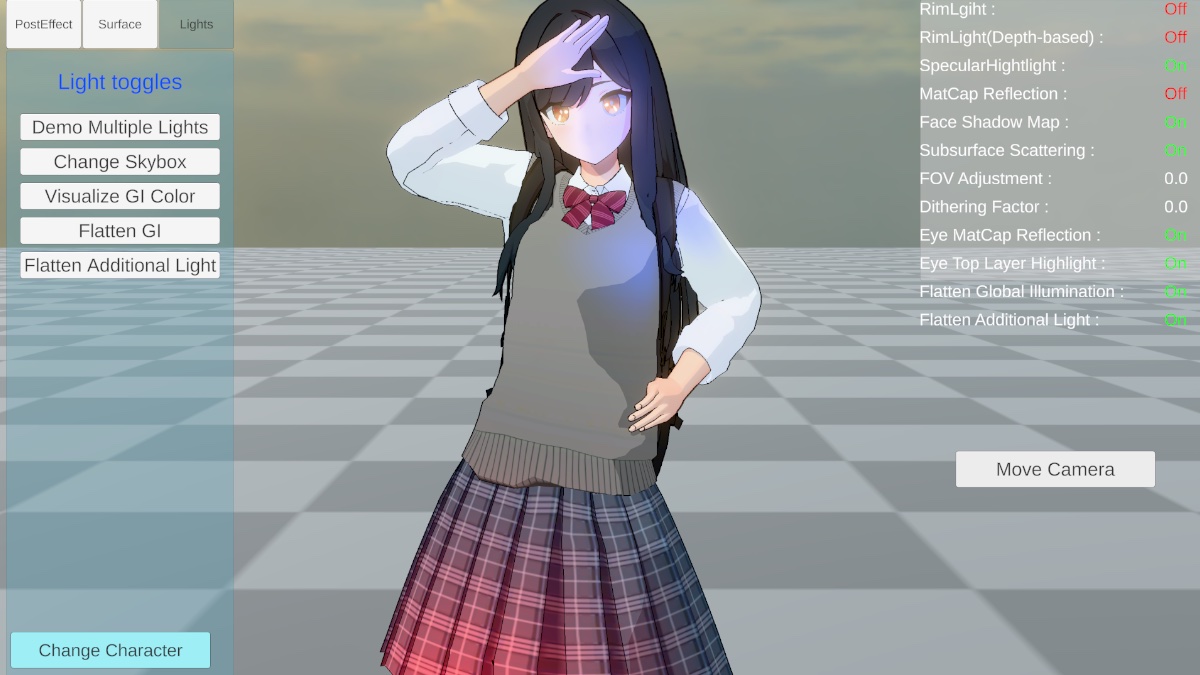
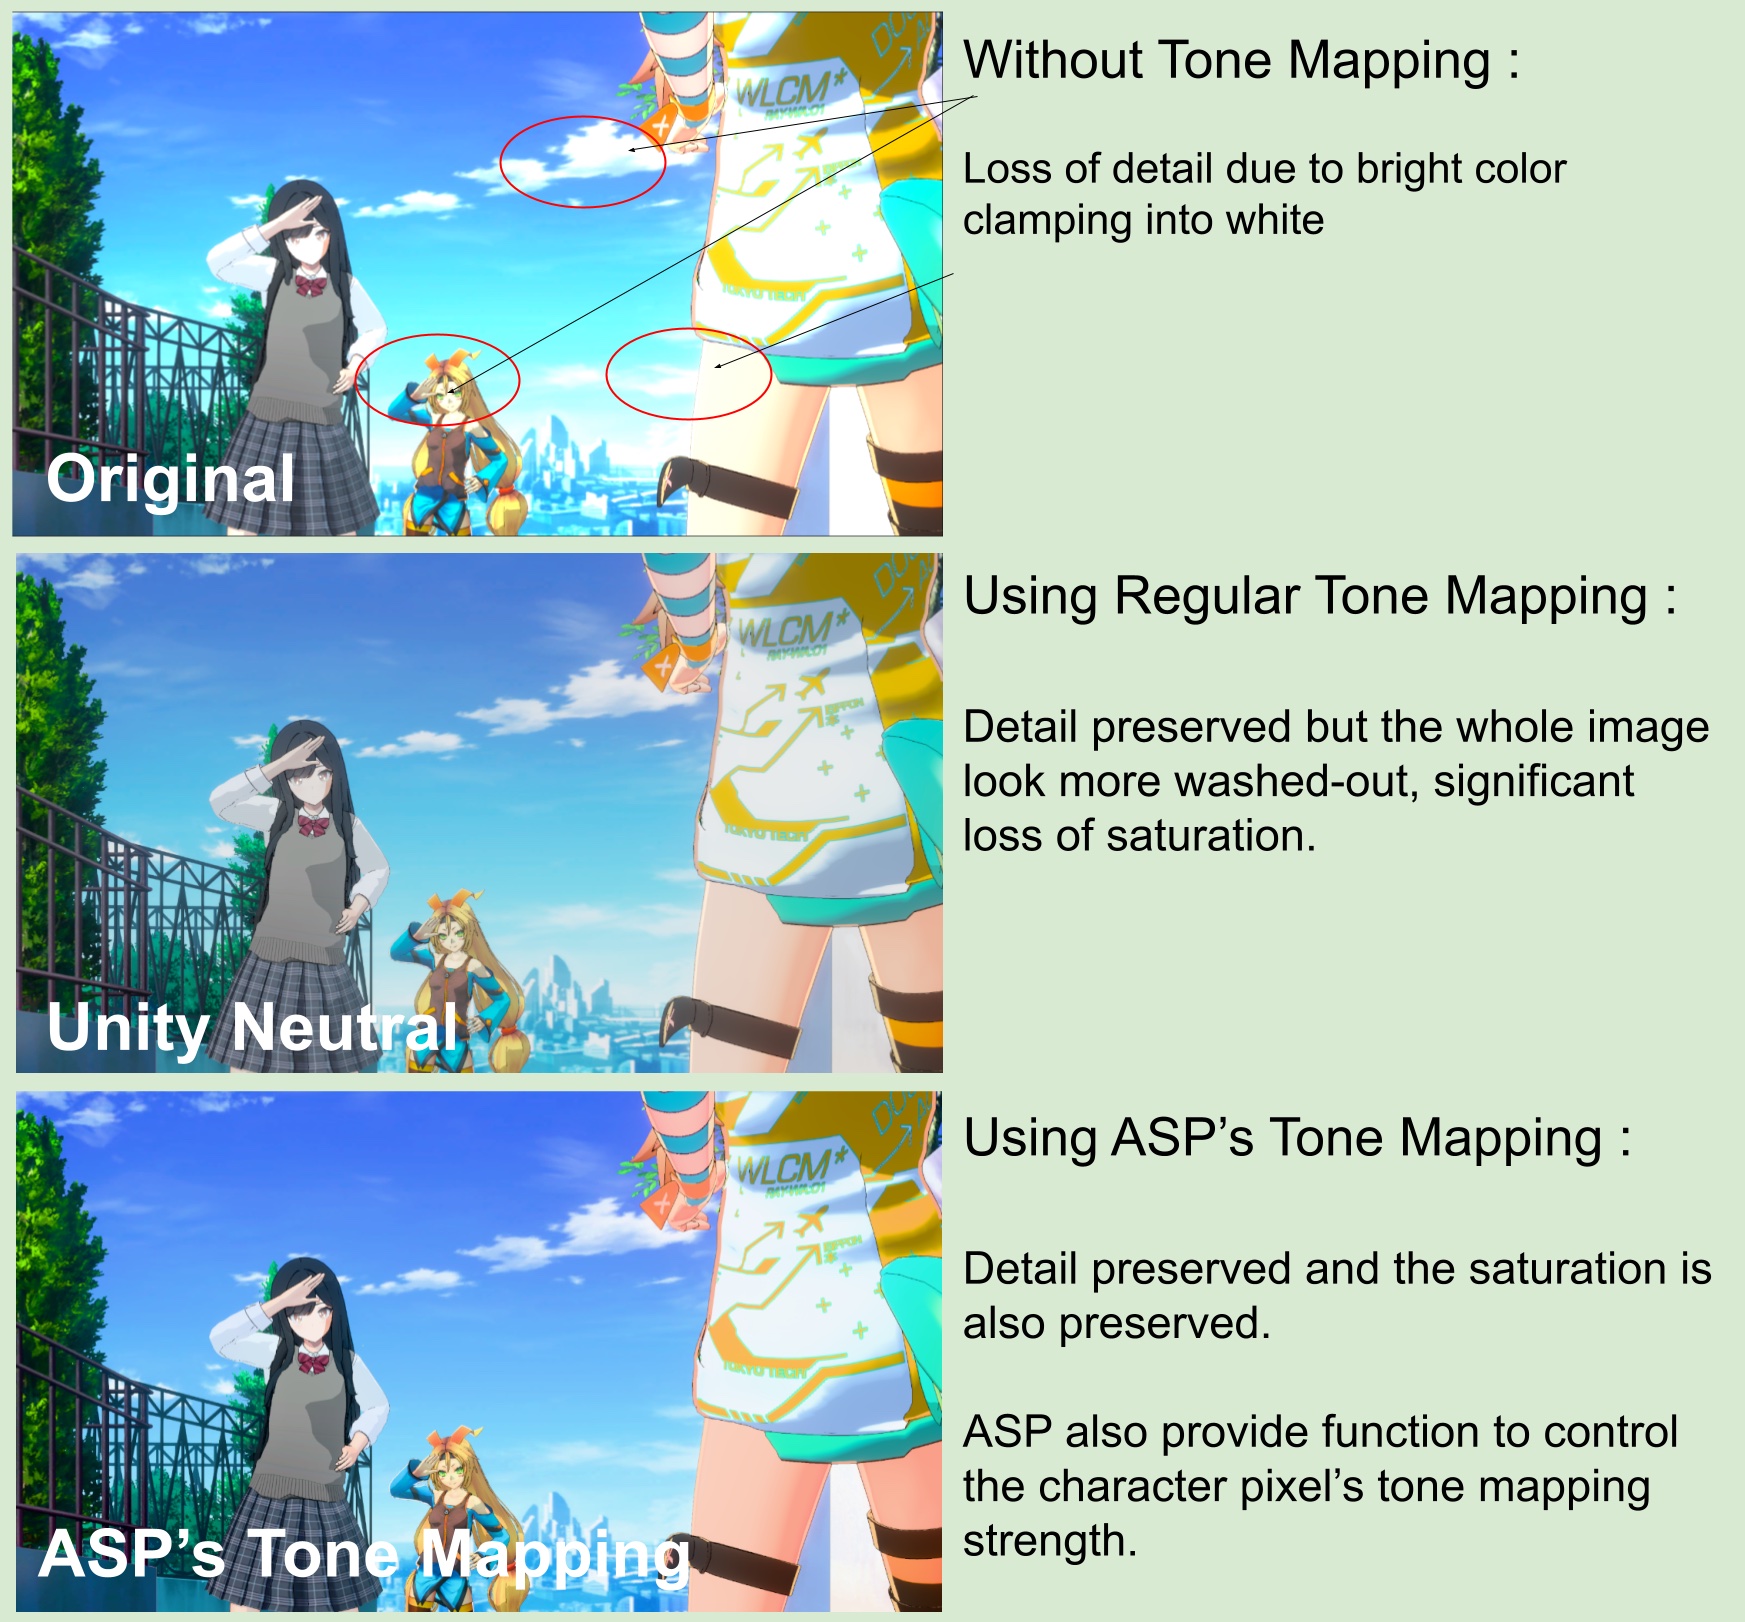
4. Comparison between different Tone Mapping
Finally, here are three comparison images: one with no Tone Mapping, one with Filmic Tone Mapping, and one with Khronos Neutral Tone Mapping.
As you can see, Khronos Neutral Tone Mapping preserves more color saturation, while Filmic allows you to control the Tone Mapping's impact on character pixels using the Character Pixel Tone Map Strength parameter.