AMD FSR and NVIDIA DLSS are both upscaling technologies. They let a game render at a lower native resolution while retaining image quality similar to a higher resolution. In an era full of real-time RT, SSGI, and SSR, they can significantly improve game performance.
Unity’s built-in support only covers FSR 1.0 and DLSS 1.0. The reconstructed image quality of DLSS 2 and FSR 2.0 is far better than the previous generation (although FSR 2.0 has a higher baseline performance cost than FSR 1). Integrating these features from scratch requires graphics-backend API skills such as Vulkan or DX12. Fortunately, AMD released a ready-made DX11 patch for Unity, so I decided to try it. This post records the DLLs needed for the build and the process of applying the patch to Unity.
Preparation
Clone these two repositories:
- FidelityFX-FSR2
- FidelityFX-FSR2-Unity-URP
- Unity 2021.3f13 (URP 12.1.7)
Other tools
- CMake 3.16 or later
- Windows 10 SDK 10.0.18362.0, installed through Visual Studio Installer
- “Desktop Development with C++,” installed through Visual Studio Installer
- Visual Studio 2019
- Git
Build the FSR2 library
To let Unity use the FSR 2.0 library, we first compile FSR and package it as a DLL.
After cloning both repositories, find
0001-fsr-2.2-dx11-backend.patchin the FSR-Unity-URP folder. A Git patch is a file containing the differences between two Git commits.Copy the patch into the folder containing FidelityFX-FSR2, then enter:
Go to
FidelityFX-FSR2/build. You will find GenerateSolutionDX11.bat; run it.
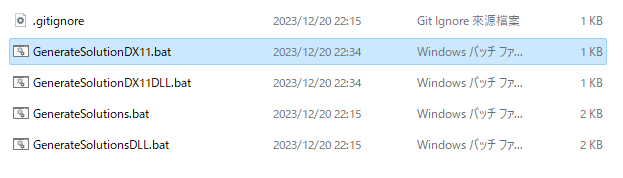
- After running GenerateSolutionDX11.bat, a
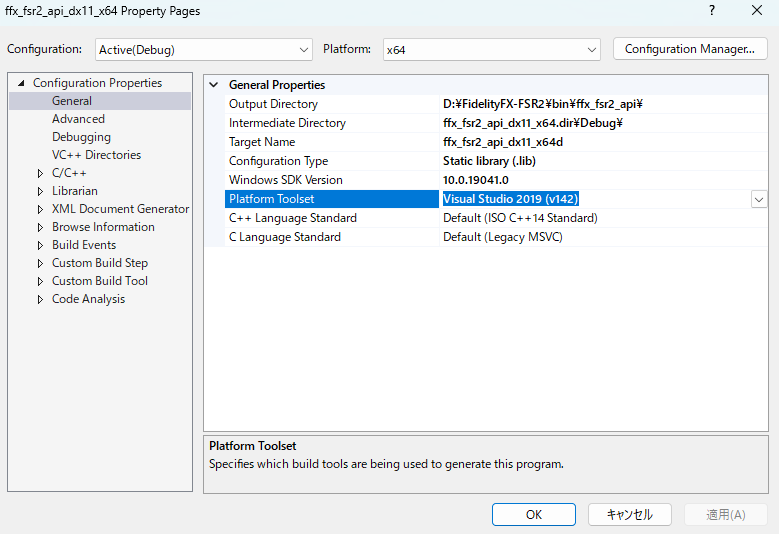
DX11folder appears. Open FSR2_Sample.sln in Visual Studio 2019 and confirm under Project → Properties → General that the Platform Toolset isv142.
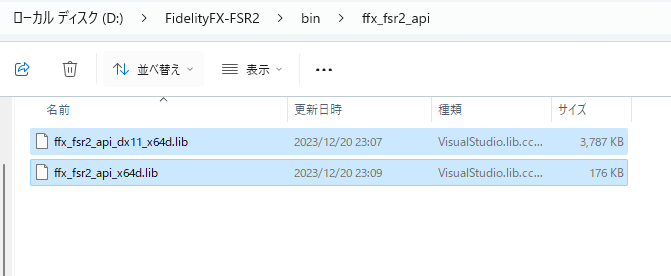
Build the project. When it finishes, two .lib files should appear in FidelityFX-FSR2/bin/ffx_fsr2_api.
Build the FSR2-Unity DLL
- Return to the FSR-Unity-URP folder. Use CMake to create a Visual Studio project that will build the final DLL. Open CMake, set the source-code path to your FSR-Unity-URP folder, and click Configure in the lower-left corner.
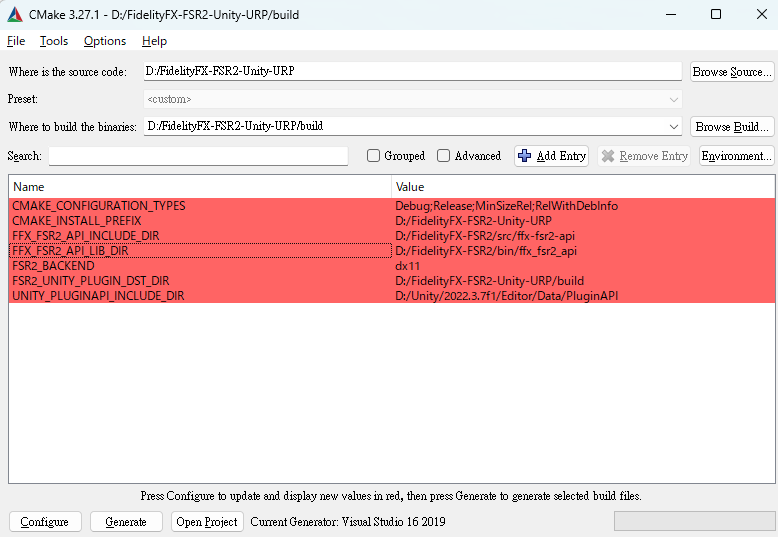
The paths corresponding to the names and values here are important. If they are wrong, the build will fail. Here is what each name means:
- FFX_FSR2_API_INCLUDE_DIR: the path to the FidelityFX-FSR2
/srcfolder, which contains the.hfiles required by the FSR2 API. - FFX_FSR2_API_LIB_DIR: the location of the
.libfiles we just built. - FSR2_UNITY_PLUGIN_DST_DIR: the destination for the generated DLL; choose any folder you like.
- UNITY_PLUGINAPI_INCLUDE_DIR: the
PluginAPIfolder inside the Unity Editor directory containing files such asIUnityInterface.h,IUnityGraphicsD3D11.h, andIUnityLog.h. The path isUnity@version/Editor/Data/PluginAPI.
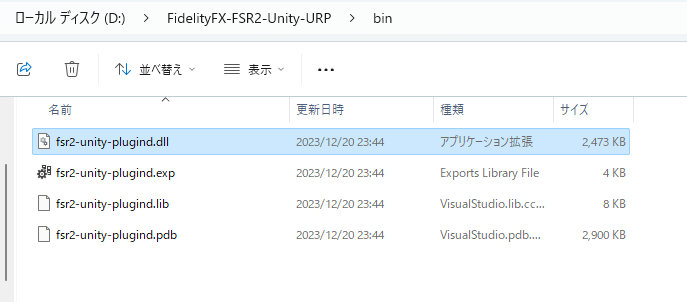
- Click Generate. A project named fsr2-for-unity.sln is created. Open it in VS2019 and click Compile. The final result is
fsr2-unity-plugind.dll; drag this file into your Unity project.
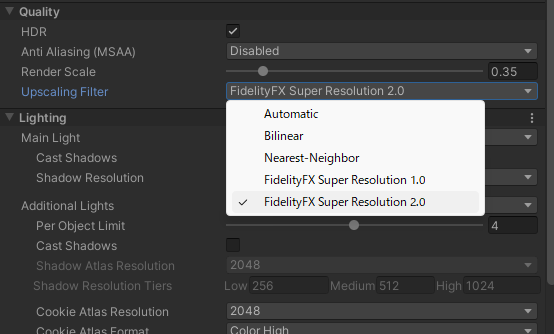
Unity: now that we have the library (DLL), we need to modify some URP code to use FSR 2.0. Embed the package before modifying it; otherwise changes to an official package that is not embedded will be reverted. See the Unity documentation for details.
After installing URP through Package Manager, find
com.unity.render-pipelines.universal@12.1.7in the project’s Library/PackageCache. Copy the entire folder intoPackagesand remove the@12.1.7suffix from its name. Unity will prefer the URP package underPackagesand ignore the cached copy.Copy
0001-Added-FSR2-support-for-URP.patchfrom FSR-Unity-URP into the root of the Unity project. In a terminal at the project root, enter:If an error appears, it will probably be because the patch failed on
Packages/com.unity.render-pipelines.universal/Runtime/Passes/PostProcessPass.cs. Tracing the failure reveals that the patch’s version ofPostProcessPass.csdiffers from the actual file. Unity may have changed some code without changing the version number, or AMD may have targeted the wrong URP version. Either way, remove thePostProcessPass.cschanges from the Git patch with a text editor, apply the rest of the patch, and manually copy the new code into the actualPostProcessPass.cs.After these steps, FSR 2.0 is ready to use.
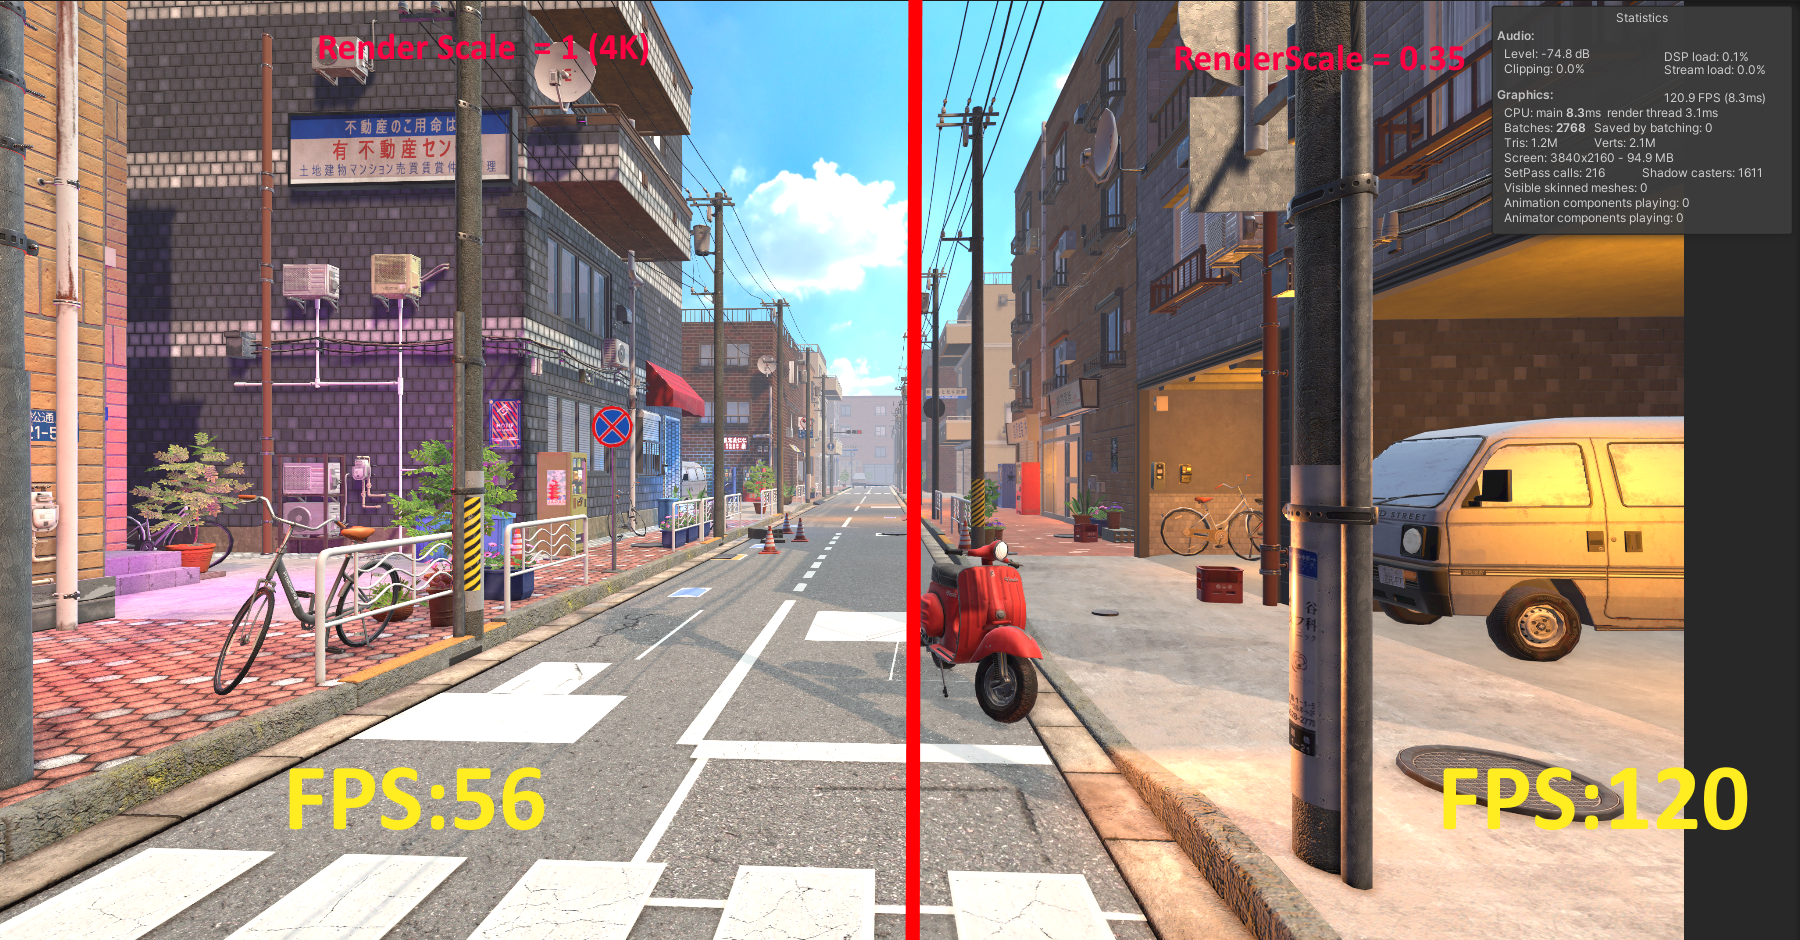
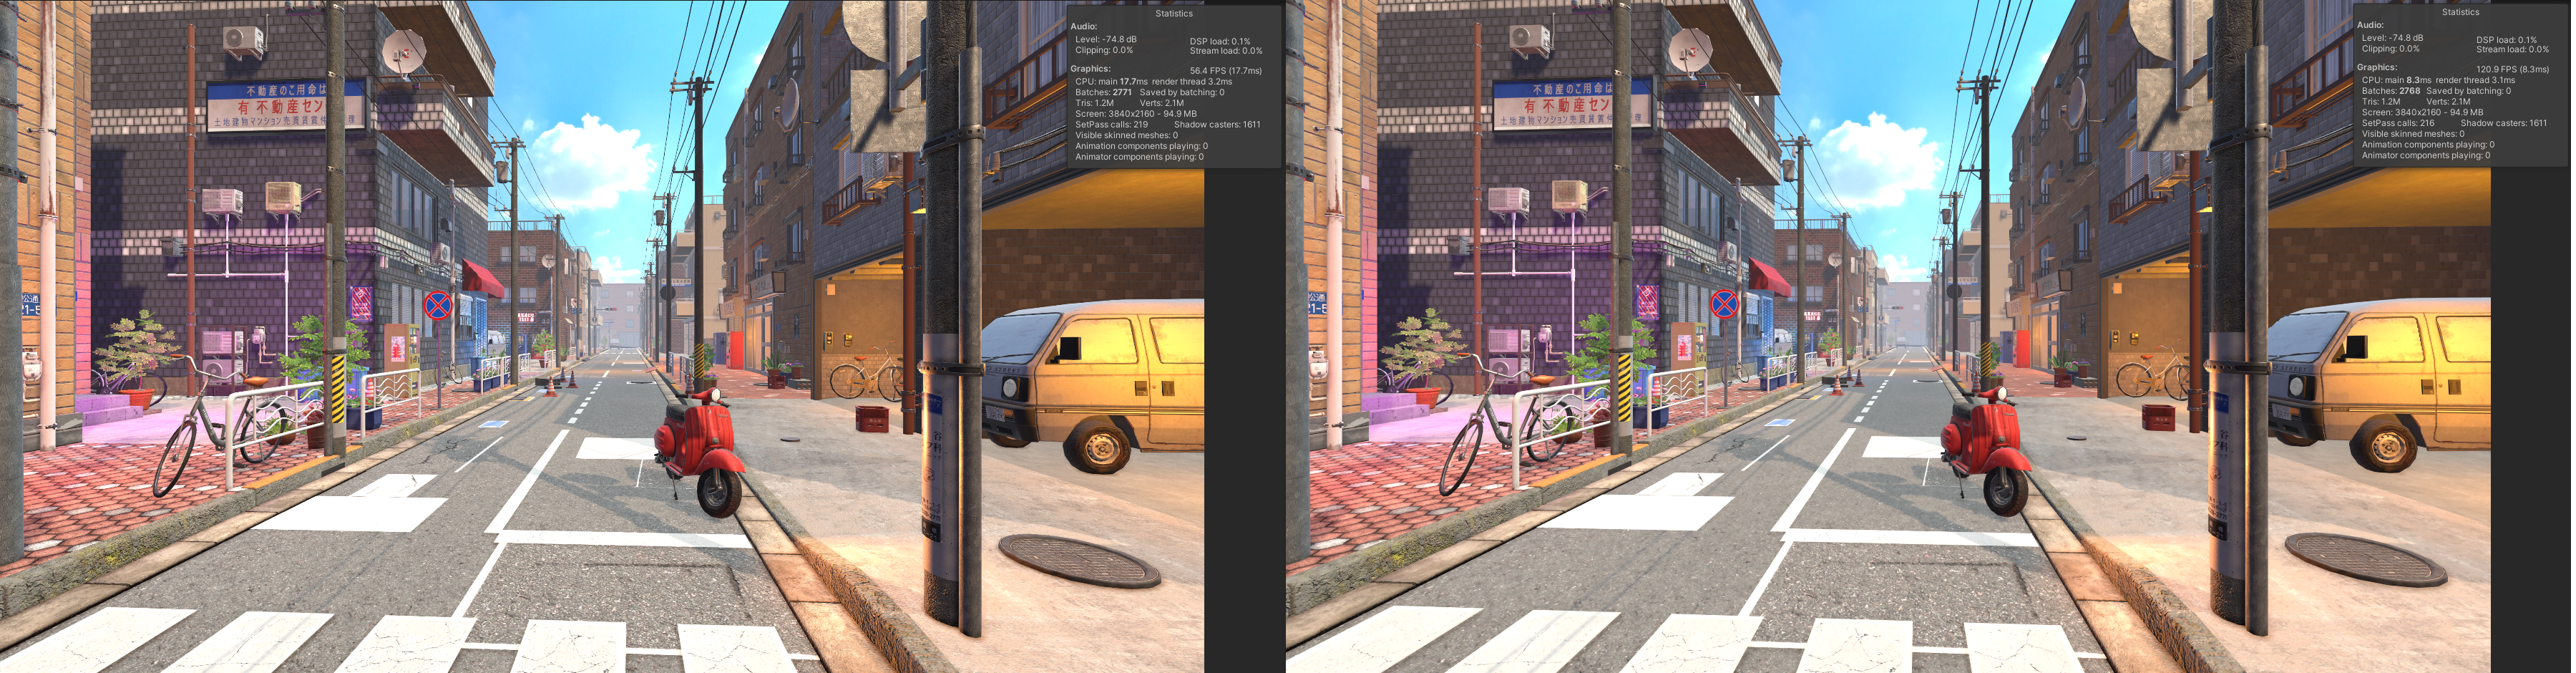
Native 4K vs. FSR 2.0
The left image is 4K resolution with SMAA enabled, at roughly 5X FPS.
The right image uses FSR 2.0.
Zooming in to compare the three cases, from left to right:
- 4K with Render Scale set to 1
- 4K with Render Scale set to 0.35 and linear upscaling
- 4K with Render Scale set to 0.35 and FSR 2.0
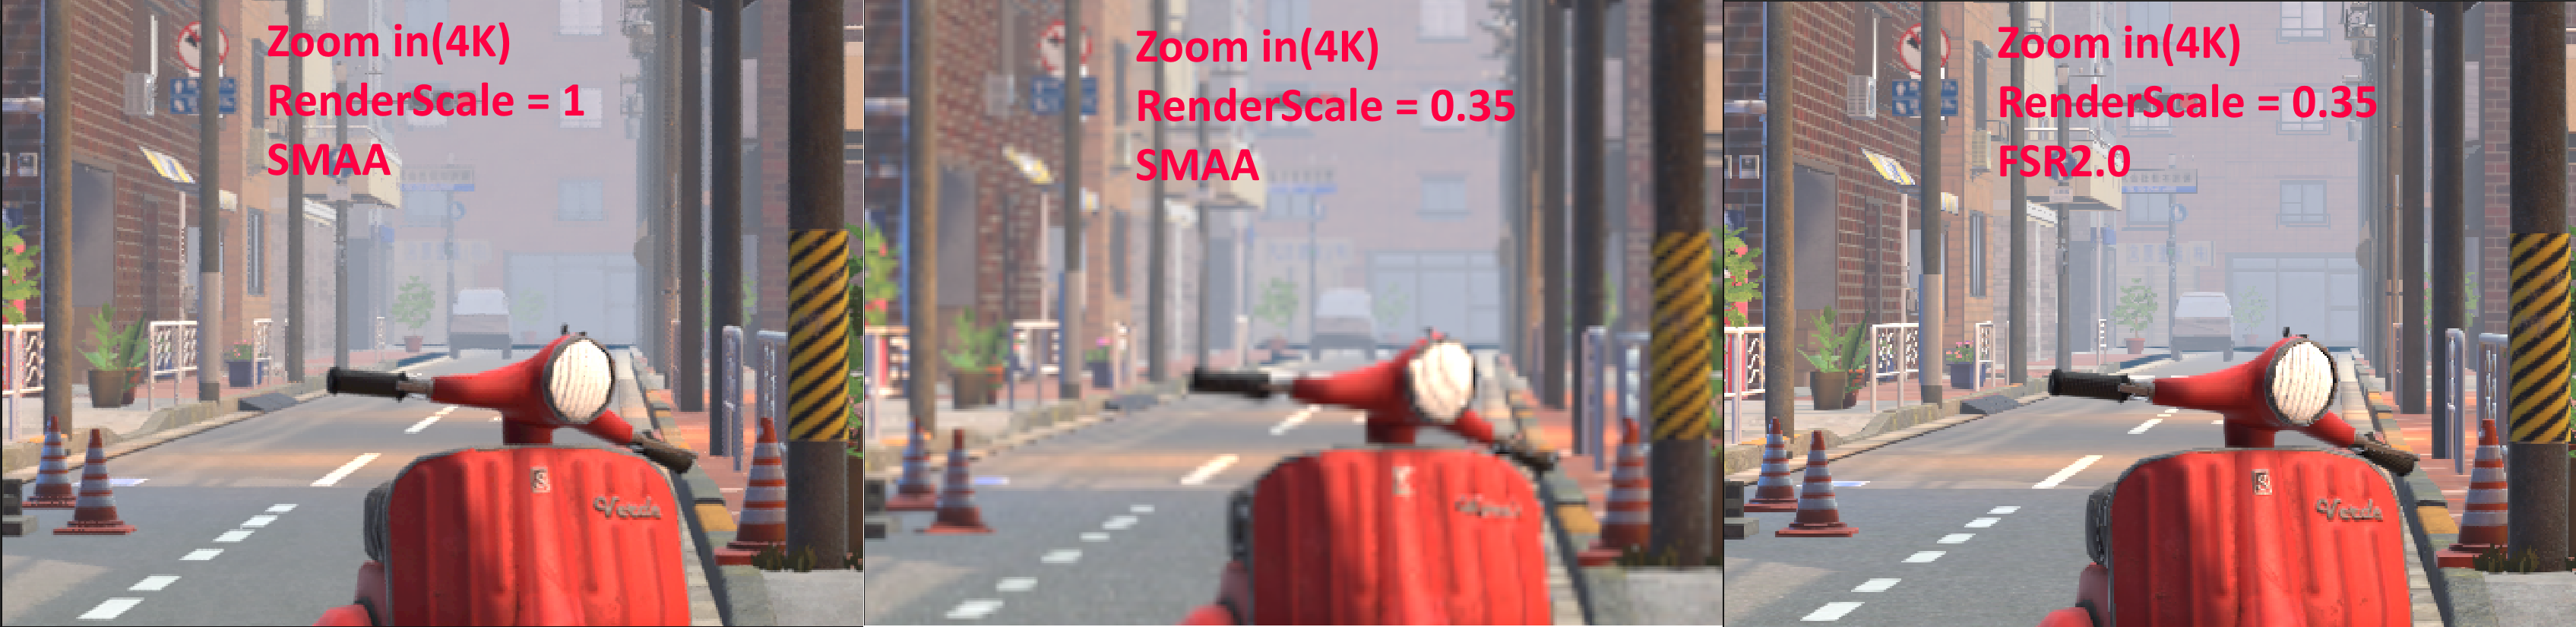
Rendering the 4K scene with a 0.35 render scale raises the frame rate to around 120 without an obvious loss of quality. Thank you, AMD. XD