👀 11. Eyes(Anime-like) Setup Guide
Since the lighting logic, textures, and other aspects of the eyes are quite different from other parts, I separates the shader used for the eyes into a separate shader → ASP/Eye.
ASP/Eye Shader has the following features for users to customize:
Optional, flattened lighting
Parallax Mapping concave effect of the pupil
MatCap Reflection of the eyeball
Additional eye highlight map that can be rotated according to the viewing angle
This page will introduce the functions of ASP/Eye and how to configure the properties step by step.
1. Use the ASP/Eye Shader
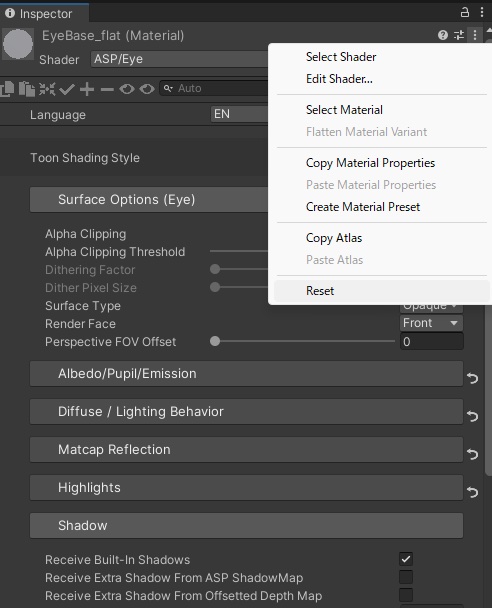
First, set the target shader of the current material to ASP/Eye. At the same time, to ensure that there are no properties and keywords from other shaders left in the material, click on the "..." in the upper right corner and press Reset. This will ensure that the keywords/properties of the current material are all set to the default values of the shader.
2. Disable shadow casting of the eye renderer
Usually, when rendering anime characters, the eye renderer does not need to cast shadows. Receiving shadows from the eyeball may cause low-quality shadows on the face or neck area.
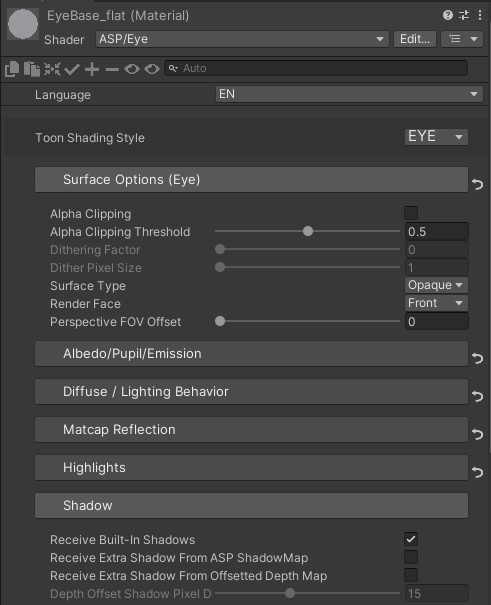
3. Flatten the lighting
Under the Diffuse/Lighting Behaviour category, ASP/Eye Shader provides two lighting modes, one is the traditional Lambert Lighting, and the other is Flat Lighting, which will unify the lightingof each pixel of the entire material. Anime-style characters are more suitable for Flat Lighting (Lambert lighting is too three-dimensional), so Flat Lighting mode is the default.
In Flat Lighting mode, you can set the Darkest Flat Color parameter. This parameter represents the lighting color of the object when it is backlit in Flat Lighting mode (on ther other hand, when facing the light, the diffuse lighting result is mix of the object albedo and the main light color).
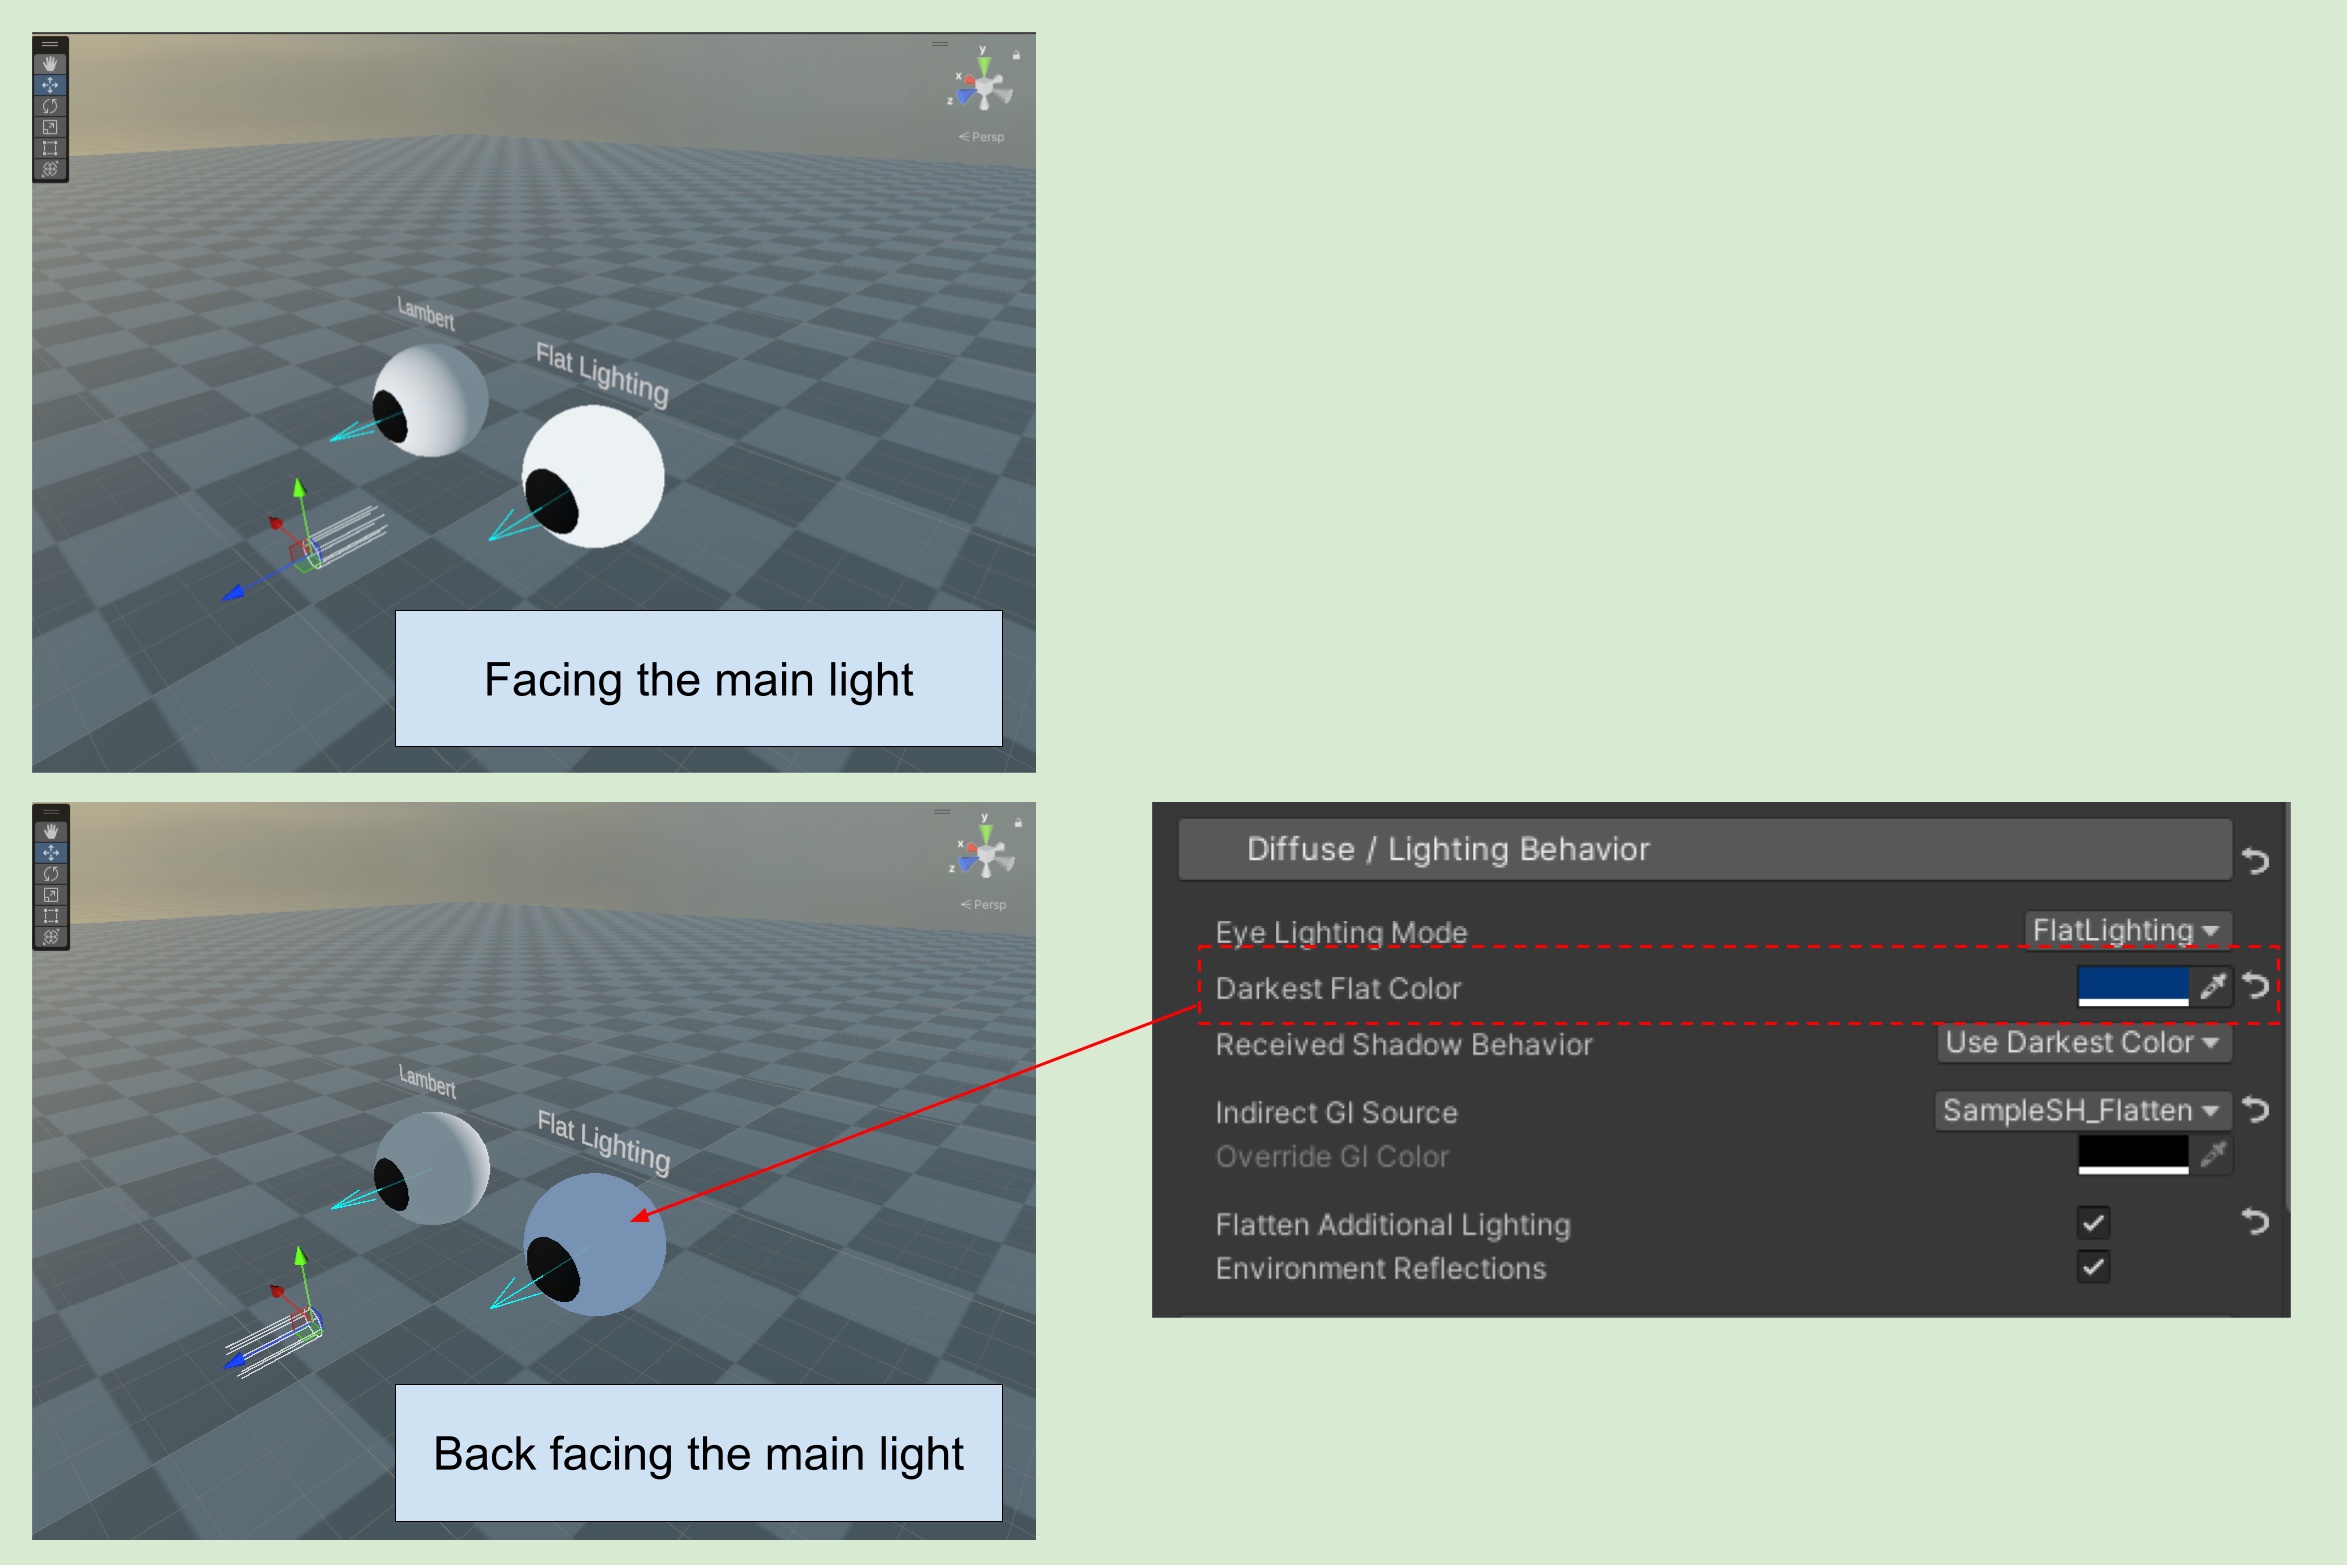
💡 Note that the blue arrow in above video represent the front direction of the ASP Character Panel Component. The ASP Character Panel of the character must setup correctly (blue arrow = character object front) in order to calculate the lighting of Flat Lighting Mode.
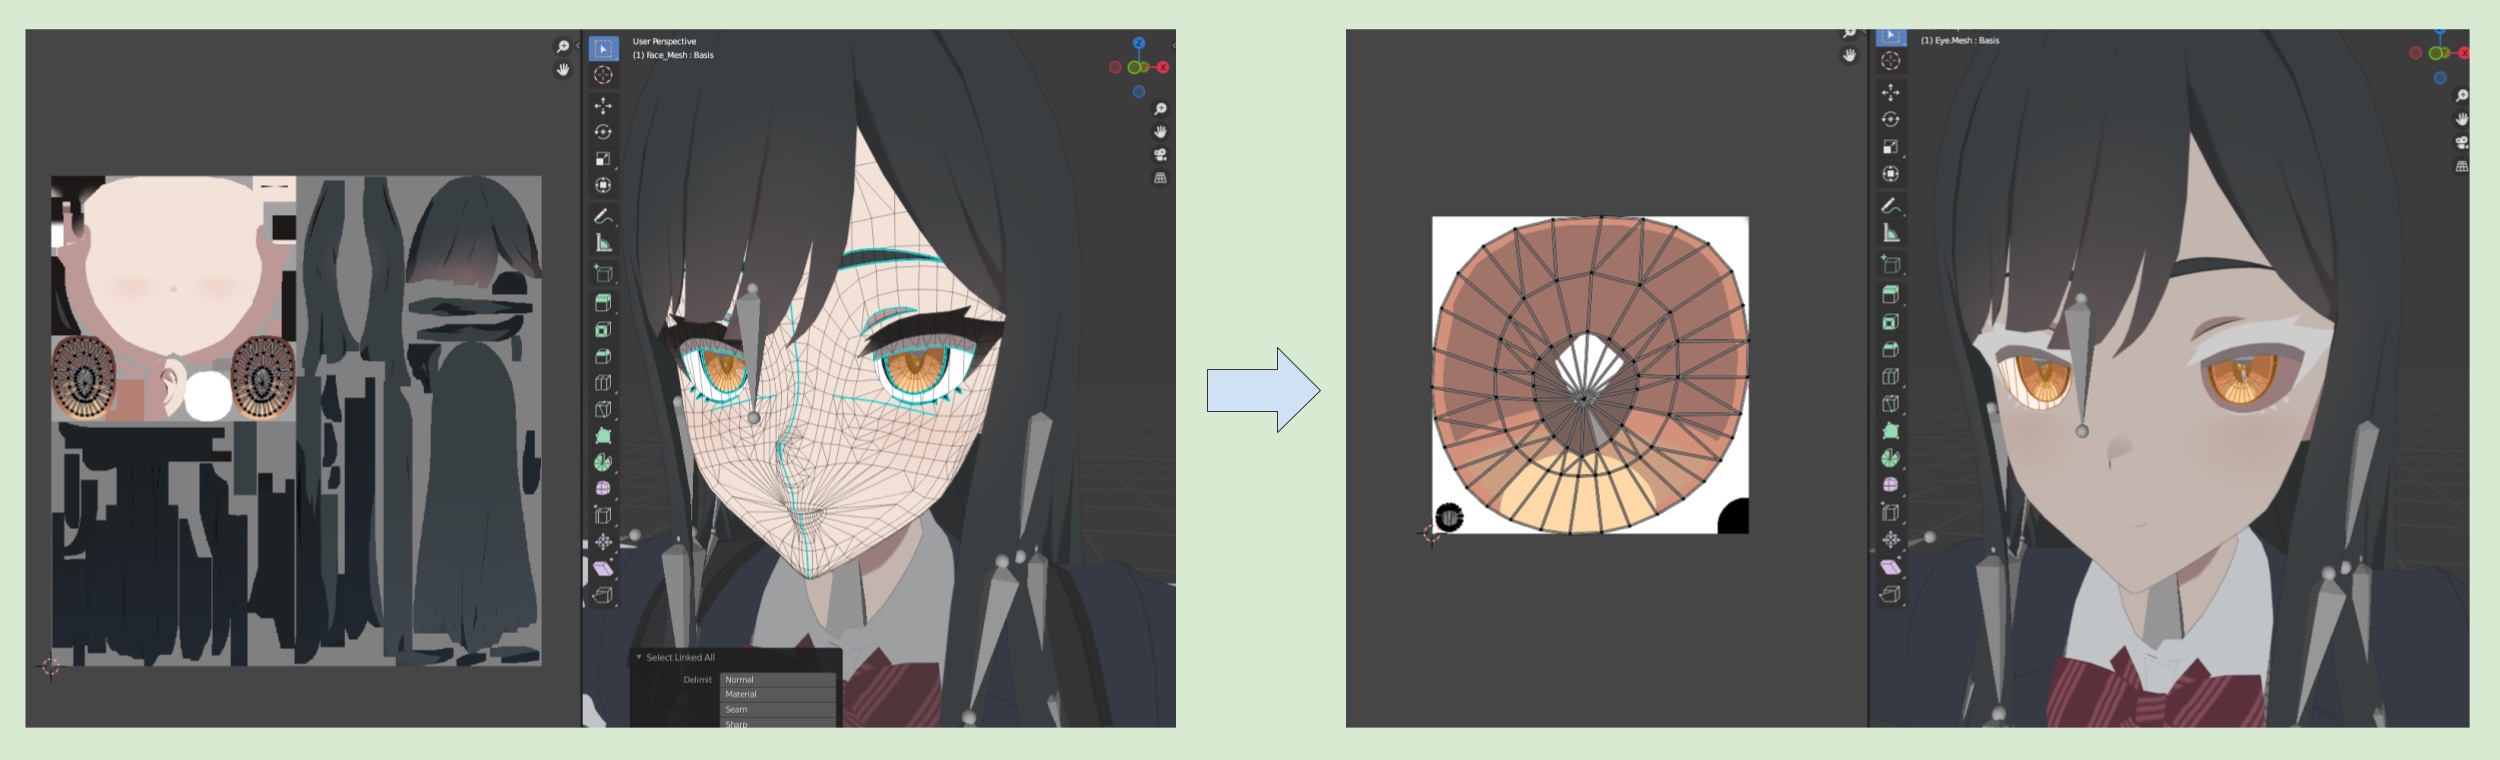
4. UV Unwrapping and texturing the eyes mesh
Next, I will use the eyes of below character as an example.
The (sclera) and (iris + pupil) of this character model are separated into two meshes. This is mostly a preference thing.
In order use the subsequent MatCap Map and the Highlight Map that can be rotated according to the light/viewing angle, It is recommended to unwrap the UV of the eye into a layout suitable for MatCap (the iris part is aligned with the top, bottom, left and right boundaries).
5. Parallax mapping effect of the eyes
After uv unwrapping and all the texture painting stuff, It’s time to make some fancy effect.
Human Iris is a convex shape, using parallax mapping give more convincing visual appearance.
Draw a circle gradient mask texture that uses the pupil as the center for the iris and pupil.
Toggle Enable Parallax Effect to true.
Drag the mask texture into the pupil mask property.
Set Parallax Height according to your preference.
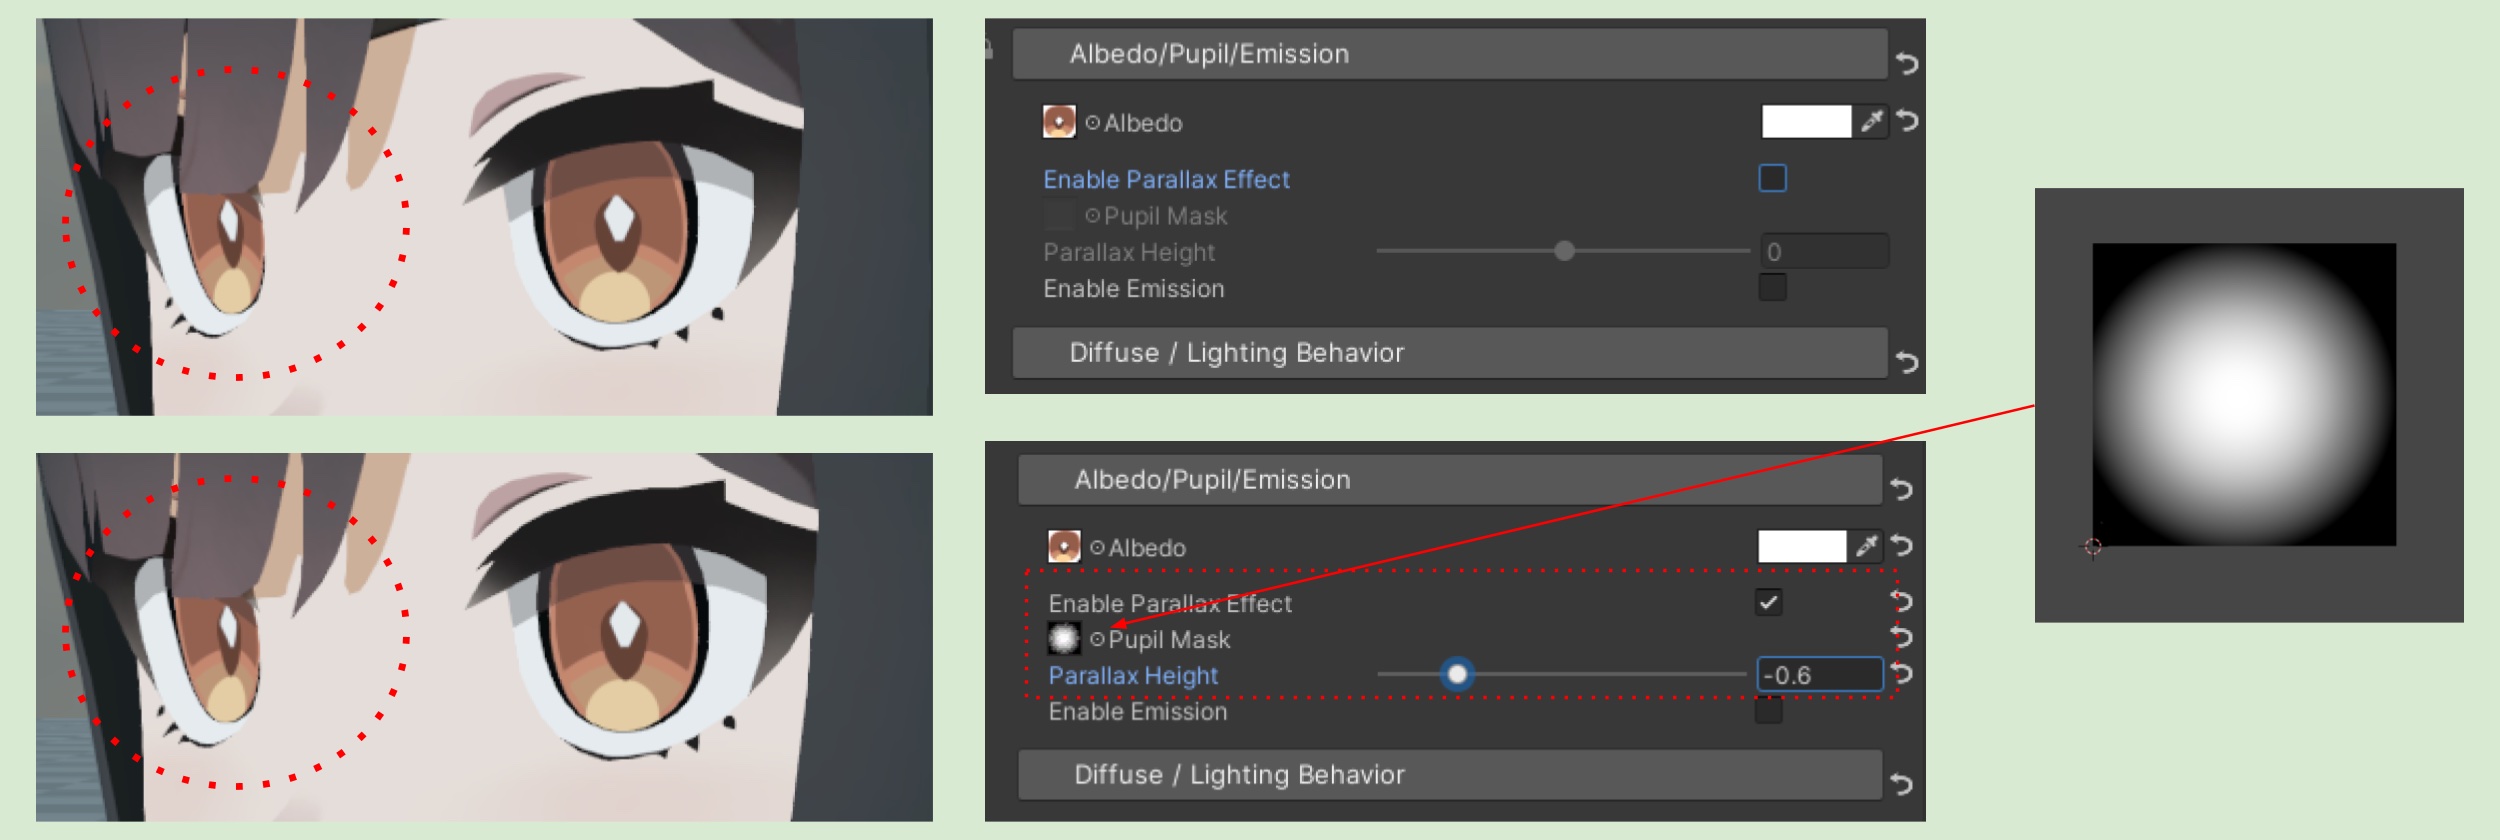
💡 If the pupil of your eyeball mesh is concave when it is modeled, then you do not need to use parallax effect. Simply set the parallax Height to 0.
6. Eyes MatCap Reflection
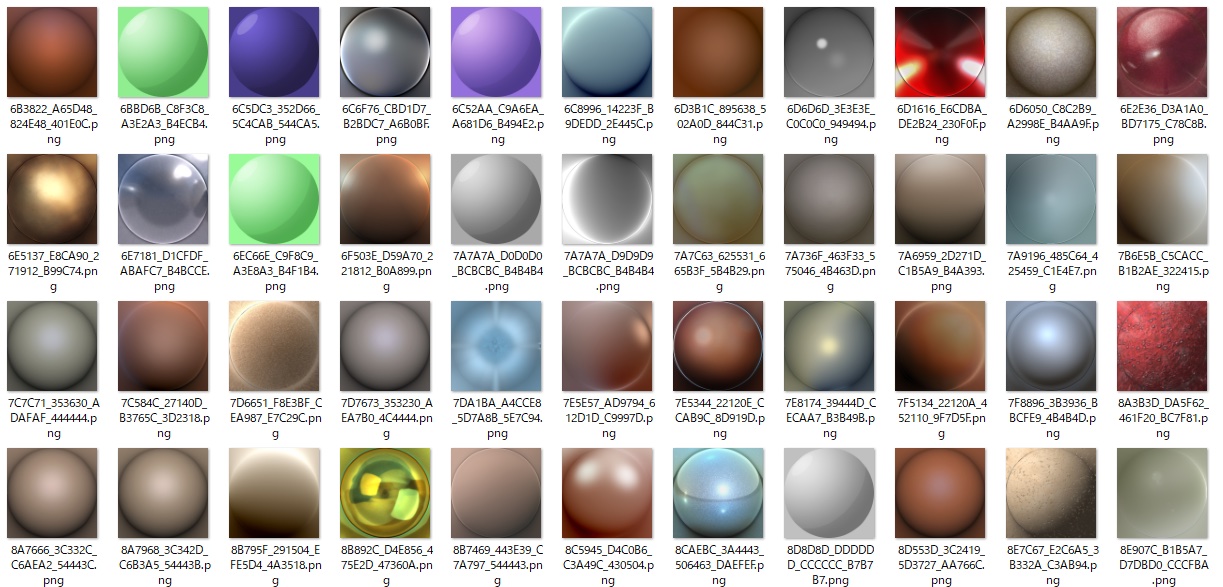
We can achieve very stylized environment reflections through MatCap maps. MatCap textures usually appear like below screenshot, which is why I made the UV of the eyeball to be aligned with the bounds at section 4.
6-1. Fix the MatCap effect with a spherical normal map.
Drag a MatCap texture into the MatCap Reflection Map property. You might notice that the reflection effect doesn't change along the view angle and seems a bit off. This is because MatCap textures don't work well on flat meshes. Which happen to my case. Fortunately, we can use a spherical normal map to fix this.
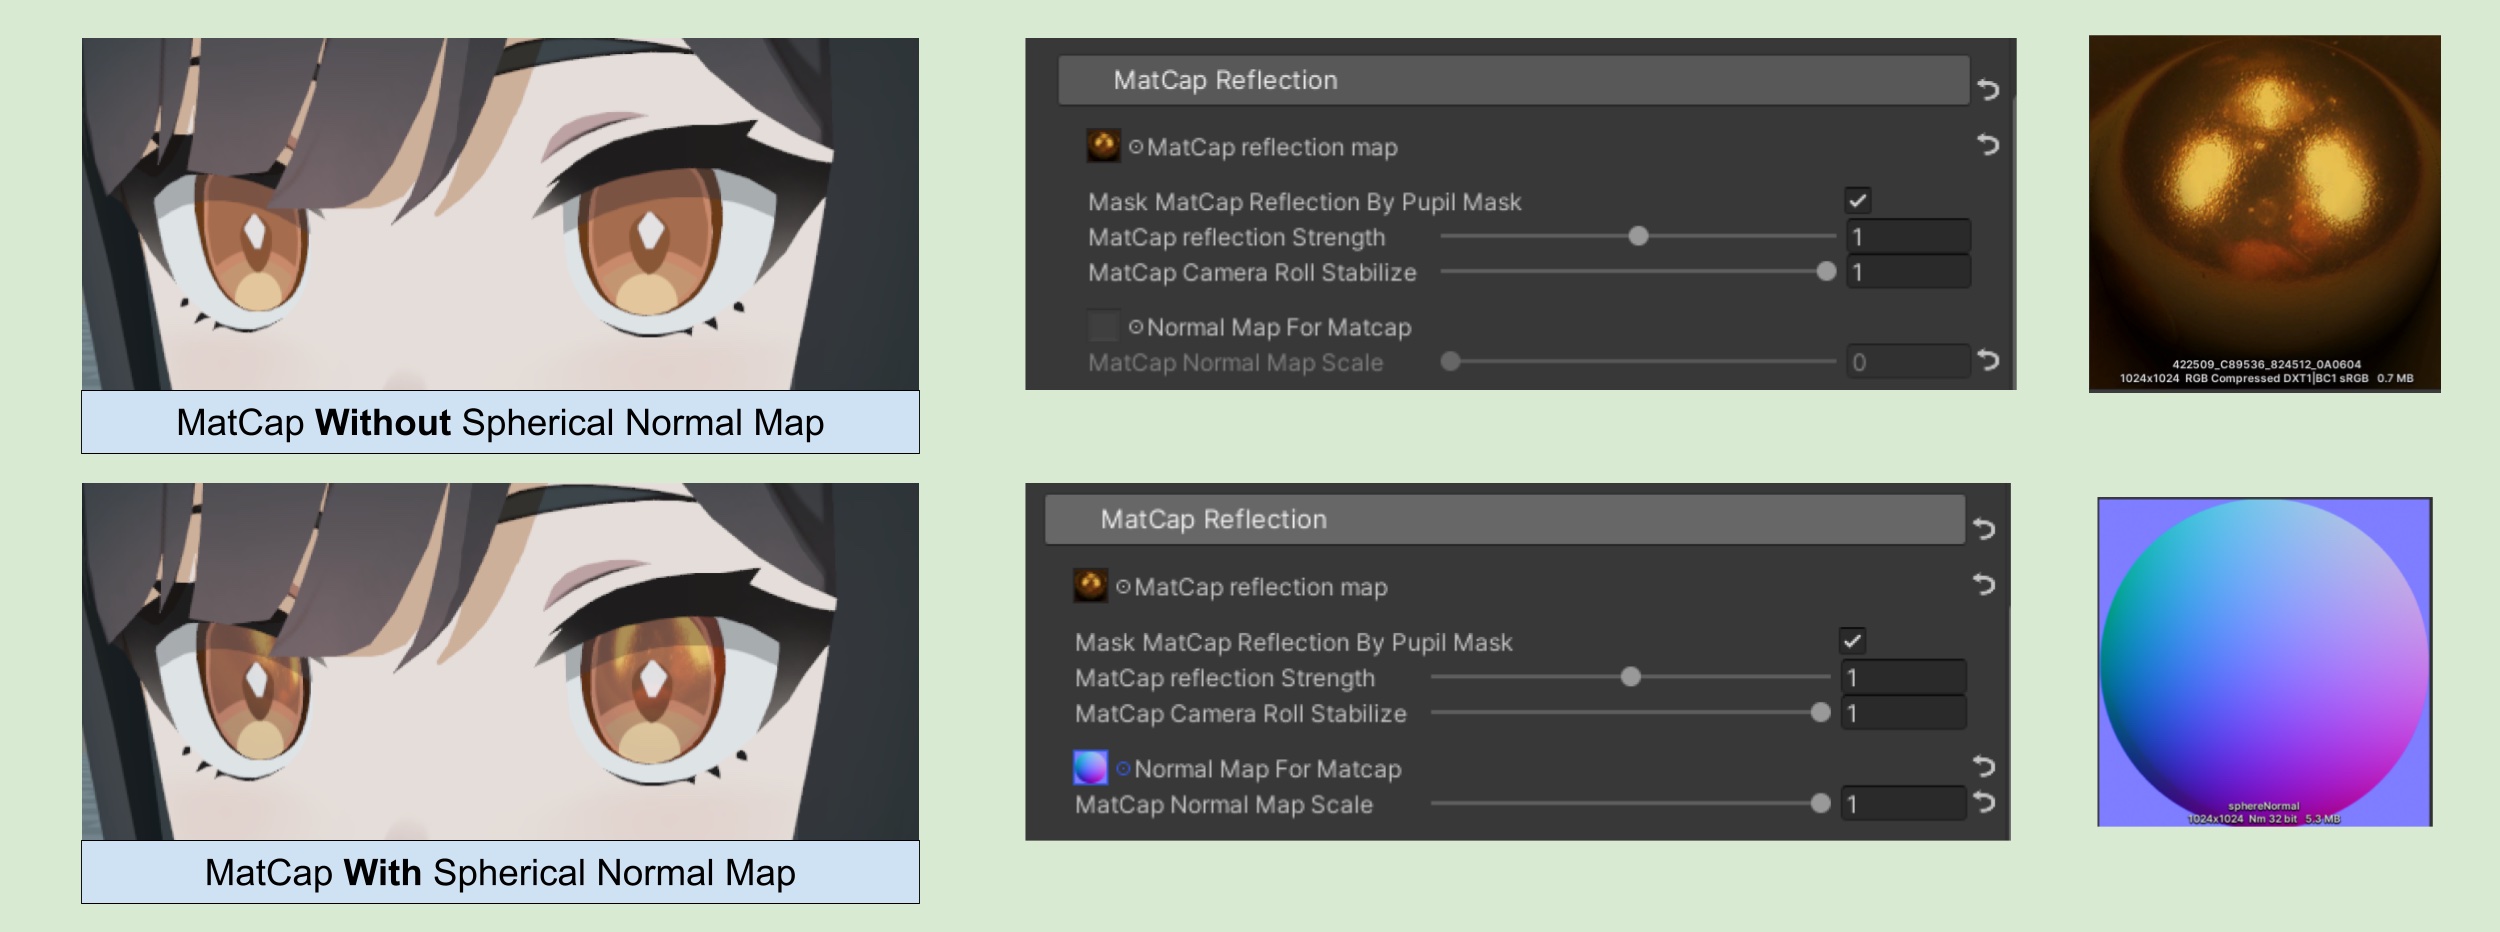
In addition, after enabling the Mask MatCap Reflection By Pupil Mask option, the Pupil Mask property under the Albedo/Pupil/Emission category will be used to further control the strength of the MatCap reflection.
After setting up the spherical normal map, adjust the Reflection Strength to determine the brightness of the MatCap effect. We will eventually get a MatCap effect as following video:
💡 For an even stylize reflection, you can hand-paint your own MatCap maps!
7. Top-Layer Highlight Map
Finally, we can add a highlight effect to the top layer of the eyes. This highlight map is similar to MatCap (both act like a layer of emission). The difference is that you can set an additional rotation angle. The shader will rotate the highlight based on the current Half Vector (the half vector of the light direction and the view vector).
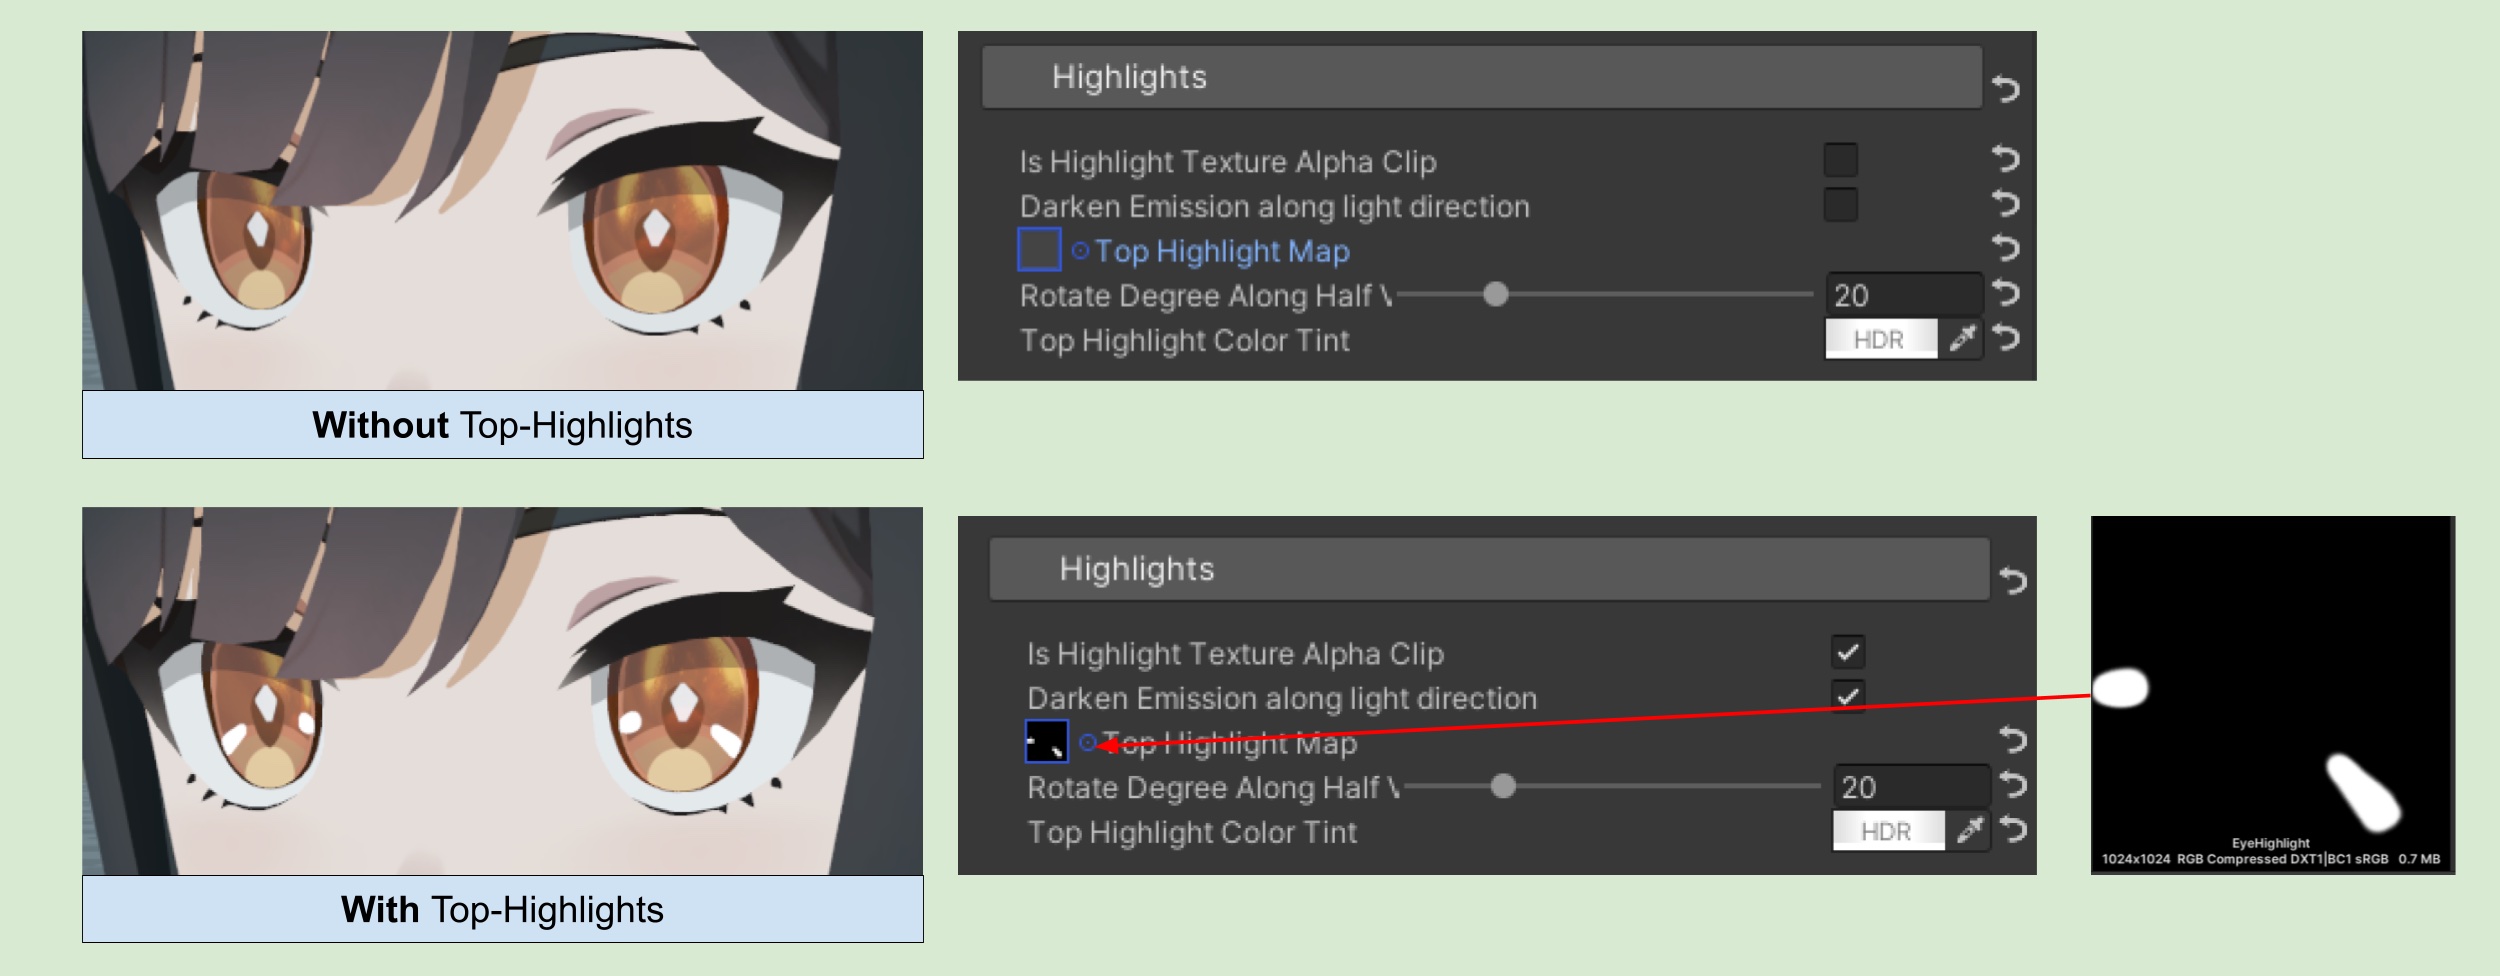
💡 Checking the Darken Emission Along Light Direction checkbox will reduce the intensity of the Color Tint based on how much the object is facing away from the main light.
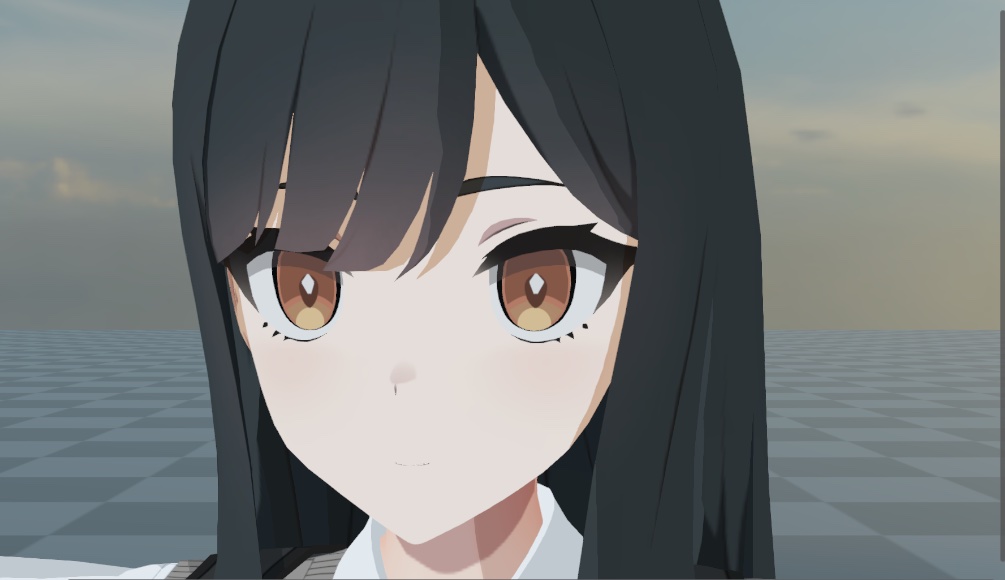
Here is the result after the Top Highlight is applied :
8. Bloom、Screen Space Lens Flare Post Processing
In the ASP/Eye Shader, you can adjust the HDR color intensity of both MatCap and Highlight through parameters. Combined with Bloom and Screen space lens flare post-processing, you can achieve the following effect:
⏭️ Go to next page 〰️ 14. Screen Space Outline Setup Guide