🙃 9. Face Shadow Map- Creation & Baking Workflow
Introduction to Face Shadow Textures
When rendering cartoon characters, it is common to see broken light and shadow changes on the face. This is mainly because the normal of the character's face tends to be more complex than other parts of the body, but for simplified lighting logic (e.g Cel Shading), it will resulting a undesired visual appearance.
Common solutions include usingええroxy normal or manually modifying the model normal in third-party DCC, and using SDF-based face shadow map.
Face shadow map is the most efficient method in my opinion. It has high controllability for artists and does not take as much time as modifying normals manually . Therefore, the Face mode of ASP/Character shader supports the use of face shadow map, and provides a tool to bake individiual hand-painted maps into SDF-based face shadow map.
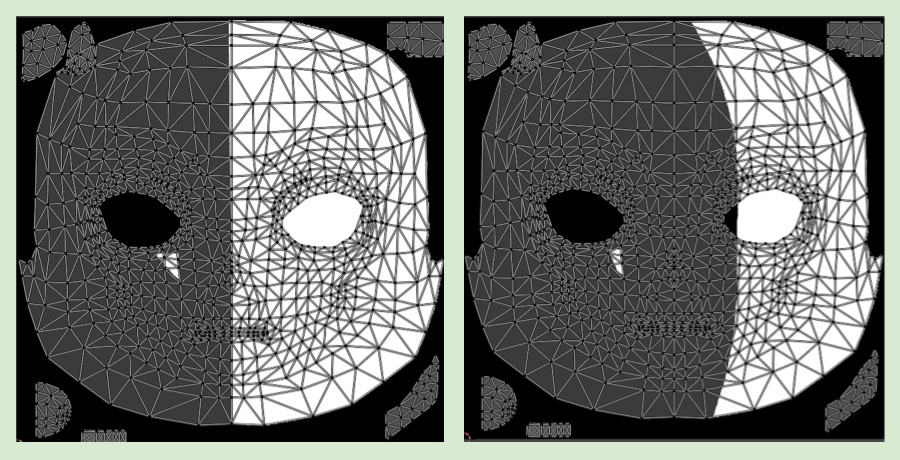
Before applying face shadow map
After applying face shadow map
Create a Face Shadow Map
1. Hand paint the map
First, according to the uv unwrapped face, draw 9 textures. In the Face mode of ASP/Character shader, there is an option to select the UV channel used by the texture (UV0~UV3). Therefore, you can choose to use the existing UV channel in DCC or do uv unwrap in the new UV channel based on the face shadow texture.
Divide the light angle of 0~180 into 9 angles, and draw 9 textures according to the change of the light angle on the single side face.

Finally, import the 9 drawn pictures into the Unity project.
💡 It is not restrict to 9 textures (as long as total texture is more than 2). The more textures, the more detailed can be control under different angles of light. The less pictures, the lower the controling, and there will be a larger jump of light and shaded area change when the light angle changes. (From the previous texture to the next texture)
2.Baking and Merging SDF Textures with ASP SDF Generator
Use the SDF Generator

- Open the SDF Generator:
In your Unity project, navigate to the top menu bar.
Click on "Tools/ASP" and then select "SDFGenerator" to open the SDF tool's window.
- Add Source Textures:
Locate the 9 textures you want to use for generating the SDF(made in previous section).
Drag and drop them directly into the "Source Textures" field within the SDF Generator window.
- Set Generation Settings:
GroupName: In the designated field, provide a name that will be used as the prefix for your generated texture files. This helps you organize them.
GeneratePath: Choose the path in project where you'd like your generated textures to be saved.
- Generate and Merge SDFs:
- Click the button labeled "Create SDFs & Merge". This will:
Calculate individual Signed Distance Fields (SDFs) based on your 9 source textures.
Combine these SDFs into a single texture, creating your final SDF-based face shadow map.

In the example above, I only need UnityChanFace_merged. The other generated texture are for reference only and can be delete.
Assign the Face Shadow Map
Back to the material inspector of the face materia and set 1️⃣ Toon Shading Style to Face

Assign the generated SDF-based face shadow map into the Face Shadow Map texture field and we are done.
3. Setup the Head Bone Transform So the Face Mesh Direction Follow the Head
By default, face shadow map calculations in the shader use the whole character’s foward as the face direction.
The ASP Character Panel provides a parameter to pass the head bone direction to face shader so it produce accurate lighting.
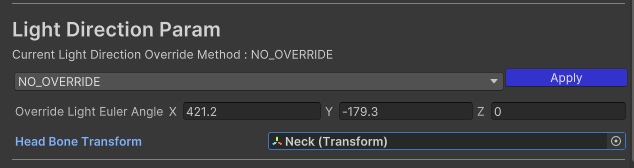
Navigate to Light Direction Param within the ASP Character Panel component.
Assign the character's Head bone to the Head Bone Transform field.
ASP/Character Shaders in Face mode will then use the transform's direction as the face direction for lighting calculations.
⏭️ Go to next page → 🌈 10. Color of The Received Shadow