🦇 7. Character Shadow Setup Guide (1.3 Update 2025/11/15)
This page will demonstrate how to use the ASP Character Panel to configure shadow casting and receiving for characters.
1. Preparation
- First, following the steps in 2️⃣ 2. Setup ASP Character Panel (Important), add the ASPCharacterPanel component to the character's root game object,
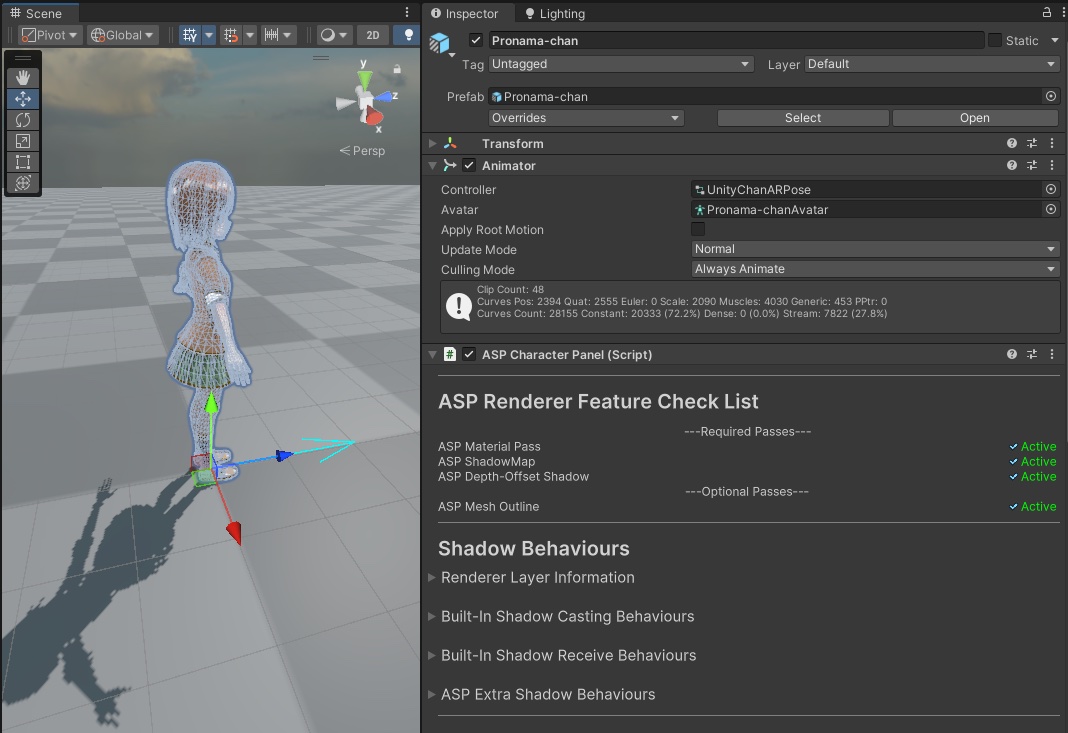
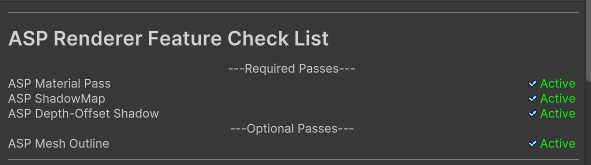
- Next, make sure that all required passes in the ASP Render Feature Check List are Active. If any are displayed as inactive or missing, it means that the corresponding renderer feature is not enabled in the current URP renderer data. Please follow the instructions in 1️⃣ 1. Installation Instructions and Prerequisites to configure URP rendering data.
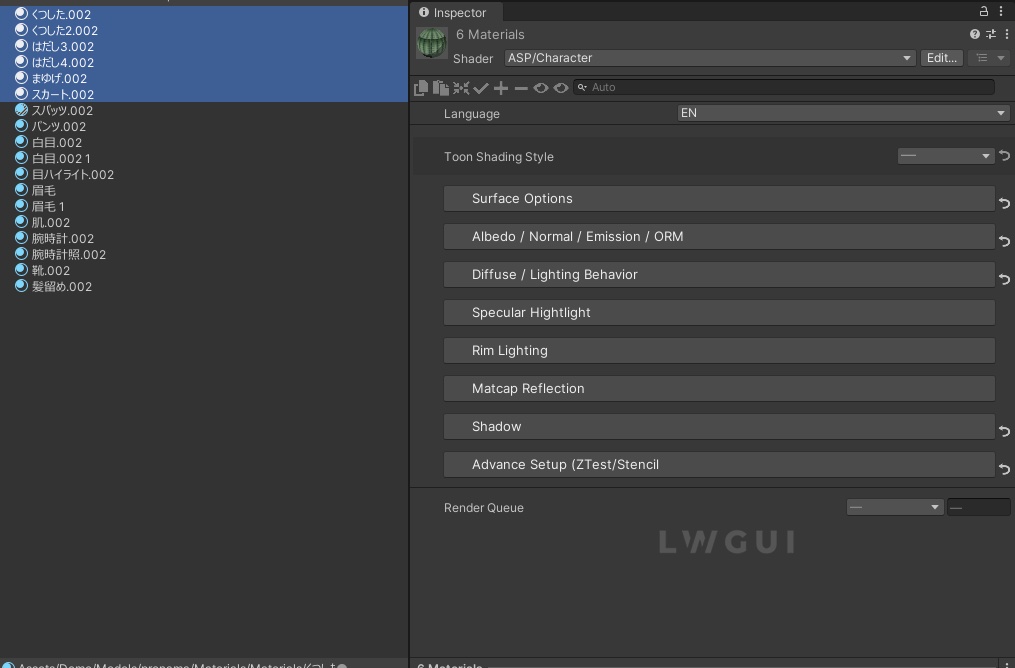
- Then, confirm that all materials on the character have been changed to use ASP/Character(or ASP/Eye if needed) as material’s target Shader.
2. Configuring Shadows
At this point, we are ready to start configuring character shadows. Back to the ASP Character Panel’s inspector for the current character and scroll down to the Shadow Behaviors category. This category contains four expandable items:
| Item Name | Description |
|---|---|
| Rendering Layer Information | Inspect and set the layer and rendering layer mask for each renderer under the current character. |
| Built-In Shadow Casting Behaviour | Inspect and set whether each renderer under the current character casts shadows to the Unity built-in shadow map. |
| Built-In Shadow Receive Behaviour | Inspect and set whether each material under the current character receives shadows from the Unity built-in shadow map. |
| ASP Extra Shadow Behaviour | Inspect and set whether each material under the current character receives shadows from the ASP character shadow map and depth offset shadows. |
💡 Starting from ASP v1.3, we introduced a new option that removes self-shadowing using a proxy cube culling method.
Compared to rendering an extra character-only shadow map, this method is easier to set up and offers better performance.
In the sections below, the setup steps for both approaches are listed separately. Please choose only one method for your project. Do not enable both.
(New) 2-1 Enable Proxy Cube Culling & Configure Shadow Receiving/Casting
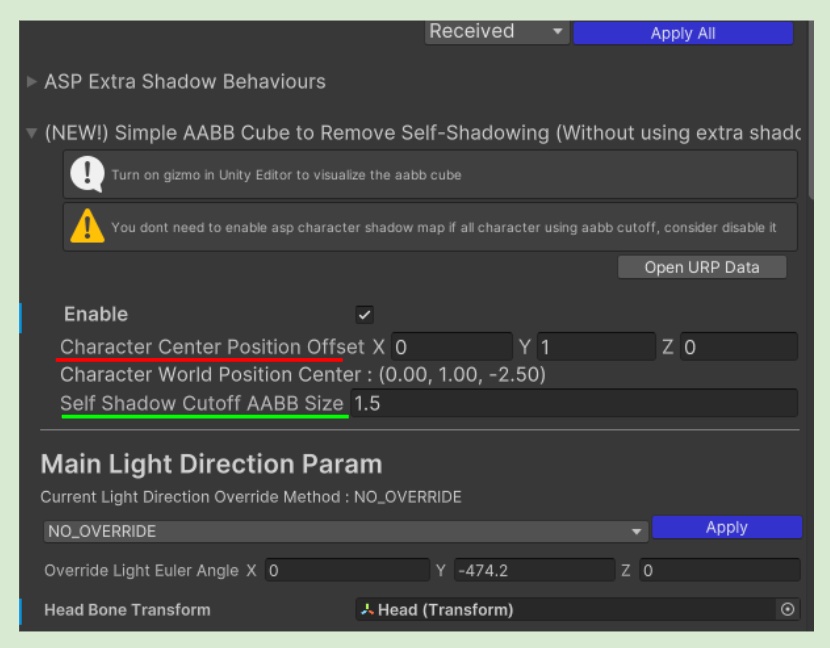
For any character that uses an ASP Character Panel, open the Inspector and look for the Shadow Behaviours section.
Enable “Simple AABB Cube to Remove Self-shadowing.”
In the rest of the Shadow Behaviours options, ensure the character is correctly set to receive and cast Unity’s built-in shadows (all indicators should appear green).
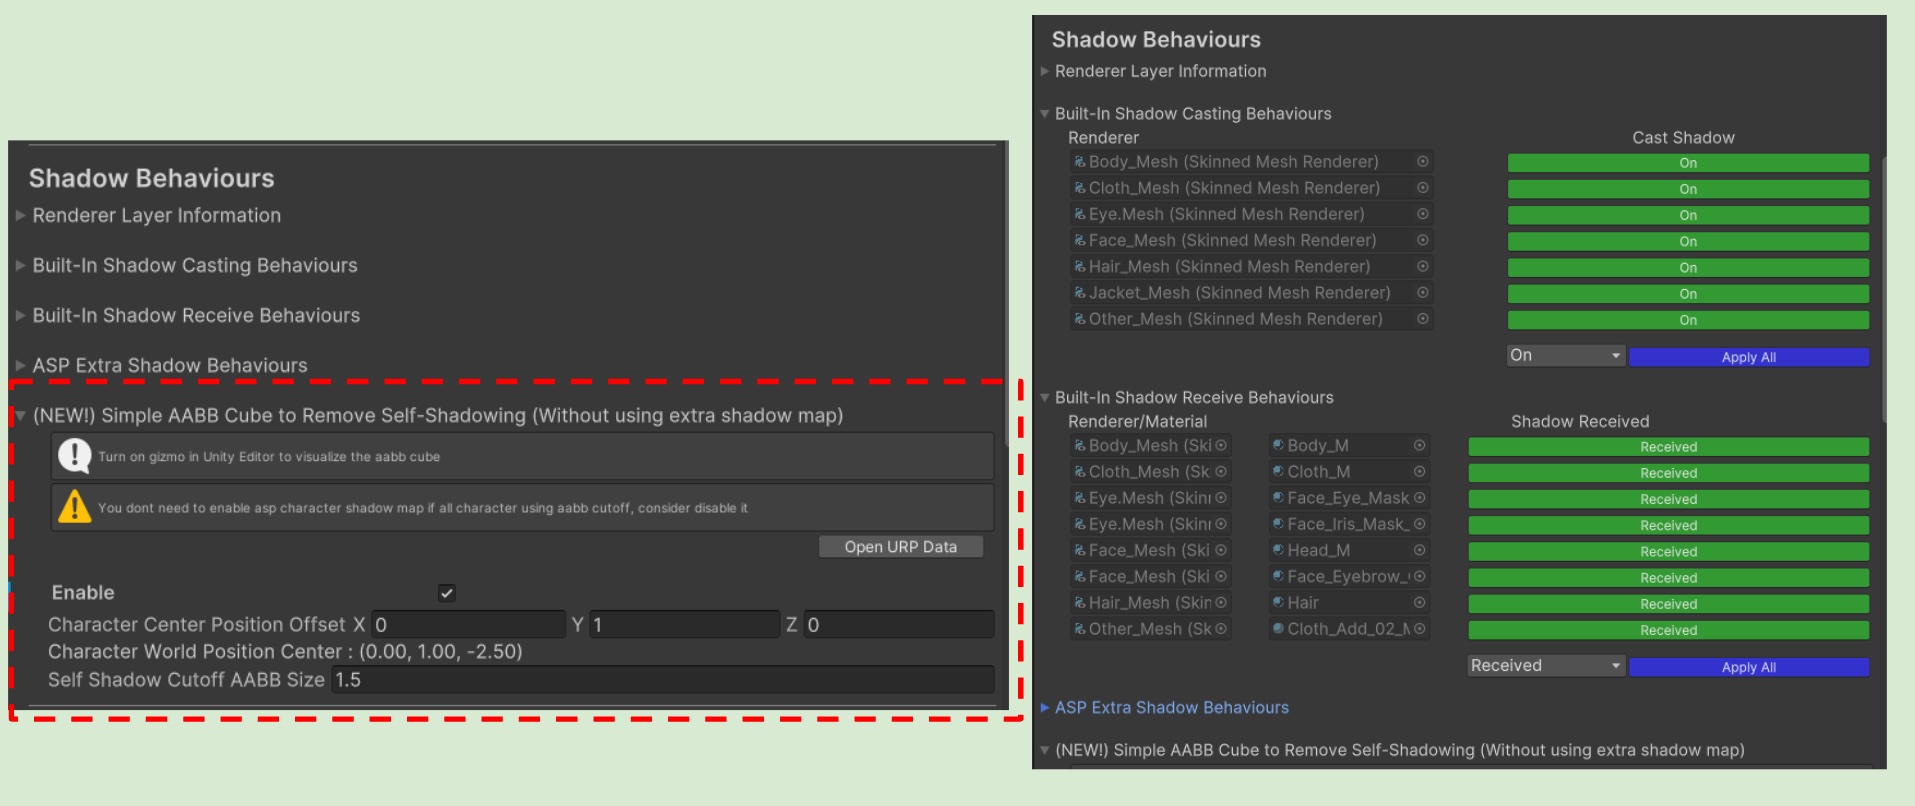
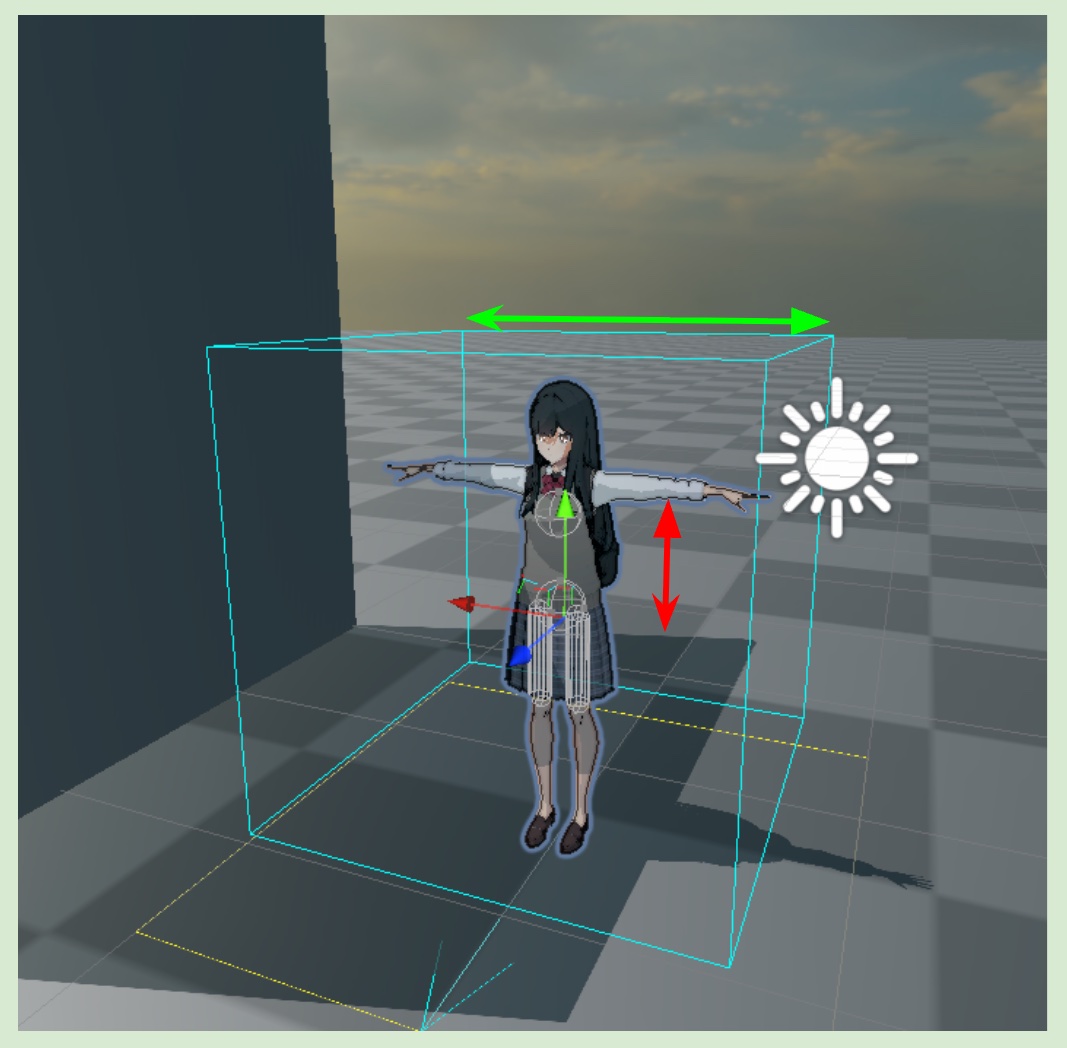
(New) 2-2 Turn On Gizmos & Adjust the Proxy Cube Center and Size
Turn on the Gizmos toggle in the Unity Editor.
Use Character Center Position Offset to adjust the cube’s center.
Use AABB Size to adjust the cube’s overall size.
💡 Try to size the cube so that it fully encloses the character without being unnecessarily large. Keep in mind that the character will not receive shadows from anything located inside this cube.
(New) 2-3 Disable the ASP Shadow Map
- This method already prevents self-shadowing without requiring a separate shadow map.

2-1 Exclude character from built-in shadow map.
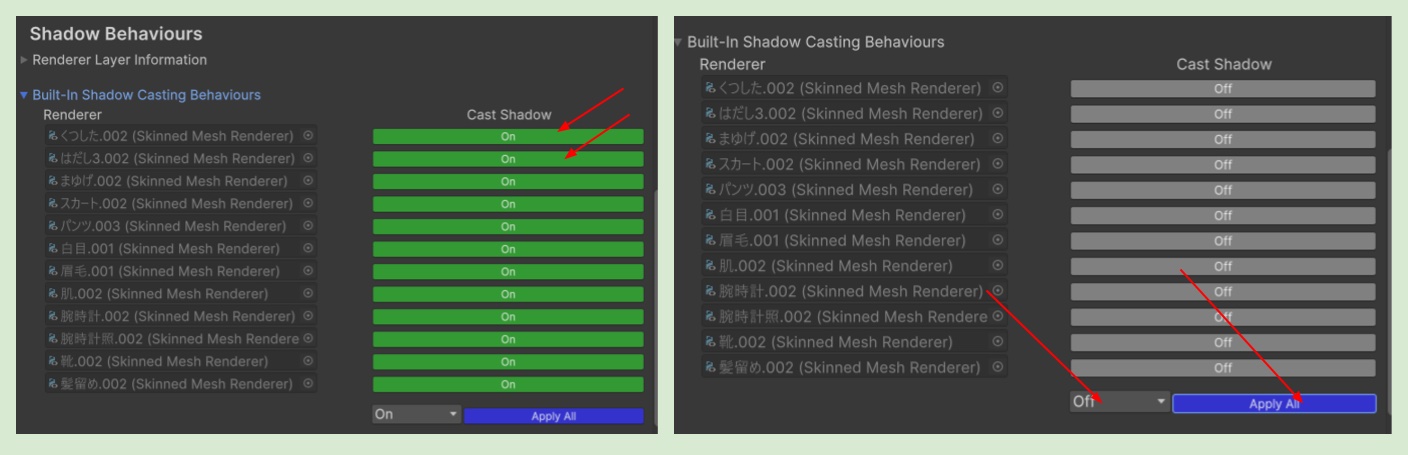
First, go to the Built-In Shadow Casting Behaviour category. Here, we can check whether all the renderers under the character are currently rendering to the built-in shadow map
To control the behaviour individually, you can click on each toggle. Or select Apply All at the bottom to turn on or off all shadow casters. Here, we set all the built-in shadow cast behaviors to OFF.
This exclude the character from being rendered into the built-in shadow map.
2-2 Make other static objects in the scene to display character shadows
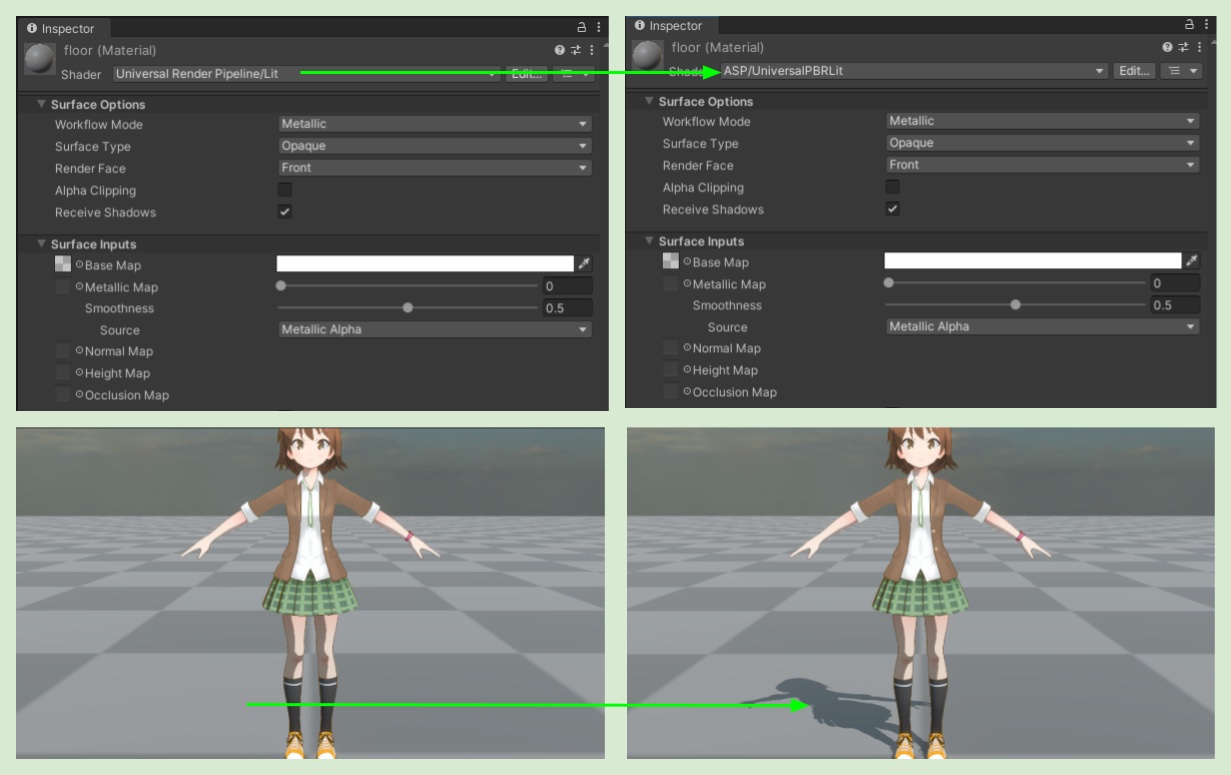
As long as the material uses the ASP/Character or ASP/Eye as target shader, it will be rendered into the ASP's Character-Only Shadow Map. In order to allow other non-ASP materials to receive character shadows (such as the standard PBR material used in the scene), we need to change the original Universal Render Pipeline/Lit to ASP/UniversalPBRLit. ASP/UniversalPBRLit is exactly the same as the built-in PBR in terms of functionality. The only difference is that in the code, it will additionally sample the ASP's Character-Only Shadow Map.
💡 ASP/UniversalPBRLit uses the exact same forward rendering code as Universal Render Pipeline/Lit, with the only difference being the additional sampling of the ASP ShadowMap.
This is exactly what you need to do if your other custom shader needs to sample ASP Shadow Map.
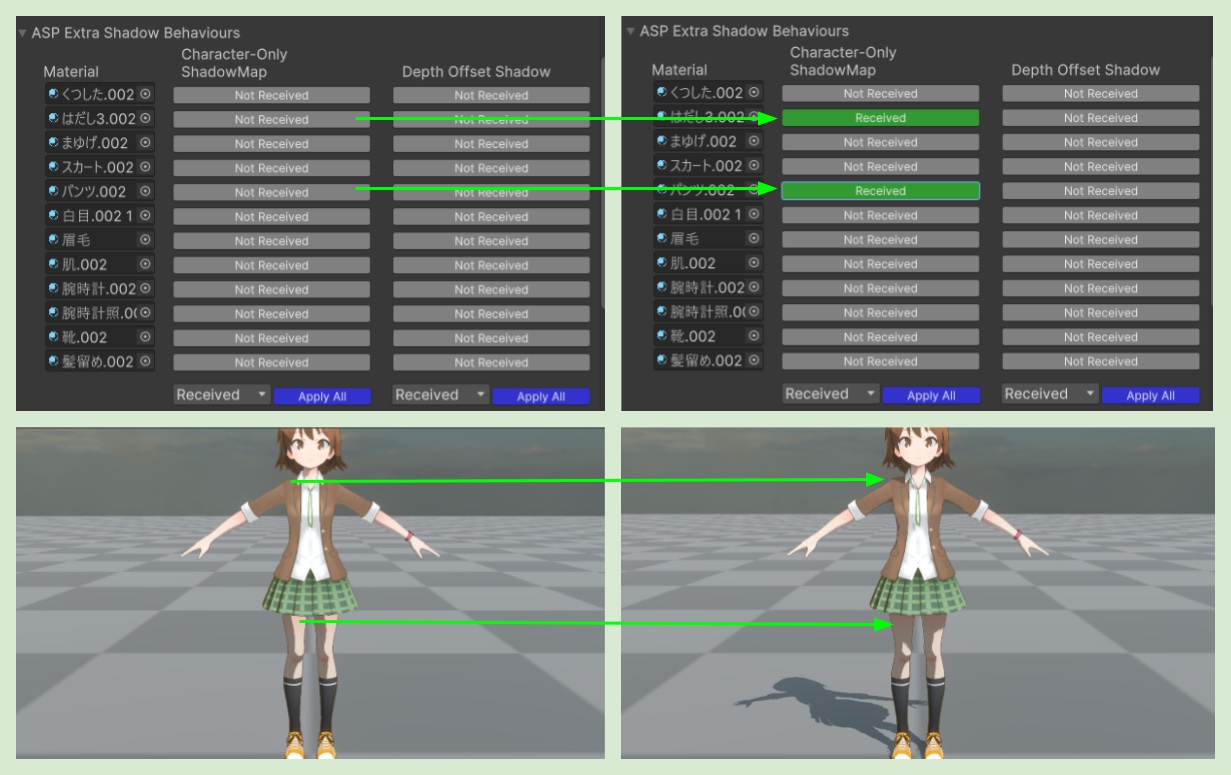
2-3 Control specific material to receive character shadows
In ASP Extra Shadow Behaviours, toggles under Character-Only Shadow Map category on the left side of the panel allows us to enable a selected parts that can receive character self-shadows without degrading the visual appearance, according to our needs. For example, legs and clothes. In most cases, they can all be set to Not received.
2-4 Specify Parts of The Body to Cast and Receive Depth-Offset Shadow
First, verify the project's Rendering Layer Mask settings and the Depth Offset Shadow Renderer Feature.
1. Configure the Project's Rendering Layer Mask and Depth Offset Shadow Renderer Feature
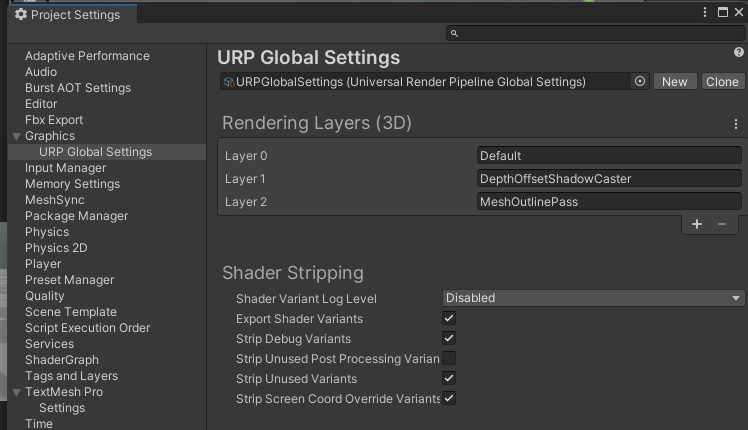
- In the URP Global Setting, set up the Rendering Layer Mask.
- In Edit > Project Settings > URP Global Setting, add a new Rendering Layer Mask (Rendering Layers(3D)). name it a accordingly , such as: DepthOffsetShadowCaster.
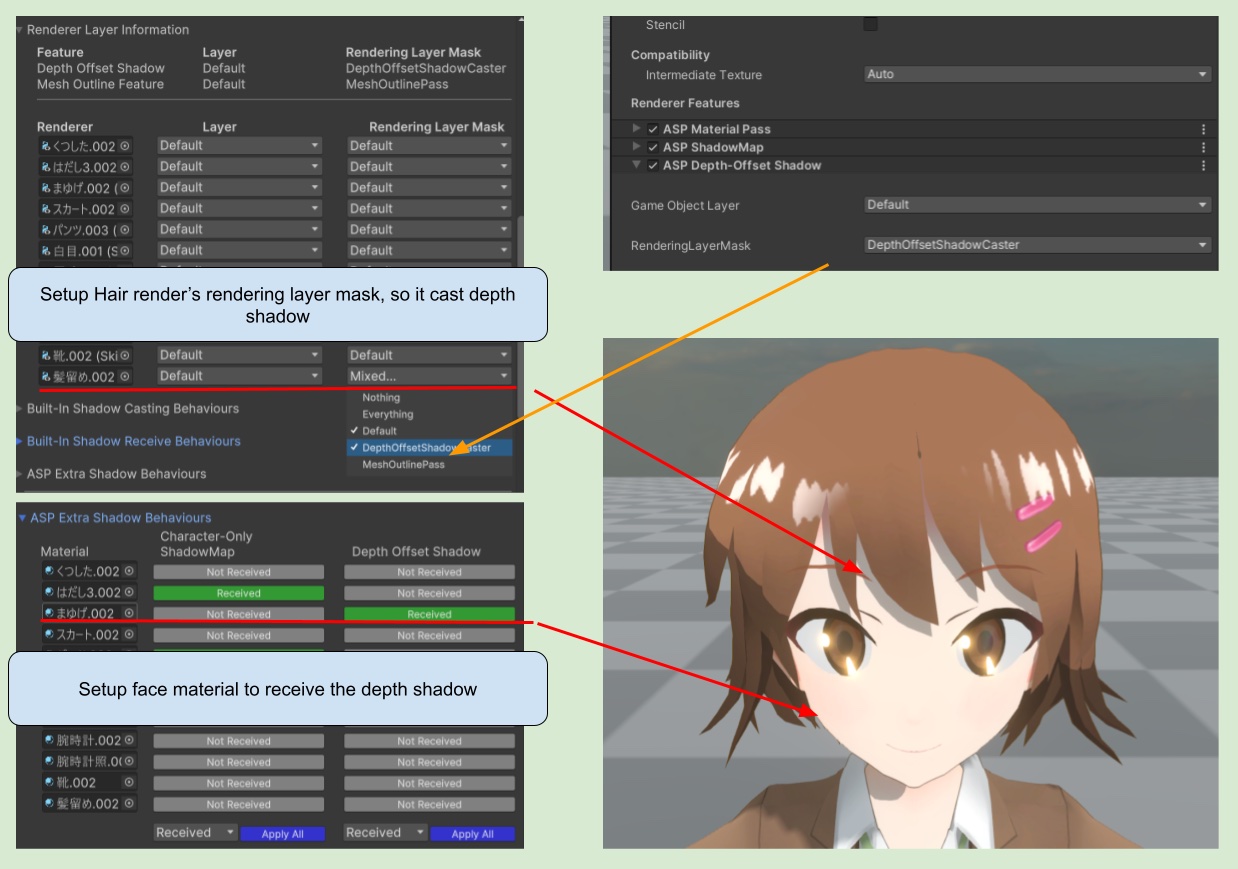
- Set up the ASP Depth-Offset Shadow.
In the Project window, find the URP Renderer Data that stores all Renderer Features.
Expand the Renderer Features list and find ASP Depth-Offset Shadow.
In the panel, setup the layer and rendering layer mask for the depth-offset shadow.
💡 Please note that a Layer can only have a single Layer setting and cannot be multi-selected. However, Rendering Layer Masks can be multi-selected.

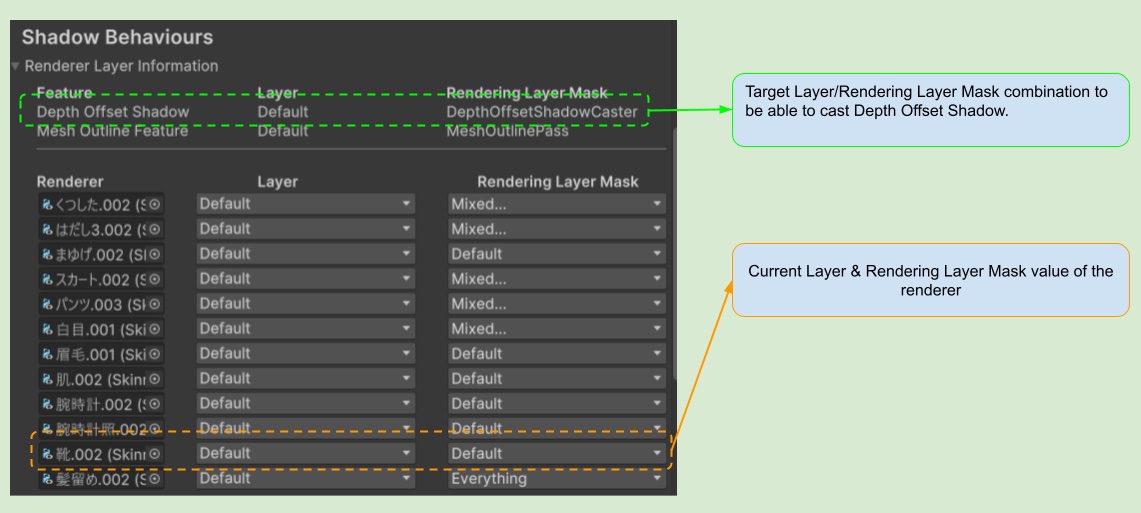
When you expand the Rendering Layer Information item in the ASP Character Panel, you will see the following information.
| Item Name | Description |
|---|---|
| Layer | Can be set in the Editor for each game object. Each game object can only have one layer, and layers are shared with the physics system. This makes layers inflexible |
| Rendering Layer Mask | Can be set independently for each renderer. Rendering Layer Masks can be multi-selected, which makes them more flexible. |
First, confirm the target layer and rendering layer mask of the Depth Offset Shadow above.
Then, set the layer value and rendering layer mask value for each renderer.
If the layer matches and the combination of the renderer's own rendering layer mask contains the value set by Depth Offset Shadow, then the renderer will cast a depth offset shadow.
⏭️ Go to next page → 3️⃣ 3. Character Rendering Example - Cel Shading