3️⃣ 3. Character Rendering Example - Cel Shading
In this page, I will showcasing how to use the ASP/Character shader to render a cel-shaded character model.
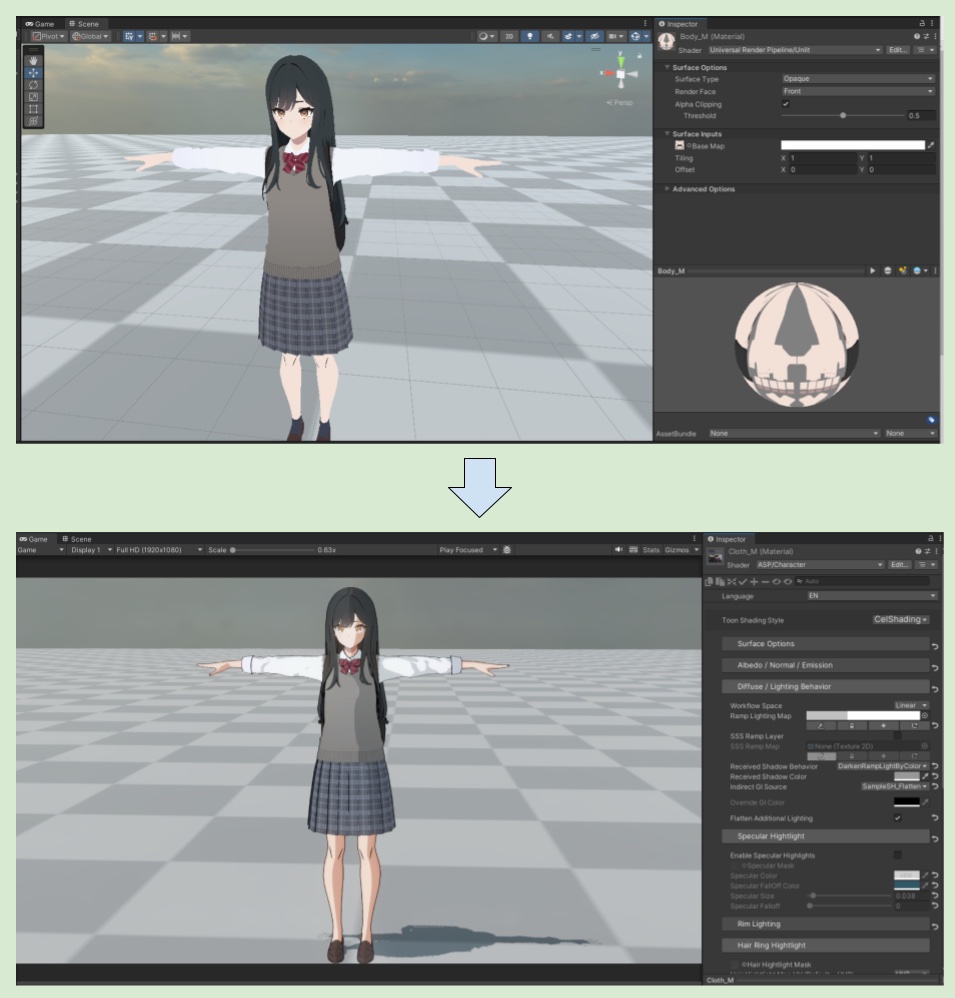
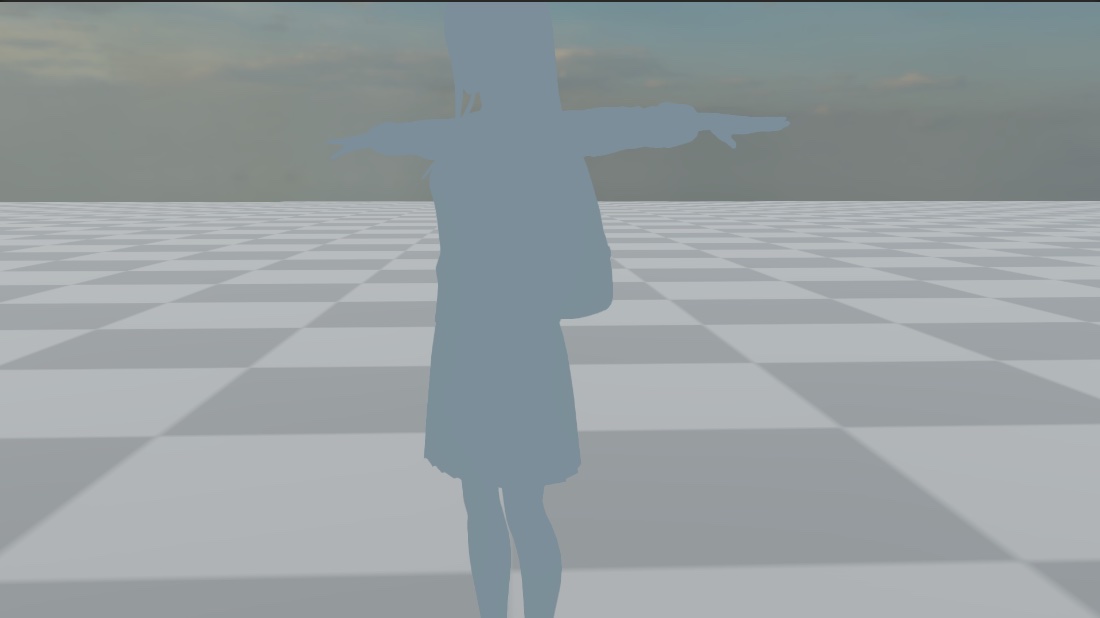
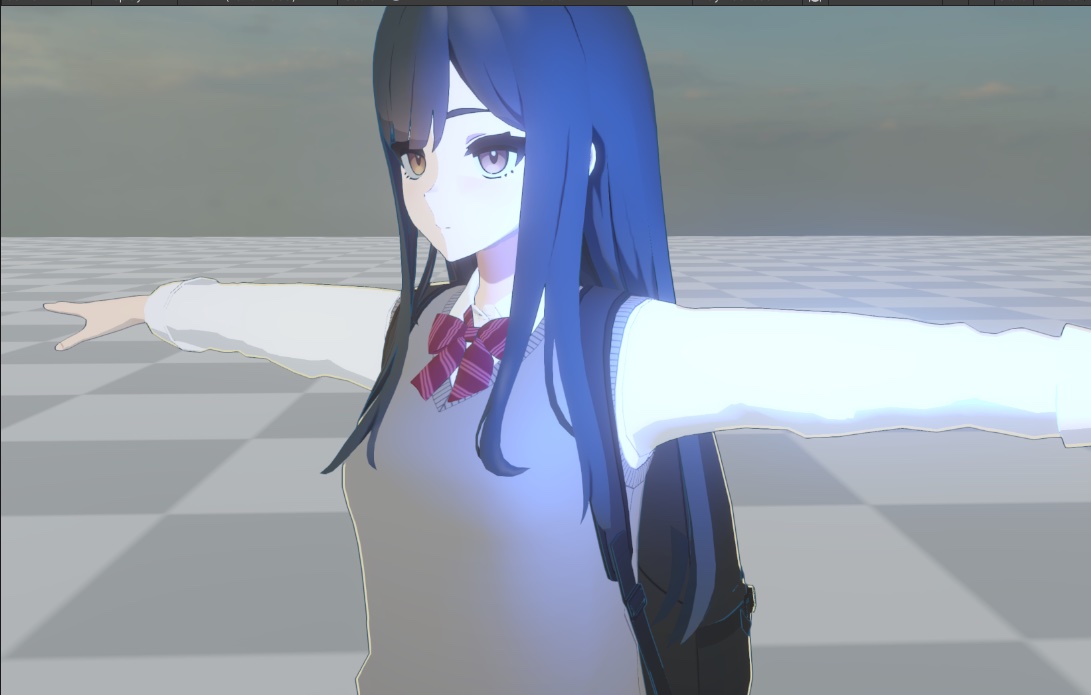
Here's a quick render comparison between using the built-in unlit shader and ASP's shader.
About the model used in this page’s demo
Disclaimer :
I did not make the character model; I only use the model to demo functions of the shader. I also did some modification of the model’s UV/material in order to showcase some features on this page.
model source :1.VRChatにアップロードする際にアウトライン法線を変換する必要があります。 手引書に従って編集してください。
2.フルトラッキング環境でのテストは行っていないため、動作の保証はできません。
3.Unityにインポートを行う際は、事前にVRCSDK avatar3.0のインストールをお願い致します。
4.Unity2022.3.6f1以外では見た目が正常に動作しません。
5.当アバターは改変UTS2.0を使用しています。 当アバターと関係のないモデルへの使用は許可しておりません。
6.VRChatを想定しているモデルになるため、異なるプラットフォームでの動作は保証しておりません。
model creator :
WARPSTAR@3DCG (@WARPSTAR15) on X
3Dでキャラモデルを作ってます。 配布モデルについてのお問い合わせはこちらのアカウントまでお願いします。 ニコニ立体 https://t.co/pX9UGPF027
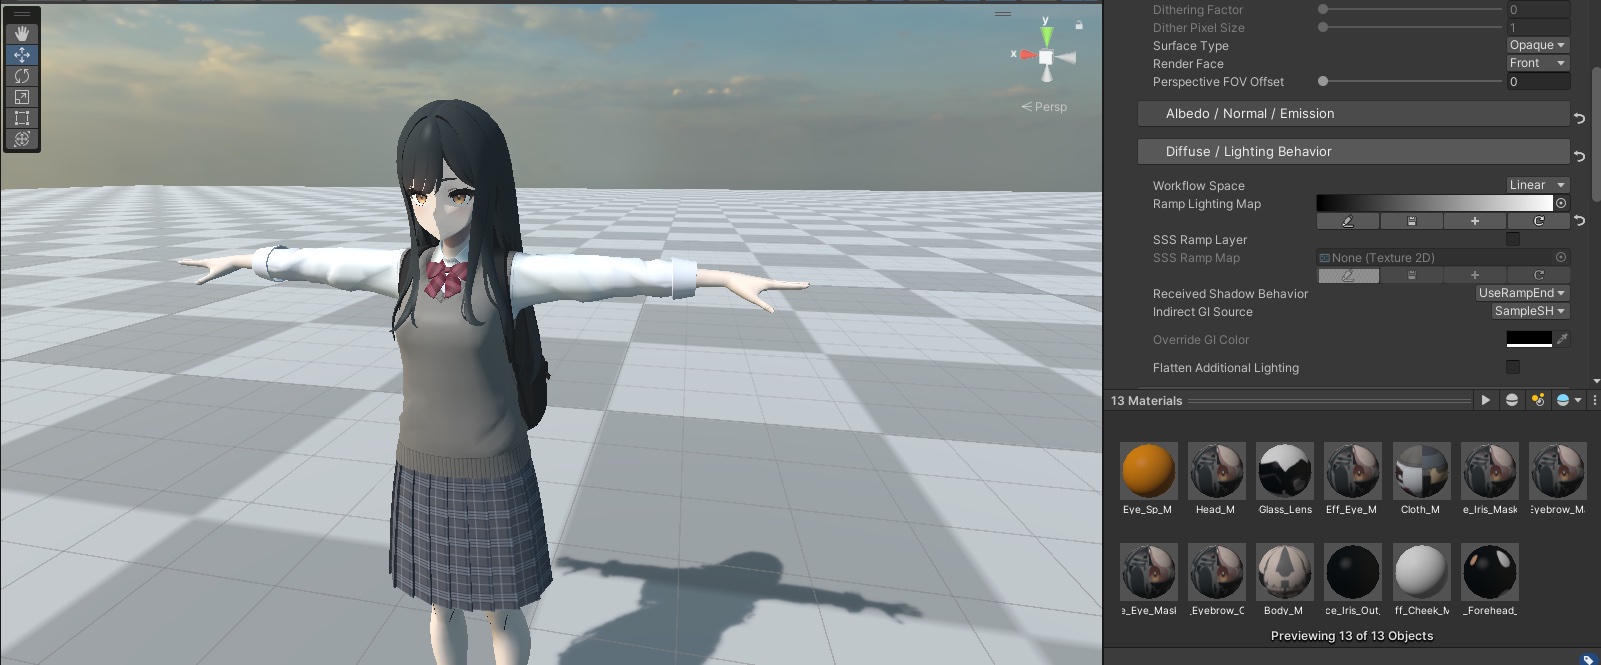
0. Replace Shader
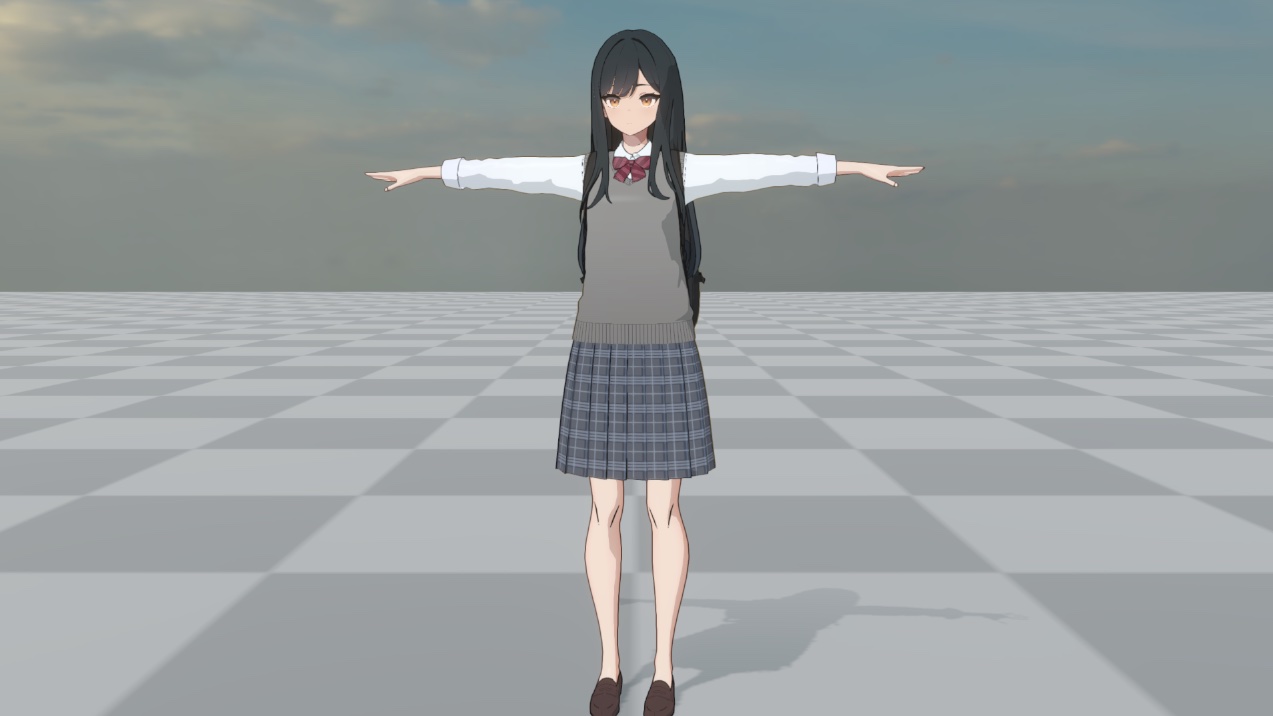
First, replace all materials’s target shader to ASP/Character (we will handle eyes on other page). After replaced, select CelShading mode under the Toon Shading Style at the top, and select Face mode for the face material.
💡 If the material is metal or leather (such as metal zippers and accessories on the backpack), you can choose to use StylizePBR and apply the corresponding metallic map, and turn on Specular lighting.
For more information on PBR map channels, see3️⃣ Albedo/Normal/Emission/OSM Textures.
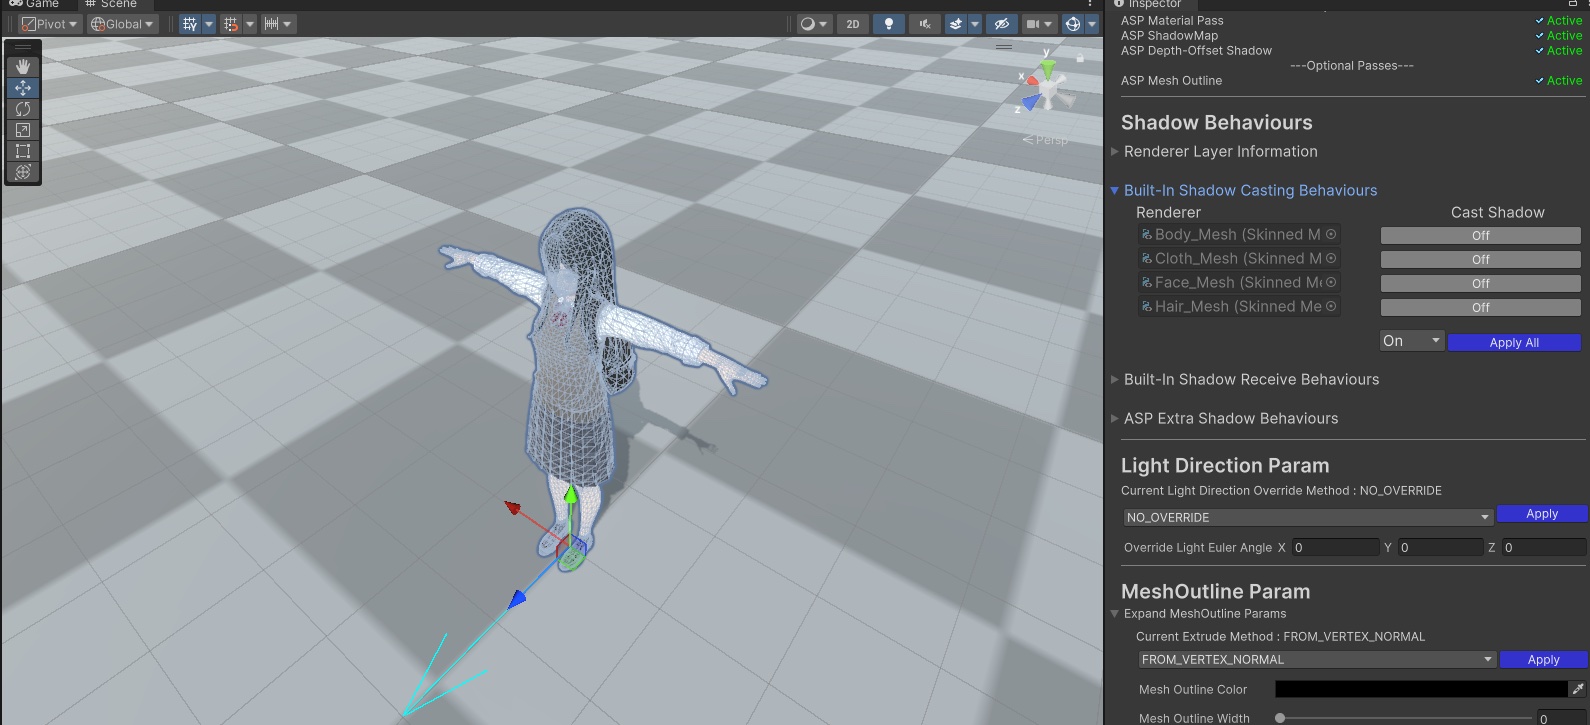
1. Set up ASP Character Panel Component and configure Shadows
Follow the 2️⃣ 2. Setup ASP Character Panel (Important) and 🦇 7. Character Shadow Setup Guide (1.3 Update 2025/11/15) to set up the ASP Character Panel and turn off shadow casting of the current character model to the built-in shadow map. Avoid unnecessary self-shadowing during the process.
2. Default value of Ramp Map
In the material editor, the Ramp Lighting Map under the Diffuse/Lighting Behaviour category will use a black-to-white gradient map by default. Resulting a regular lambert lighting.
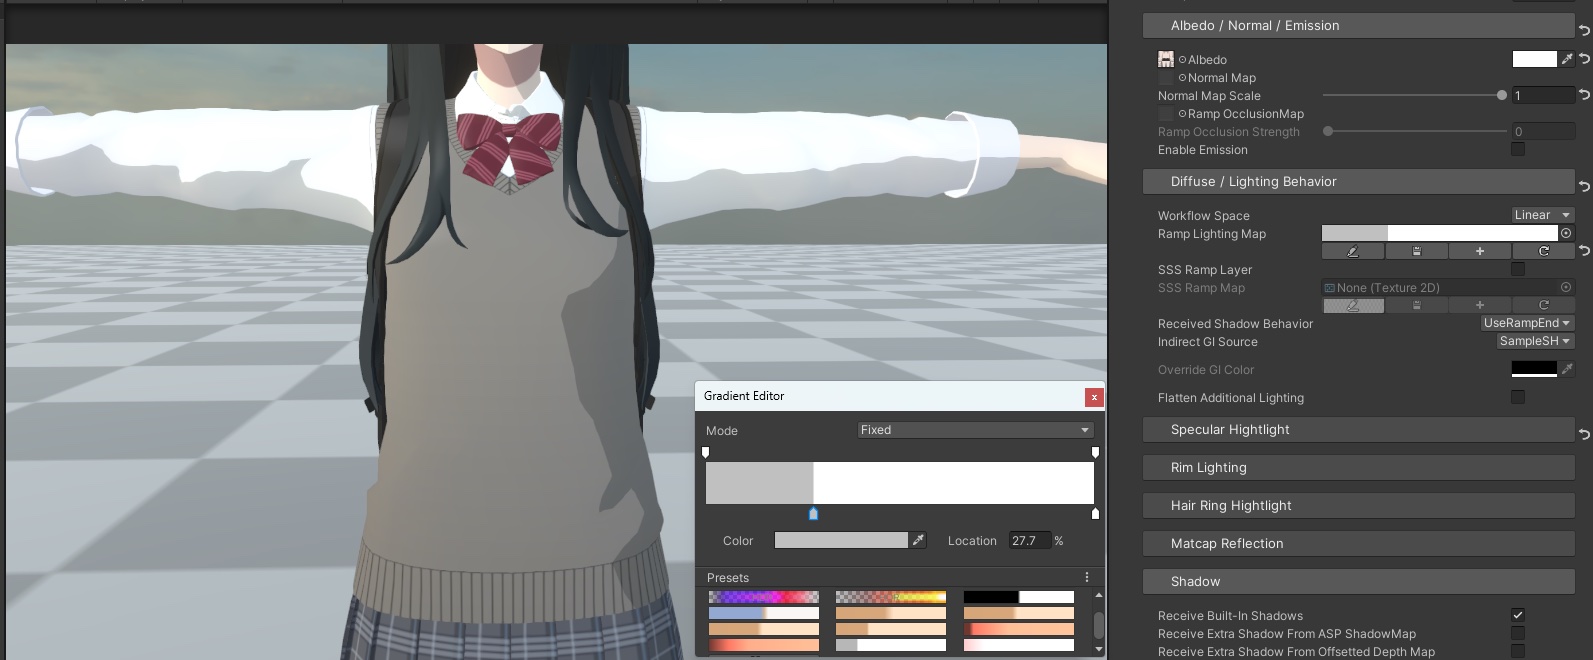
3. Create a new Ramp Map
Click the "+" button on the Ramp Lighting Map editor to add a new ramp map to the current material. Traditional Cel-shaded style is more suitable for using Fixed mode to create a 2D-ish style with obvious boundaries between light/shaded areas. After adjusting the ramp map, apply the same ramp map to other materials used by the character (in practice, different materials may apply different ramp maps according to different needs).
💡 What is ramp lighting?
Using a texture ( ramp map ) to define how surfaces respond to the angles between the incoming light and the normal.
We now have a basic 2-step celshading.
💡 When editing Ramp map, using Fixed mode will automatically change the import settings of ramp map to point sampling, while non-FIXED mode will automatically change to linear sampling.
For more info about the difference of point and linear sampling, see :Unity - Manual: Using sampler states
Most of the time when sampling textures in shadersA program that runs on the GPU. More infoSee in Glossary, the texture sampling state should come from texture settings – essentially, textures and samplers are coupled together. This is default behavior when using DX9-style shader syntax:
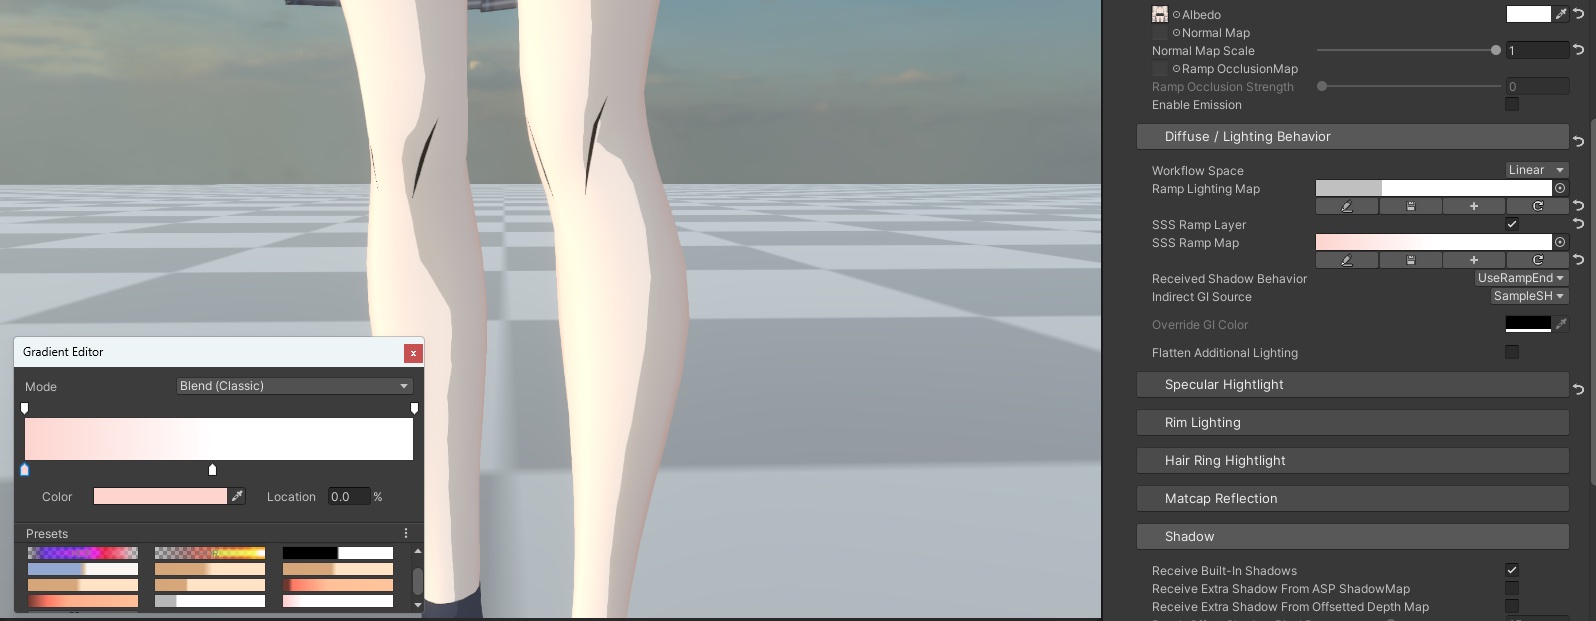
4. Subsurface scattering for anime style skin
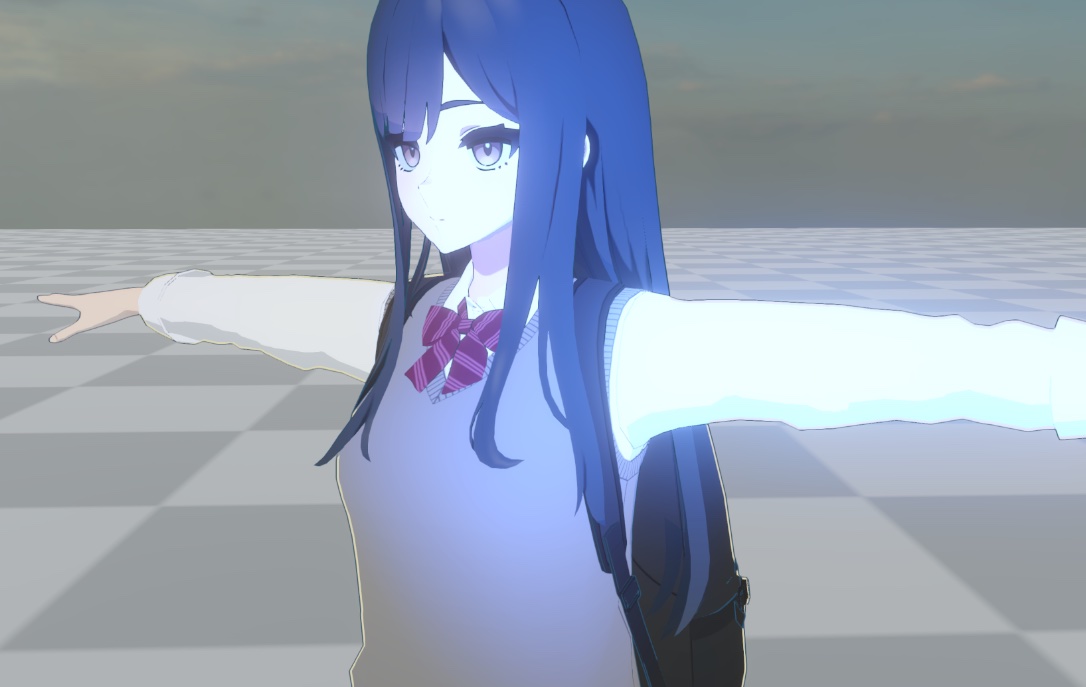
Next, for the materials of the character's skin (e.g - legs, hands, neck, face), in CelShading mode, you can set an additional layer of subsurface scattering effect under the Diffuse/Lighting Behaviour category. Enable the SSS Ramp Layer and add a SSS ramp map. The shader will sample the SSS ramp map based on the object's normal information and view angle, which will give the material a red translucent feel caused by indirect light passing through the skin and then scattering back into the eyes from the blood vessels. In general, the color of this ramp map should be very light (as shown in the figure below).
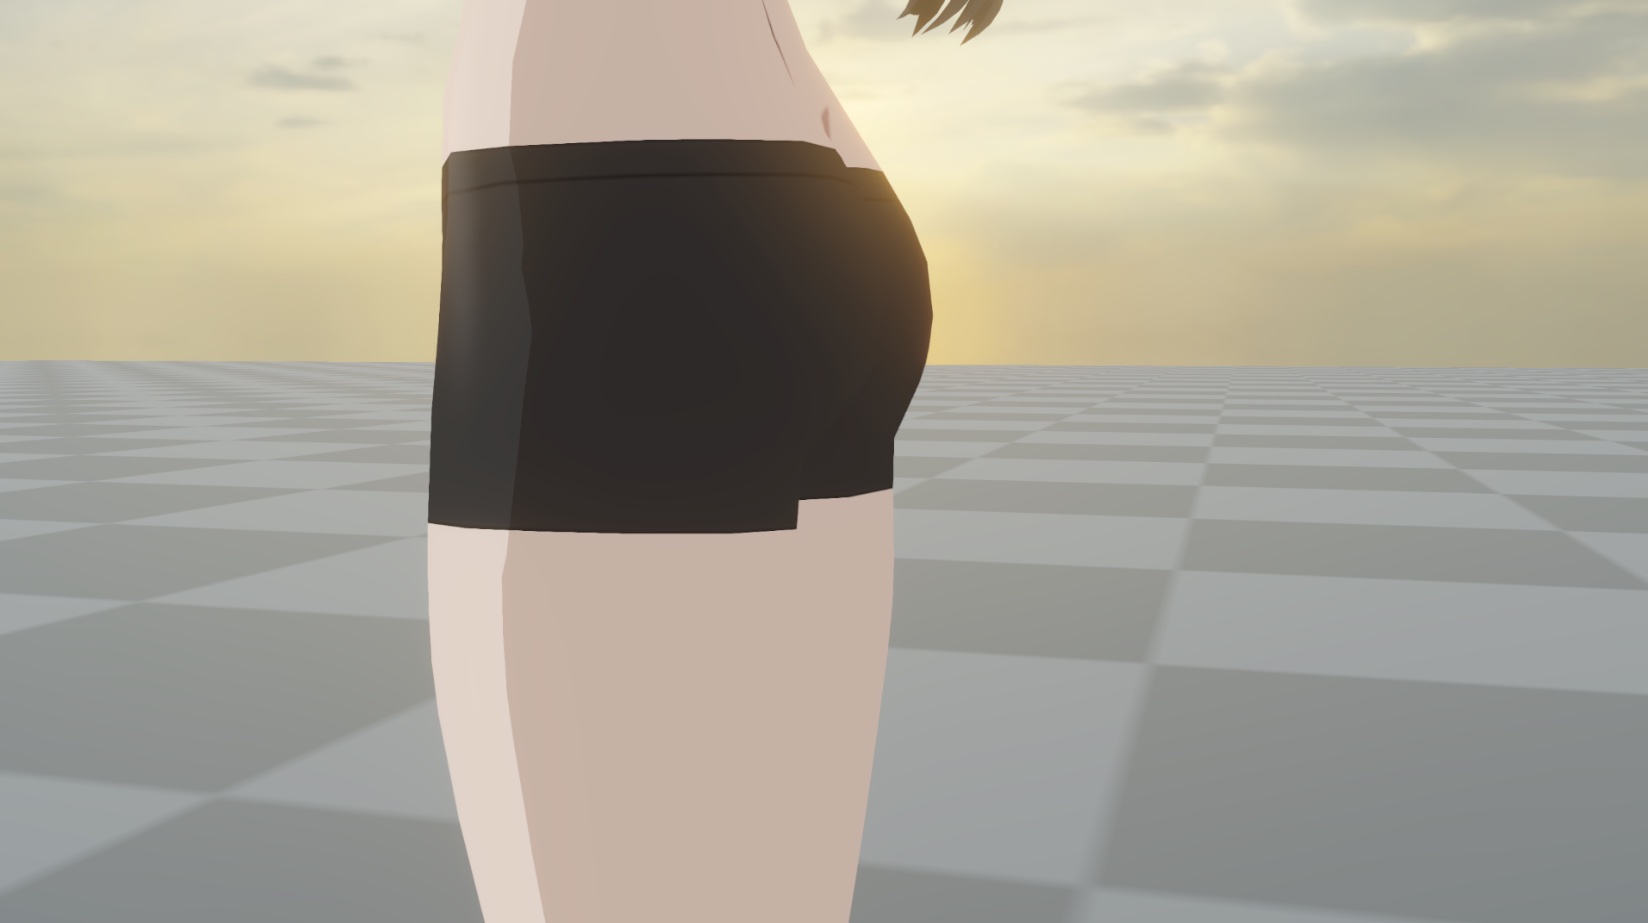
Without SS

With SSS
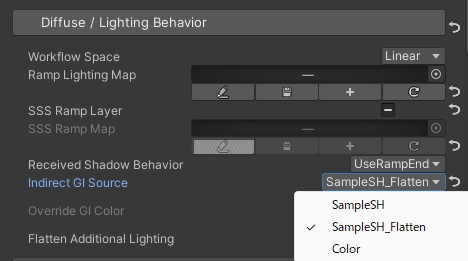
5. Flattening the Global Illumination
For a cel-shading character, you may consider flattening the indirect light from the environment as well. In the Diffuse category, setting Indirect GI Source to SampleSH_Flatten can turn the ambient light that would otherwise create a 3D sense of the geometry into a single color.
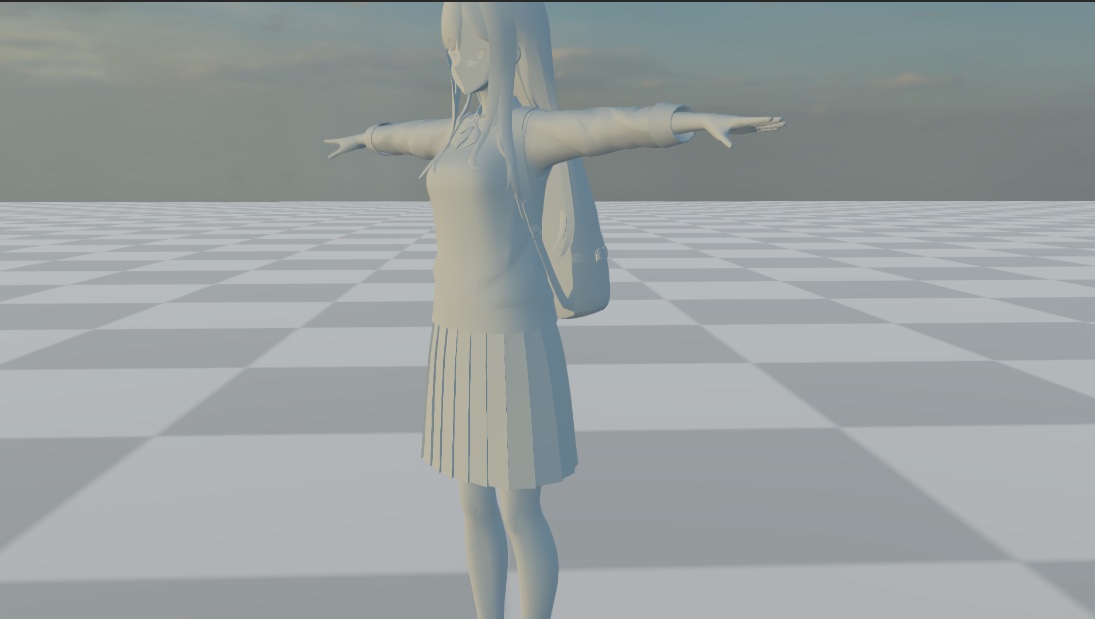
Regular PBR global illumination color (the base color of the receiving material) enhances the 3D-feel of the model. the gi color is especially noticeable when lowering the main light intensity.
Flattened global illumination
💡 Flattened global illumination is also applied to the light from light probes.
6. Flattening lighting from additional lights
For light sources other than the main light source in the scene (point lights and spot lights), ramp lighting is not applied. This is because ramp lighting usually produce unsatisfactory lighting results and it is too expensive to perform texture sampling of the ramp map for each additonal lights. ASP provides an option to change the lighting model from built-in Lambert lighting to flattened lighting for the additonal lights.
In the Diffuse category, toggle Flatten Additional Lighting to true
By default, the lighting from multiple light sources will result in a strong 3D-ish feel on the nose of the face.
After flattening, the 3d-ish feel disappears, and the 2D style is preserved.
💡 When calculating flattened lighting for additonal lights, only the distance to the light source and the light source intensity are considered. Normal information is no longer effective, so light sources from behind will also illuminate the surface as long as they are within the distance.
This is a method specially designed for anime-style characters, and is not applicable to other non-cel/anime rendering styles.
7. Rim Lighting
Depending on the needs of your project, some materials may be suitable for rim lighting. In this case, you can choose to use either Fresnel-based rim lighting or depth buffer-based rim lighting.
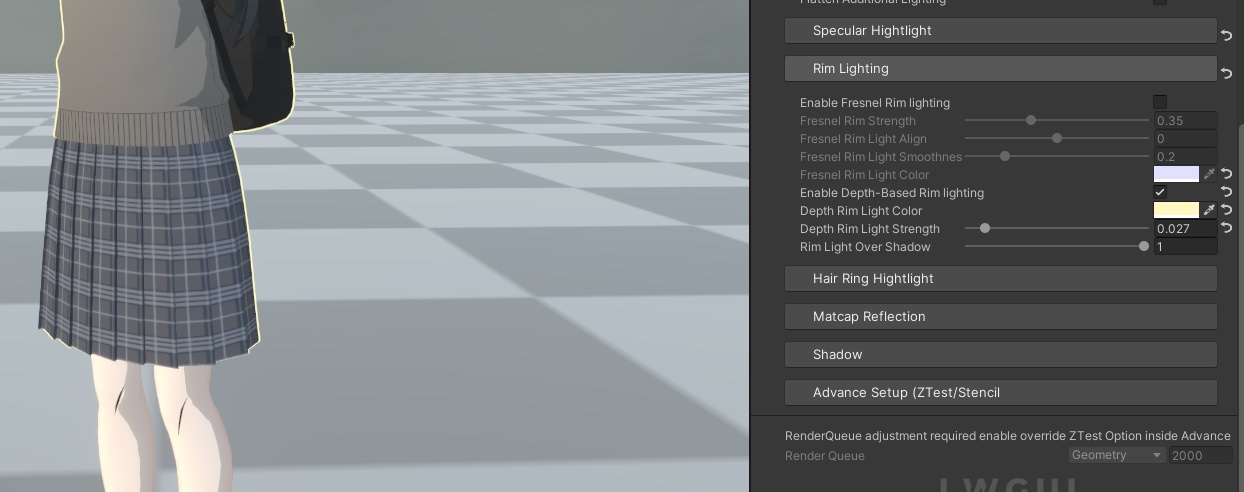
💡 For more information on rim lighting, please refer to 6️⃣ Rim Lighting
8. Enable/Disable Specular Lighting
Specular lighting is enabled by default. However, if you are not using a specular mask, the area where specular light appear might be too large. Adjust the property accordingly.
💡 For more information on rim lighting, please refer to 5️⃣ Specular Highlight
9. Create/Use a Face Shadow Map
By using Face Shadow Map, we can prevent the undesired toon lighting on complex face geomety.
The setup of a face shadow map deserves a dedicated page for a proper explanation. Please refer to the Face Shadow Map guide - 🙃 9. Face Shadow Map- Creation & Baking Workflow to learn how to create and apply a face shadow map to the character's face material. “
💡 When using Face Mode, the character will only use the leftmost end of the ramp map as the shadow color. The ramp map itself does not create ramp lighting (The lighting will control by the face shadow map).
10. Using Depth Offset Shadow to Create Hair Shadows on the Forehead
Follow the depth-offset shadow tutorial in the 🦇 7. Character Shadow Setup Guide (1.3 Update 2025/11/15) (section 2-4) to set up the rendering layer mask for depth offset shadow and hair renderer of the character.
In the ASP Character Panel’s Shadow Behaviours section, under ASP Extra Shadow Behaviours, enable the Depth Offset Shadow’s Receive toggle like below figure so the face material can received depth offset shadow.
After completing the above steps, hair shadows based on depth offset will appear on the character's face.
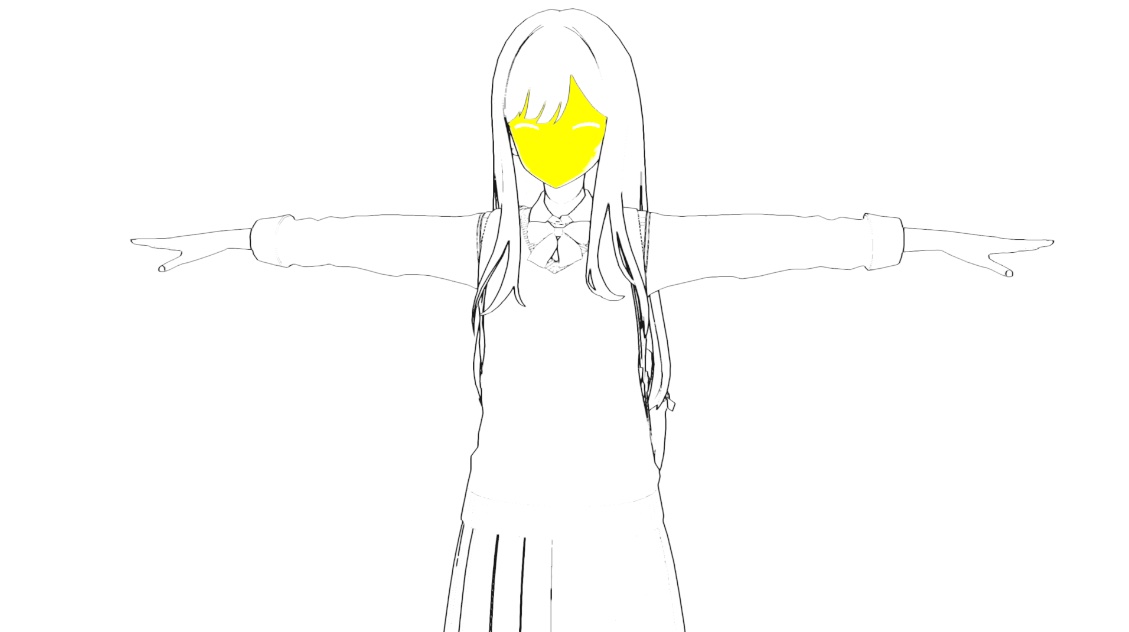
11. Adjusting Screen Space Outline and Using Vertex Color to Control the Outline Weight Mask
Follow the Screen Space Outline (Outline) Instructions to set the outline parameters and paint the vertex color mask into the mesh in DCC.
Use the debug mode in the screen space outline override to observe the outline of the character and the outline mask(shown as yellow parts in below figure).
12. Tone Mapping/P
Follow the 🎨 17. Tone Mapping For Cel-Shading Characters’s Instructions to adjust the post-processing effect accordingly.
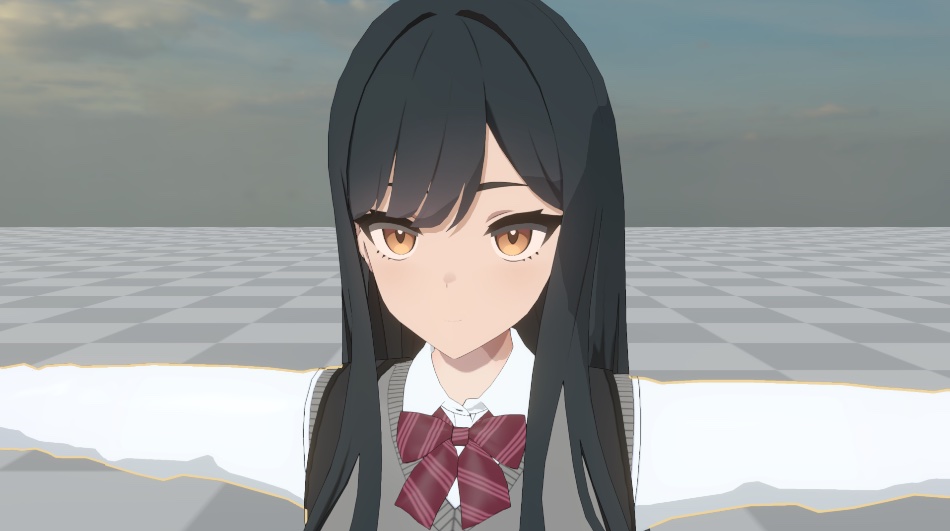
Final Render Result

⏭️ Go to next page → 4️⃣ 4. Character Rendering Example - Stylize CelShading/PBR