🏫 5. ASP Character Panel Feature Guide
This page explains the additional features provided on the ASP Character Panel. Theoretically, these features can be set directly through code or inspector individually for each character's material. However, for the sake of convenience (a character may have multiple materials), the ASP Character Panel allows you to set the corresponding parameters for all material at once.
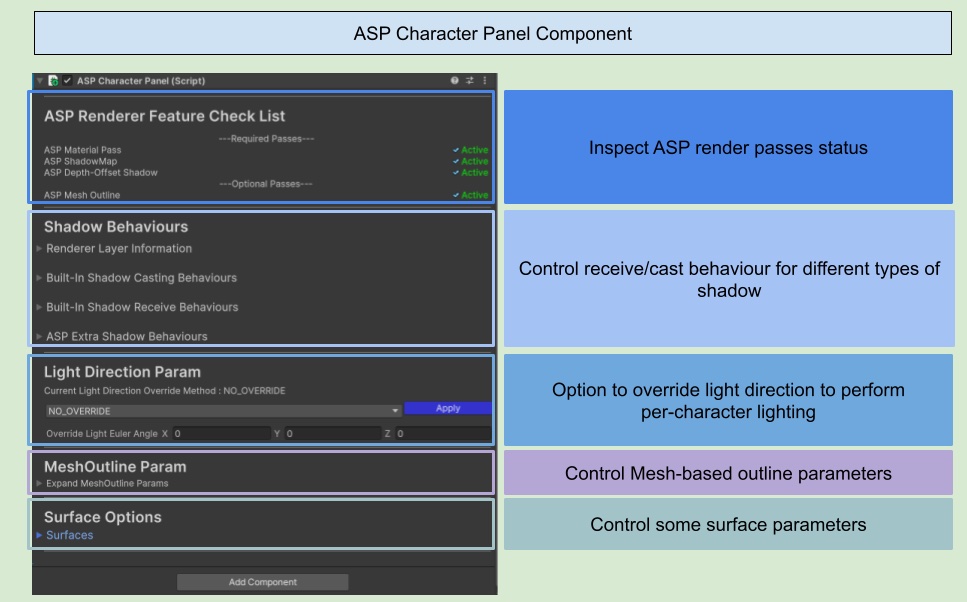
ASP Renderer Feature Check List
In order to render ASP characters correctly, the following three renderer features need to be added to the URP rendering data:
ASP Material Pass
ASP ShadowMap
ASP Depth-Offset Shadow
The status of these renderer features will be displayed under the ASP Renderer Feature Check List category. If any are missing or disabled, "missing" or "inactive" will be displayed.
Shadow Behaviours
You can uniformly view and set the Layer/Rendering Layer Mask and the shadow receiving and casting states of all material/renderer of the current character.
💡 For detail setup, please refer to 🦇 6. Setup Character Shadow - ASP’s Shadow Solution (1.3 Update 2025/11/15) and 🦇 7. Character Shadow Setup Guide (1.3 Update 2025/11/15)
Light Direction Param

| Mode | Description |
|---|---|
| NO_OVERRIDE | Do not override light direction information, use the directional light in the scene as the main light source |
| OVERRIDE_WITH_EULER | Use Override Light Euler Angle as the main light source direction |
The Light Direction Param provides the ability to override the main light source direction for the current character. This feature is suitable for when the main light source direction for the character needs to be separate from the light source direction in the scene (e.g., when the character is more suitable for a higher angle, top-down light source, and the scene uses a light source closer to the horizon...).
A unity chan that use OVERRIDE_WITH_EULER mode
Main Light Property Override(2024/07/31 Update)
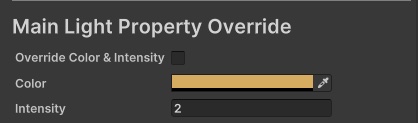
| Mode | Description |
|---|---|
| Override Color & Intensity | Whether to override the influence of the main light's color and intensity on this ASP character. |
| Color | Overridden main light color. |
| Intensity | Overridden main light intensity. |
The Main Light Property Override option allows you to override the influence of the current main light's color and intensity on the character.
The image below shows a scene with a white light color and an intensity of 2.
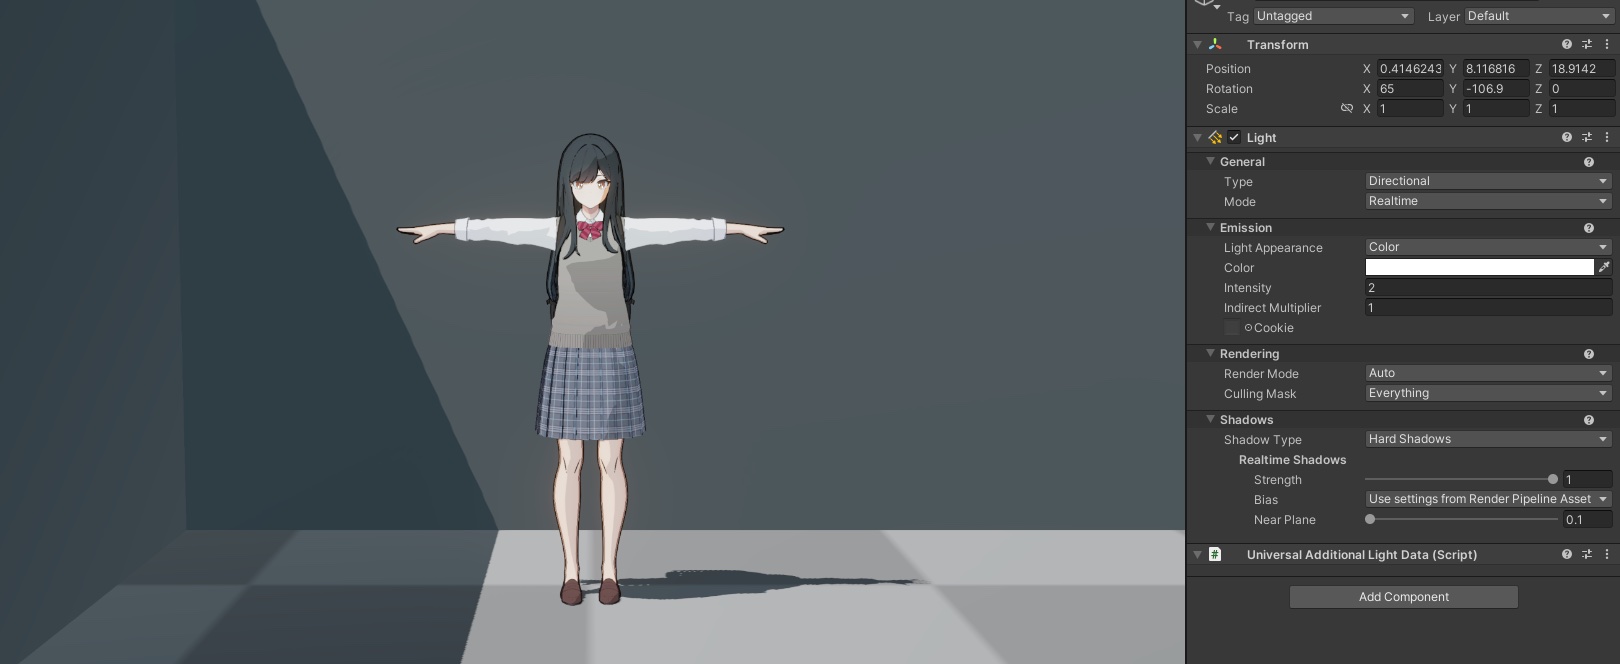
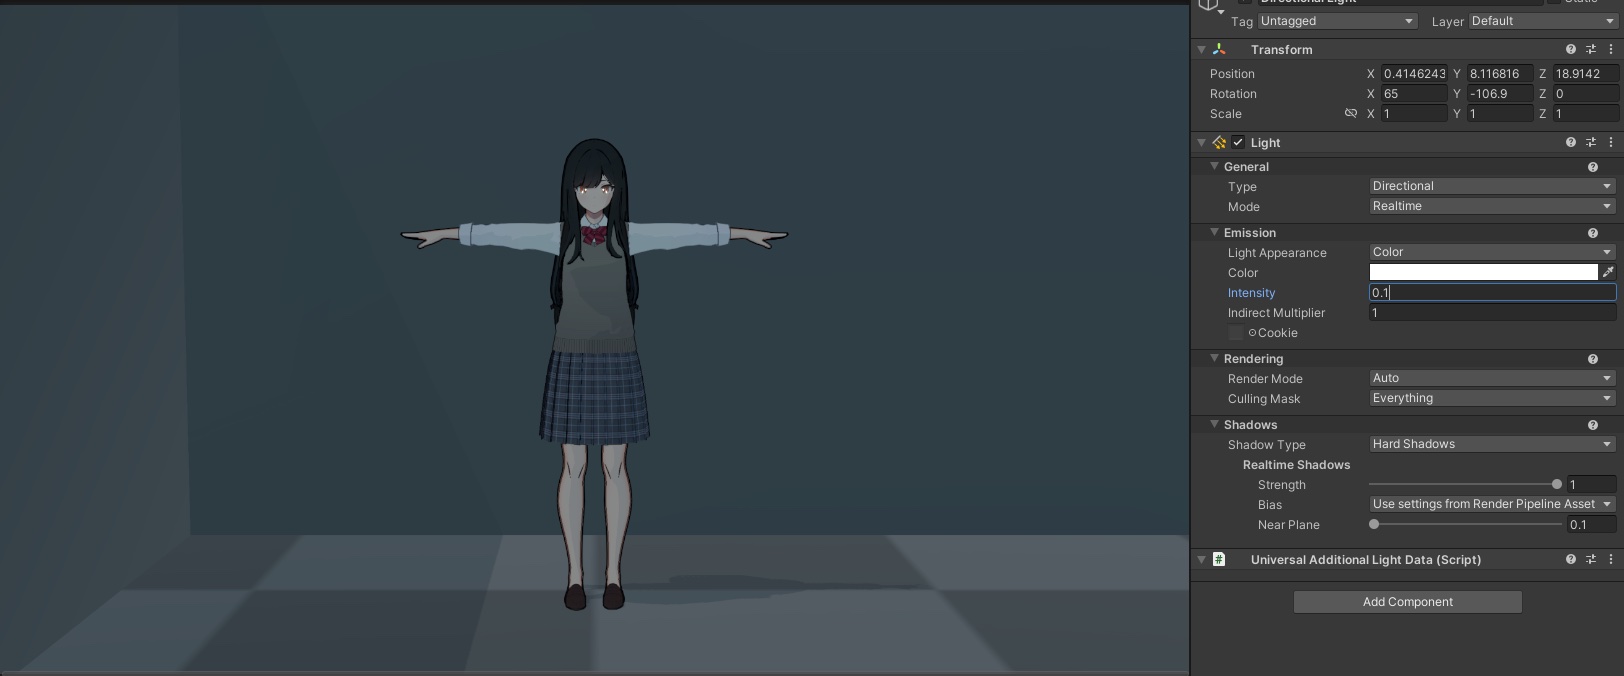
When the intensity of the main light is set very low (for example, 0.1), the toon shading effect on the character also becomes less obvious.
ASP provides the option to override the main light intensity and color. After enabling the override toggle, we can have different lighting directions, intensity, and color for the character.
The image below shows the ASP character rendered with custom intensity and color after enabling "Override Color & Intensity".
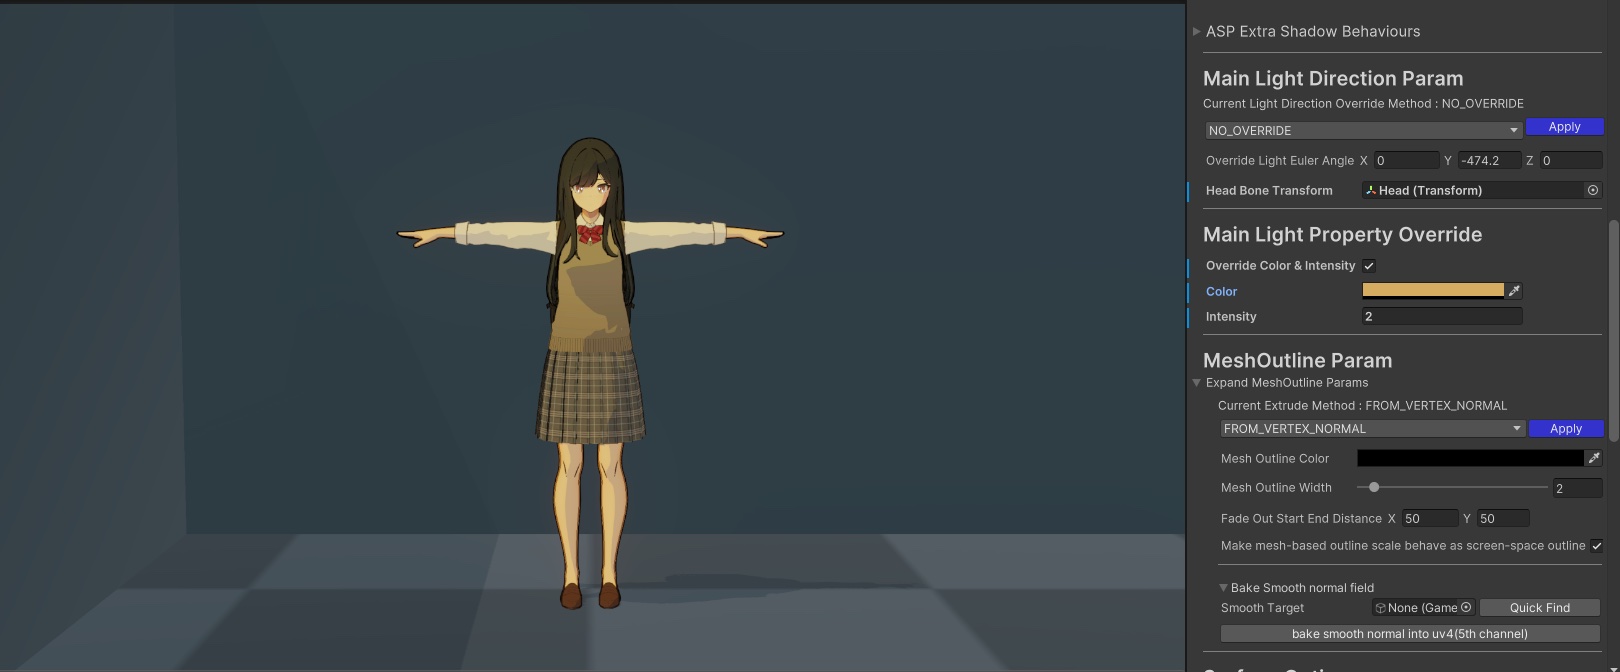
Note that this is not physically correct (remember, physical correctness is not the priority when doing toon shading). This setting will decouple the rendering of the character from other renderers in the scene.
💡 For correct toon shading, make sure there is at least one main light in the scene with an intensity greater than or equal to 0.001. This tells the shader that there’s at least 1 valid main light to perform shading.
Mesh Outline Param
This section has the parameter to controls the color, thickness, extrusion mode, and smooth normal baking tool to bake smooth normal into model’s UV4 channel.
💡 For detailed instructions on how to use these parameters, please refer to 〰️ 15. Object Space Outline Setup / Smooth Normal Bake Flow
Surface Options
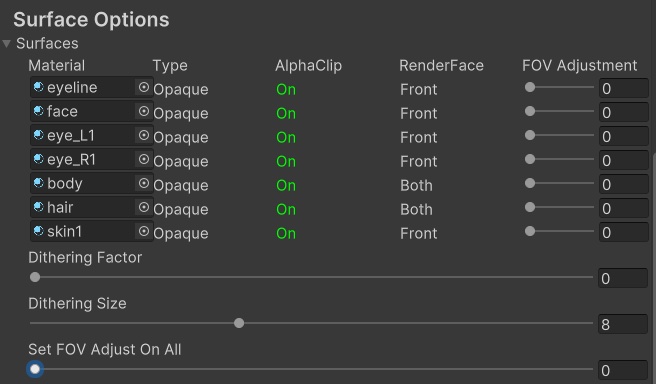
The Surface Options section displays the surface information for each ASP/Character and ASP/Eye material used by the current character.
You can also adjust the dithering and perspective FOV correction effects for each material individually or globally.
💡 To see the effects of dithering and FOV correction, please refer to 🟢 8. Surface Options- FOV Correction and Dithering