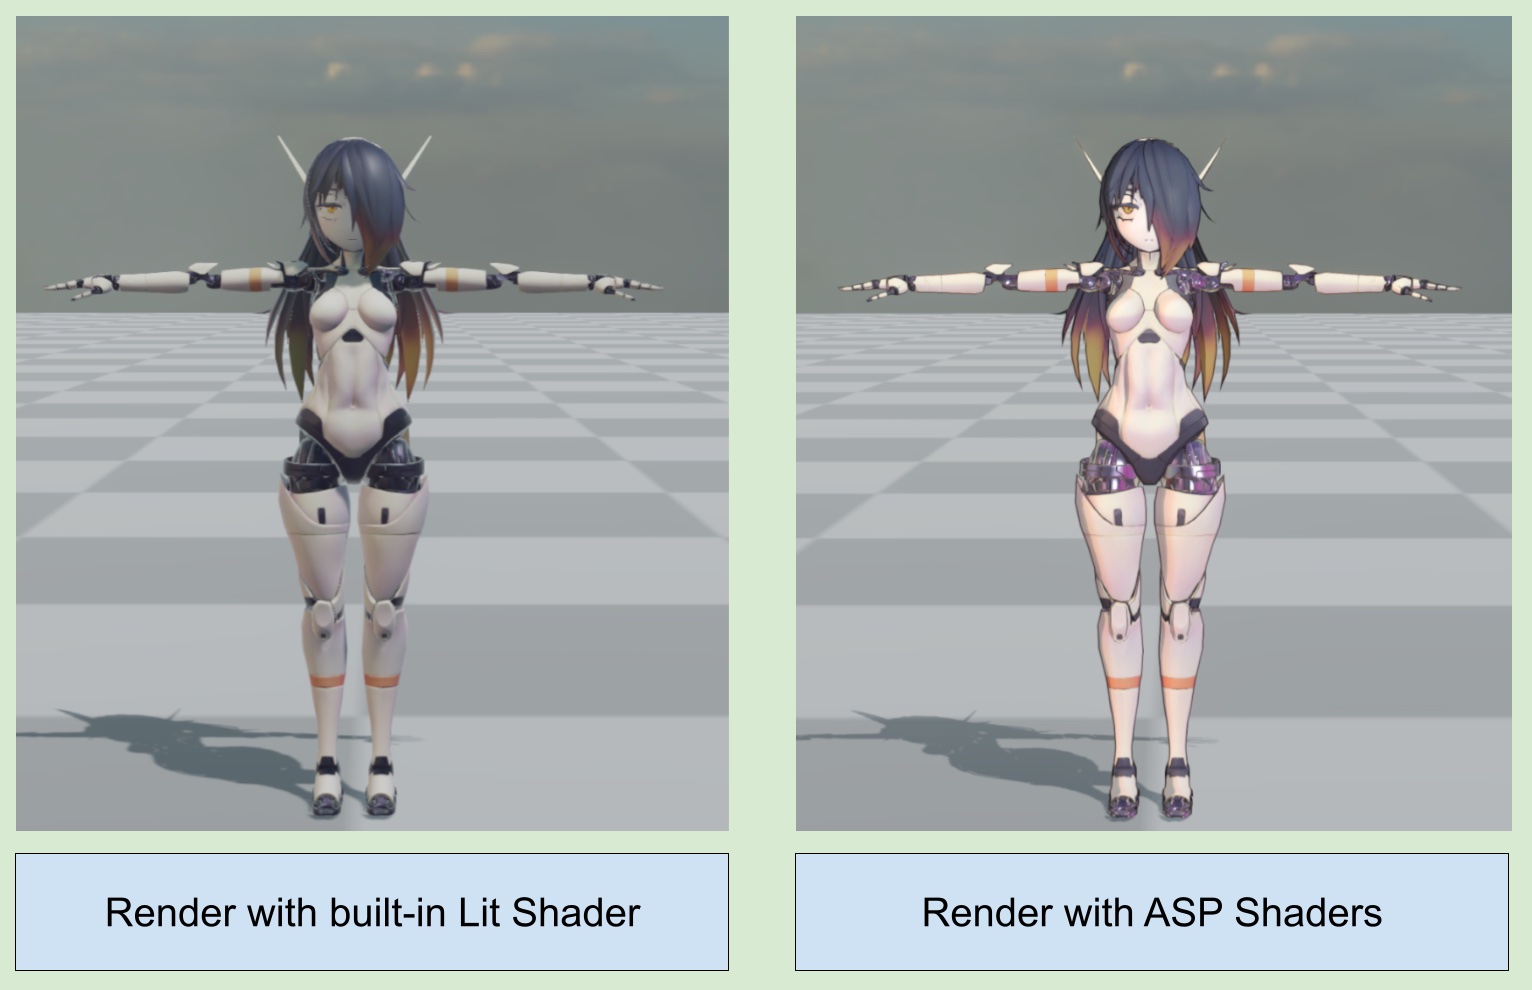
4️⃣ 4. Character Rendering Example - Stylize CelShading/PBR
This page will demonstrate how to use the shader in ASP to render the character, getting the result on the right side of below screenshot.
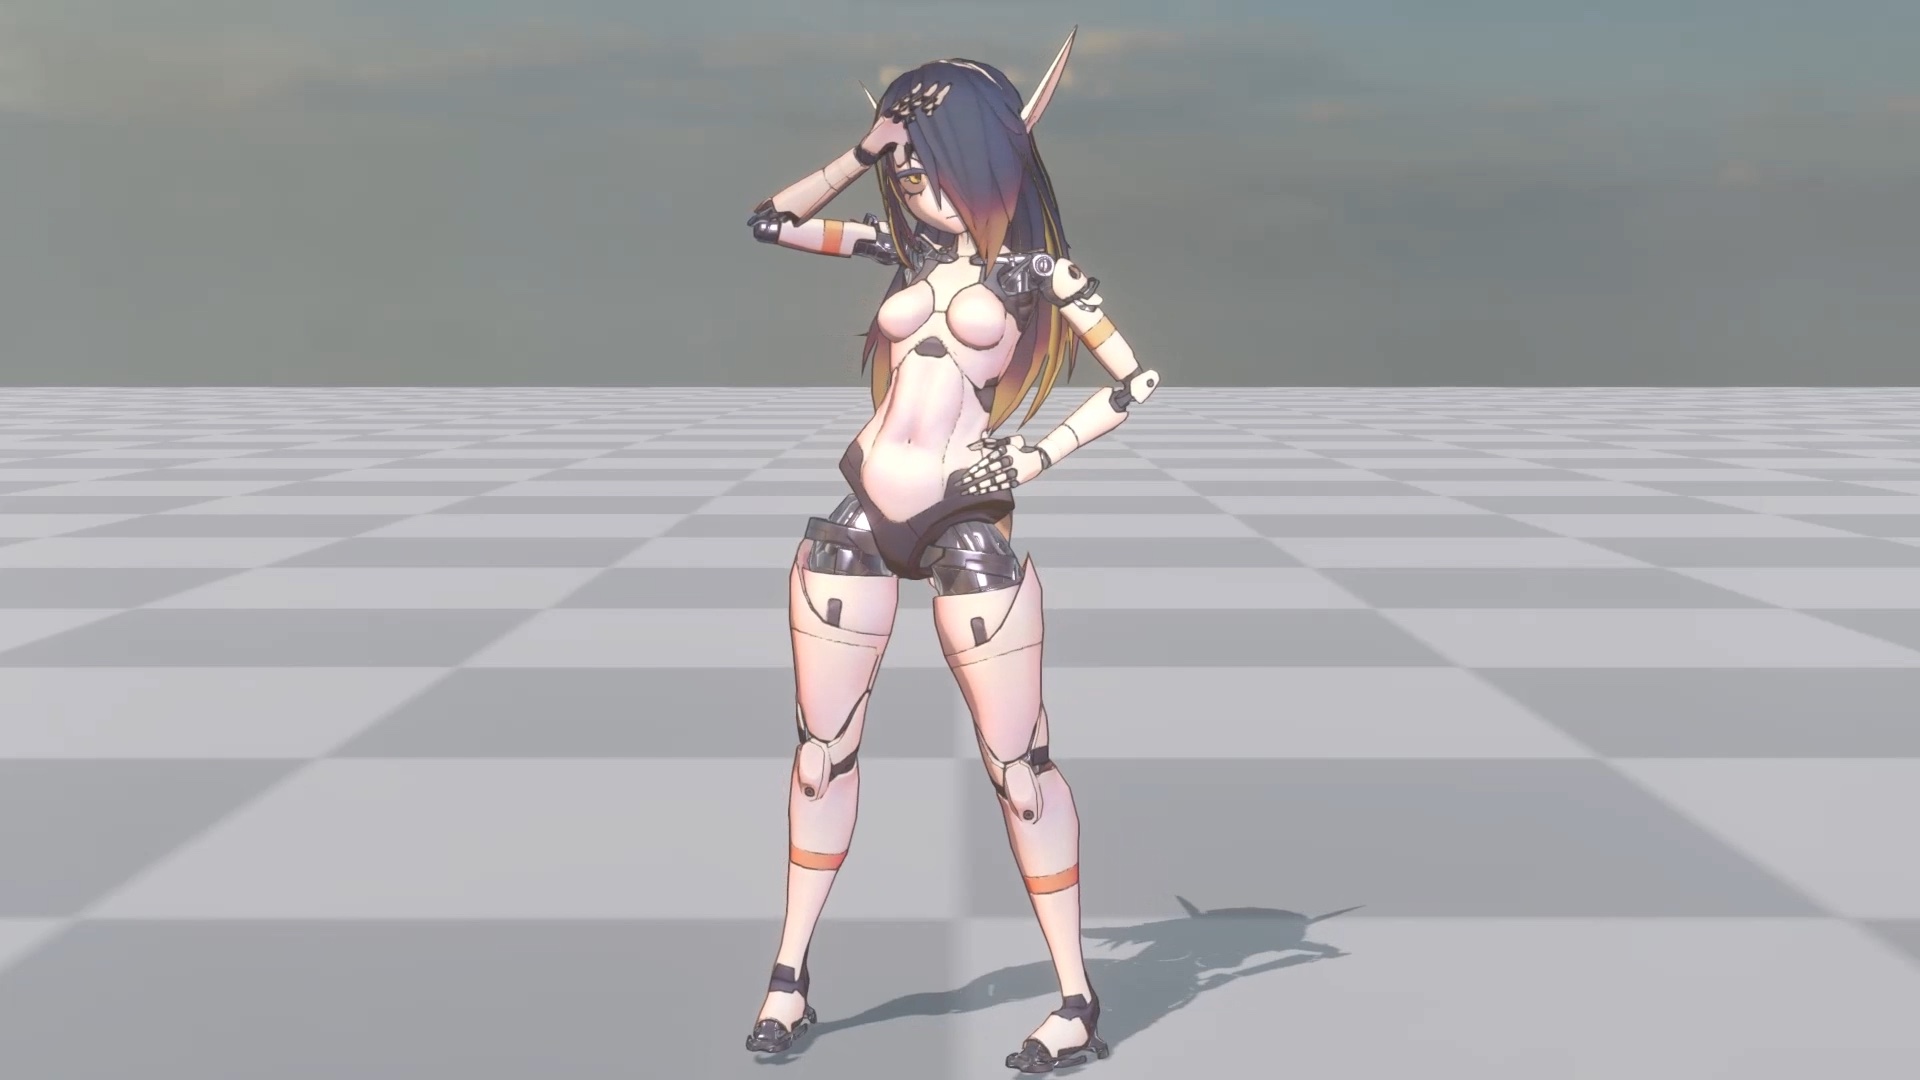
About the model used in this page’s demo
Disclaimer :
I did not make the character model; I only use the model to demo functions of the shader. I also did some modification of the model's UV/material in order to showcase some features on this page.
model source :[3Dモデル]RUNA QUEST POTATO DRONE[アバター] [VRC]
このアバターは RUNA の無料バージョンで、クエストまたは Android デバイスの使用に適合しています。 https://tori-nyan.booth.pm/items/4474266 このバージョンを使用するにはオリジナルのアバターは必要ありません クエストのパフォーマンスに合わせて適切に最適化されました(20kポリ未満) テクスチャと法線マップが存在します このバージョンは他の runa アドオンと互換性がありません テクスチャは PSD なので、色を変更することができます
model creator :
shops https://t.co/Z8kjbDE8vr https://t.co/oFmBsTlHb2 https://t.co/00oUp9WTnA No commisions
concept artist :
Self-taught artist Subscribestar : https://t.co/BdjZQo73BW Patreon : https://t.co/xQiCGKDnEh
💡 Please refer to as well when using the shader
0. Replace Shader
First, setup all material’s target shader to ASP/Character.
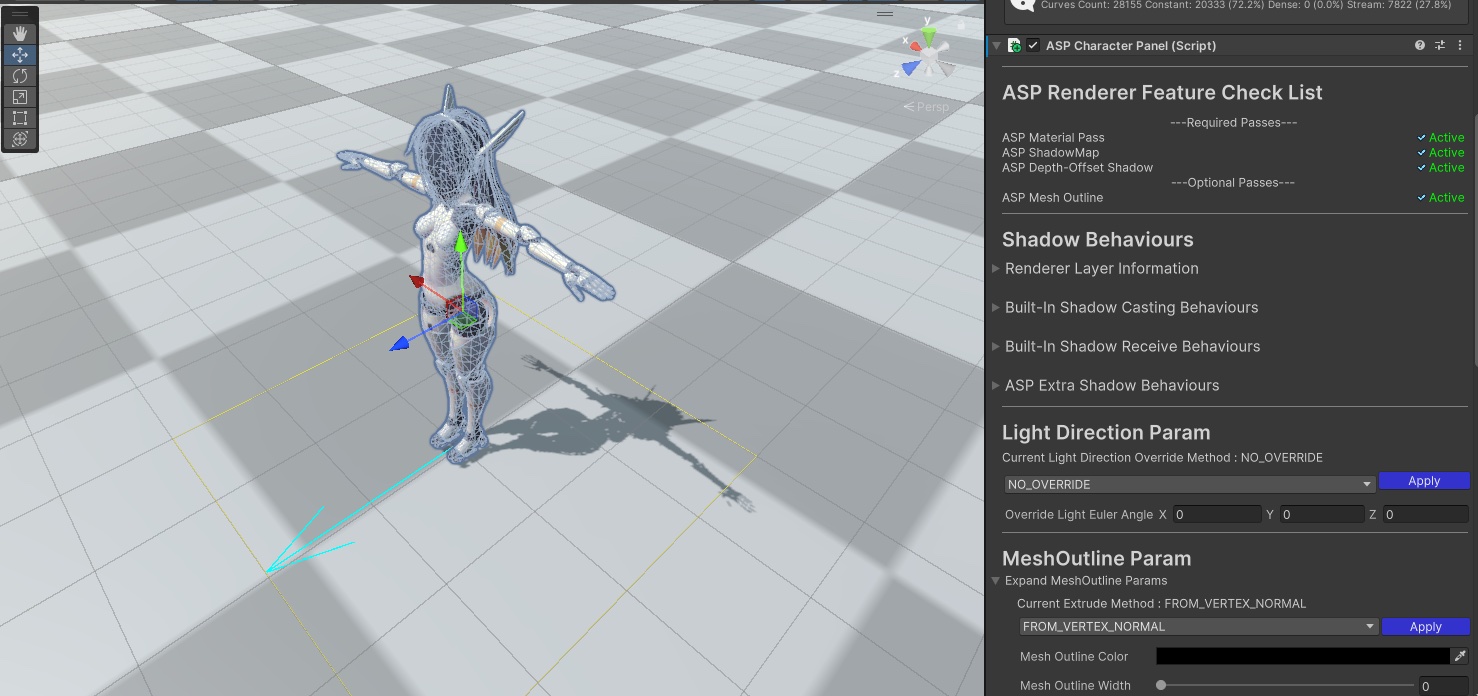
1. Set up ASP Character Panel Component and configure Shadows
Follow the 2️⃣ 2. Setup ASP Character Panel (Important) and 🦇 7. Character Shadow Setup Guide (1.3 Update 2025/11/15) to set up the ASP Character Panel and turn off shadow casting of the current character model to the built-in shadow map. Avoid unnecessary self-shadowing during the process.
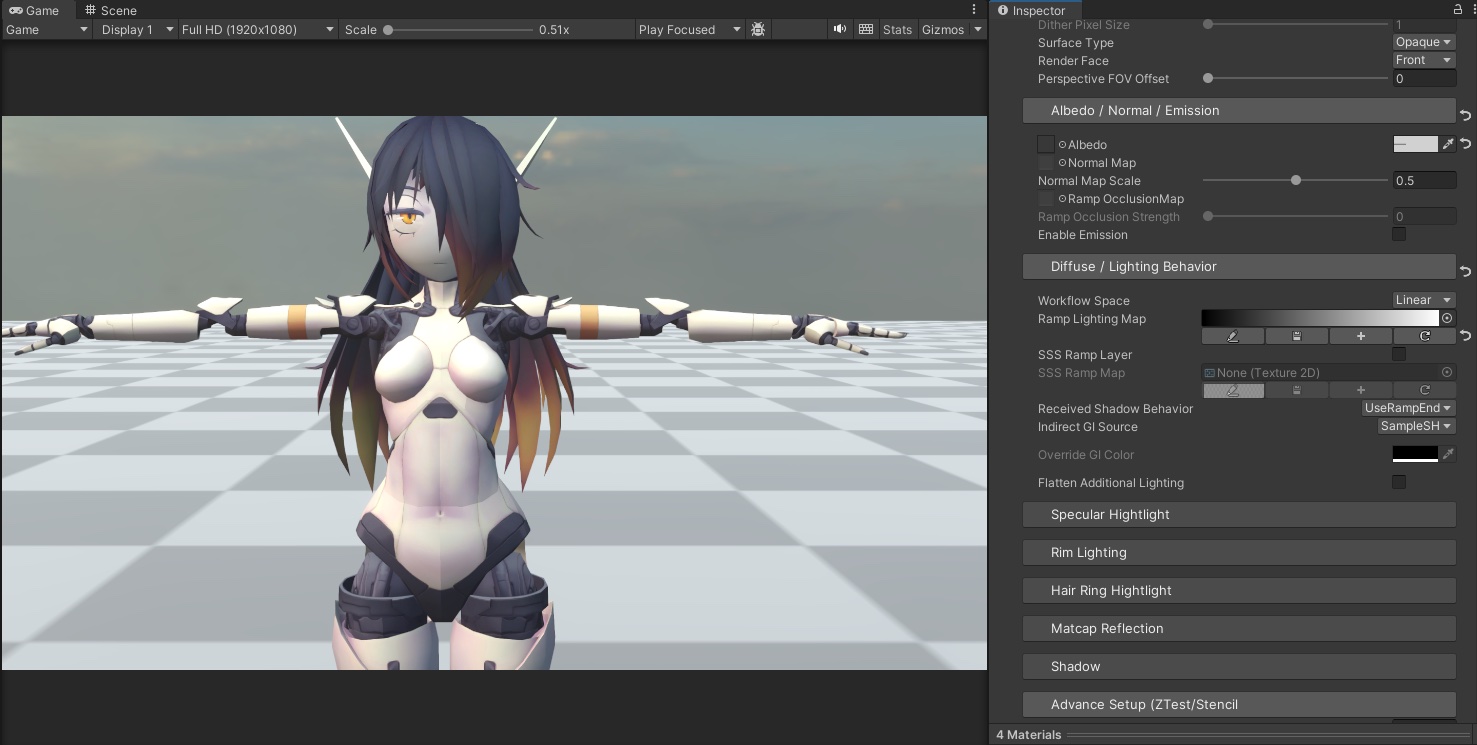
2. Default value of Ramp Map
In the material editor, the Ramp Lighting Map under the Diffuse/Lighting Behaviour category will use a black-to-white gradient map by default. Resulting a regular lambert lighting.
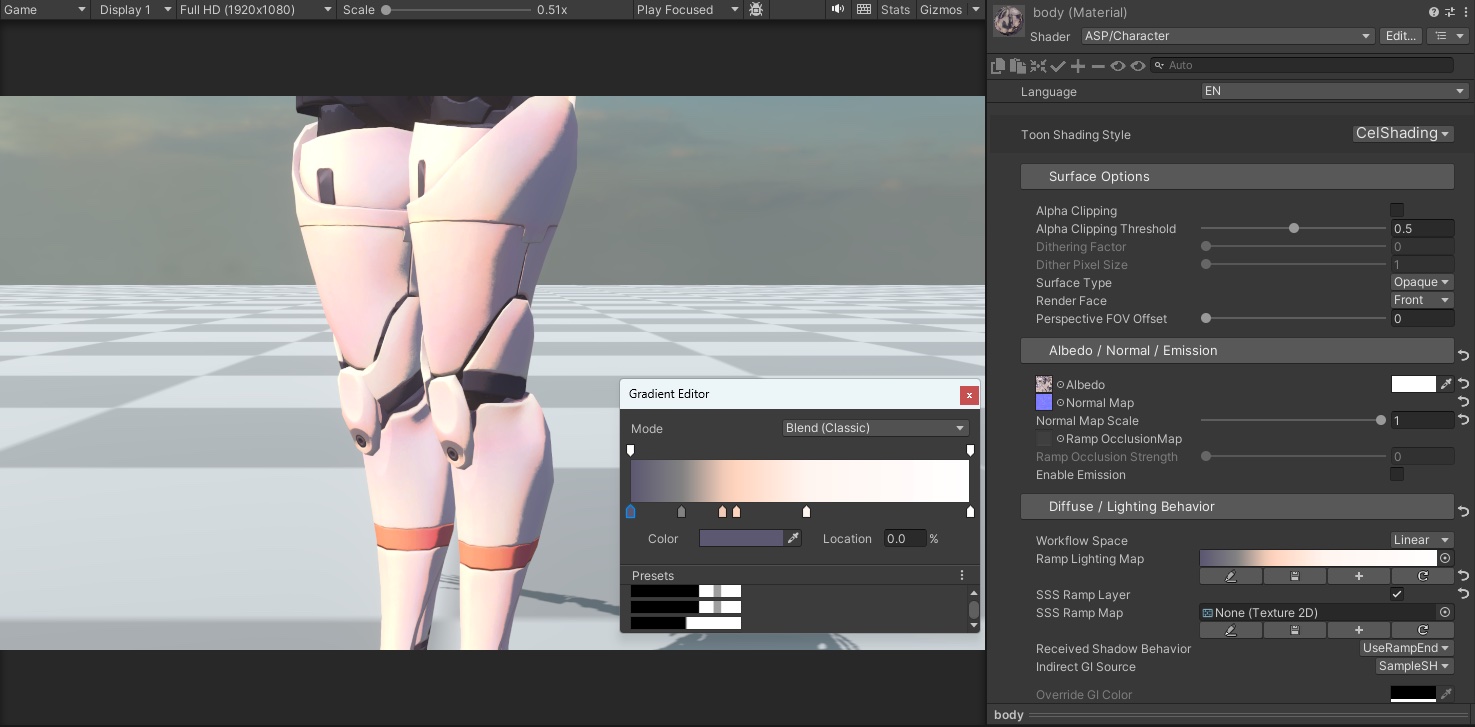
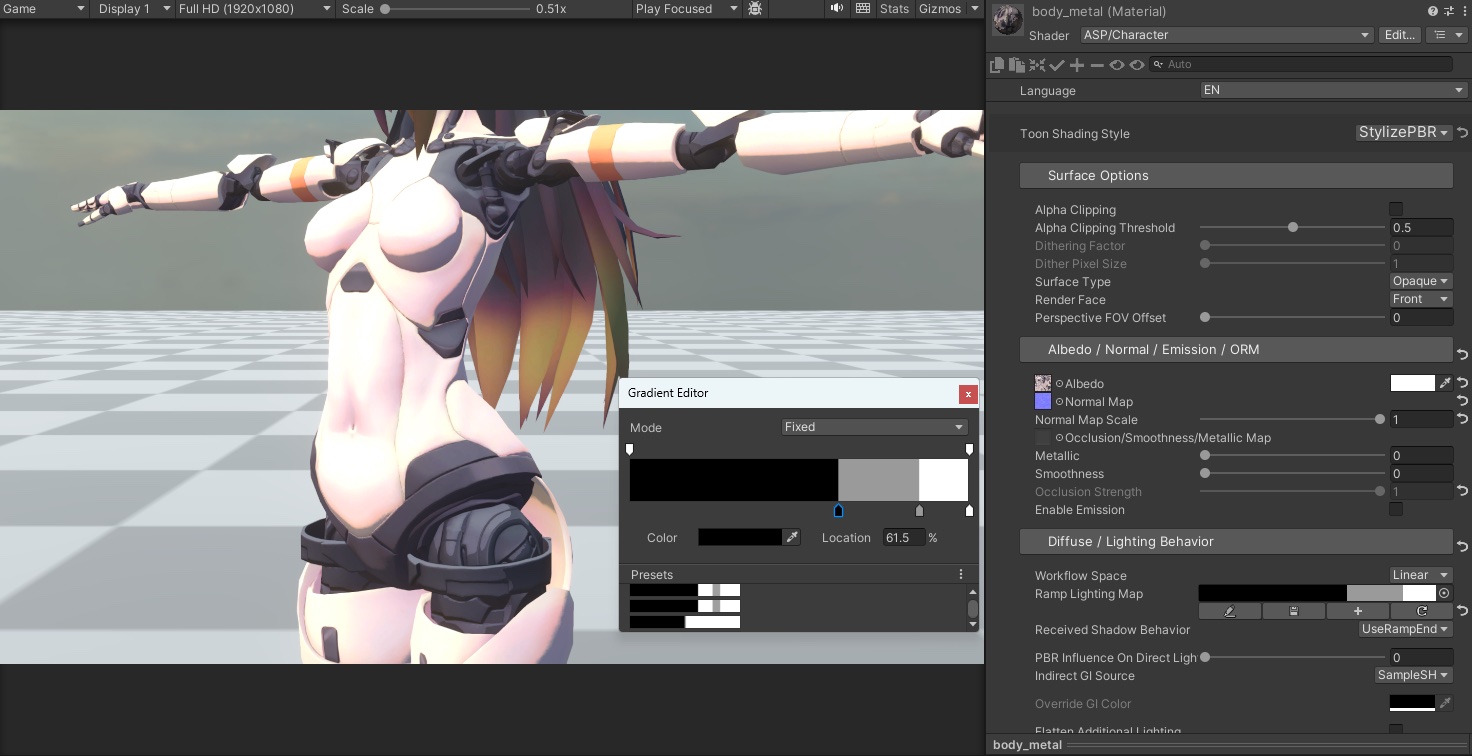
3. Create a Ramp Map for Stylize Cel Shading Character
Click the "+" button on the Ramp Lighting Map editor to add a new ramp map to the current material . Compared to the traditional cel-shaded style that is suitable for using FIXED MODE with distinct light and dark boundaries, the ramp map used for stylize cel shading characters can use a smoother gradient.
💡 What is ramp lighting?
Using a texture ( ramp map ) to define how surfaces respond to the angles between the incoming light and the normal.
3-1 Ramp Map for Non-Metallic Materials
This character model body is divided into metallic and non-metallic parts.
Let's first handle the non-metallic parts -
Open the Gradient Editor by click on the ramp light map (or create a new one).
Set the Mode of the gradient to Blend(Classic) mode.
Create a multi-color ramp. Add several color keys to your gradient map. This will provide more colors for the transition.
This gives more smooth color transition on the body parts when lighting it. Compare to the traditional cel shading.
3-2 Ramp Map for Metallic Materials and Stylized PBR Parameters
PBR is well suited for metals and leathers materials, and here I will demonstrate how to use StylizePBR mode to create a hybrid effect of toon rendering and standard PBR.
Switch the Toon Shading Style to StylizePBR at the top of the material panel.
For the metal parts, I use the ramp map in FIXED Mode (personal preference).
set the relevant PBR parameters - metallic and Smoothness.
| Property Name | Description |
|---|---|
| Metallic | control the metalness |
| Smoothness | Smoothness, i.e. (1 - roughness) in PBR of other non-Unity renderers |
PBR Influence On Direct Lighting -
The PBR Influence On Direct Lighting parameter controls the blending ratio between ramp lighting and standard PBR direct diffuse lighting.
For example, setting it to 1 will completely ignore the ramp map's lighting result and use the standard PBR diffuse lighting as result. Here it is set to 0.35 - so the result will be a mix of 65% ramp map lighting and 35% standard PBR diffuse lighting.
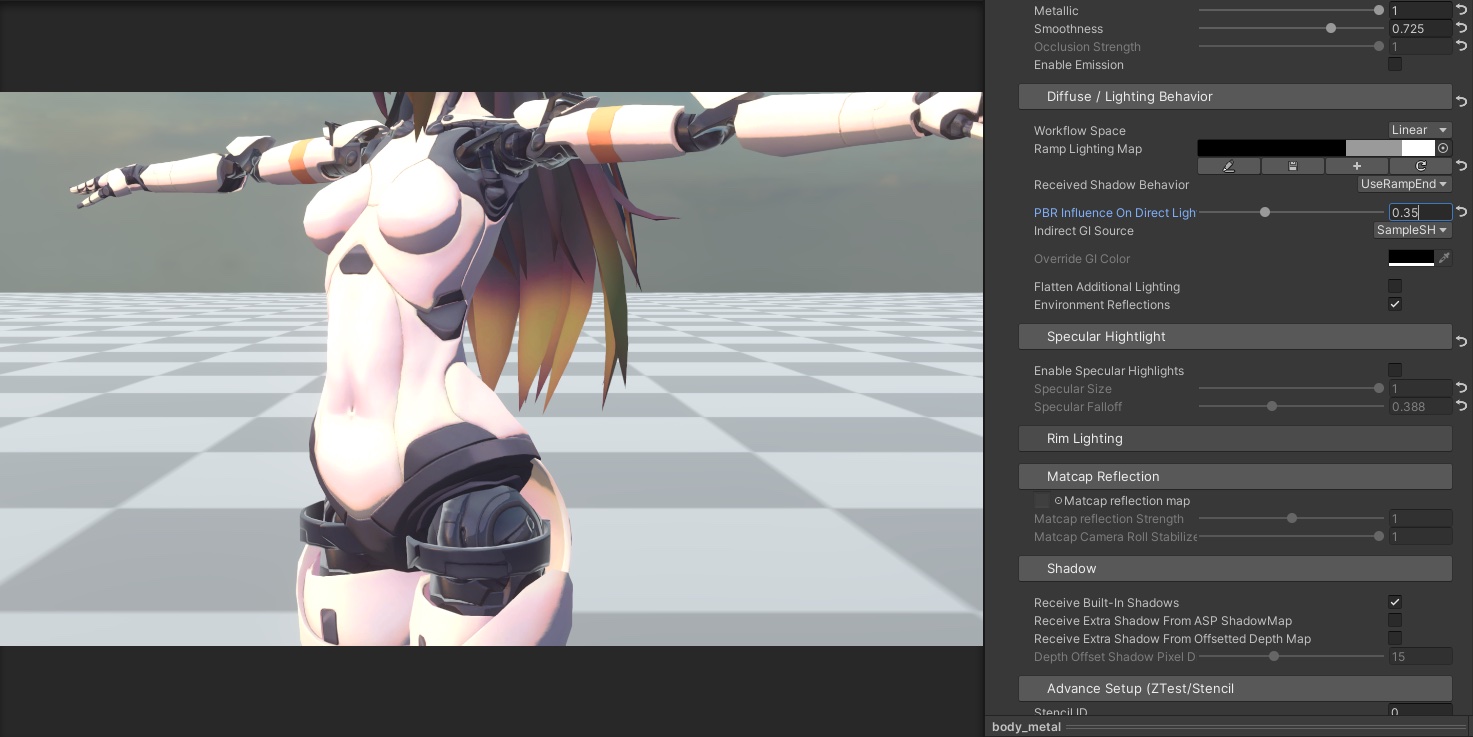
under the current settings, the material’s diffuse lighting will have a stronger ambient reflection compare to pure ramp lighting.
💡 You can also use PBR Texture(Occlusion/Smoothness/Metallic) to directly control occlusion, smoothness, and metallicness. The difference from Unity's built-in PBR is that ASP treat the value sampled from R channel as the occlusion, in order to reduce the number of texture sampling.
Specular highlight
An important element of PBR metallic materials is BRDF specular lighting. In the material inspector, turn on specular highlight and use specular falloff to control the softness of the highlight edges.
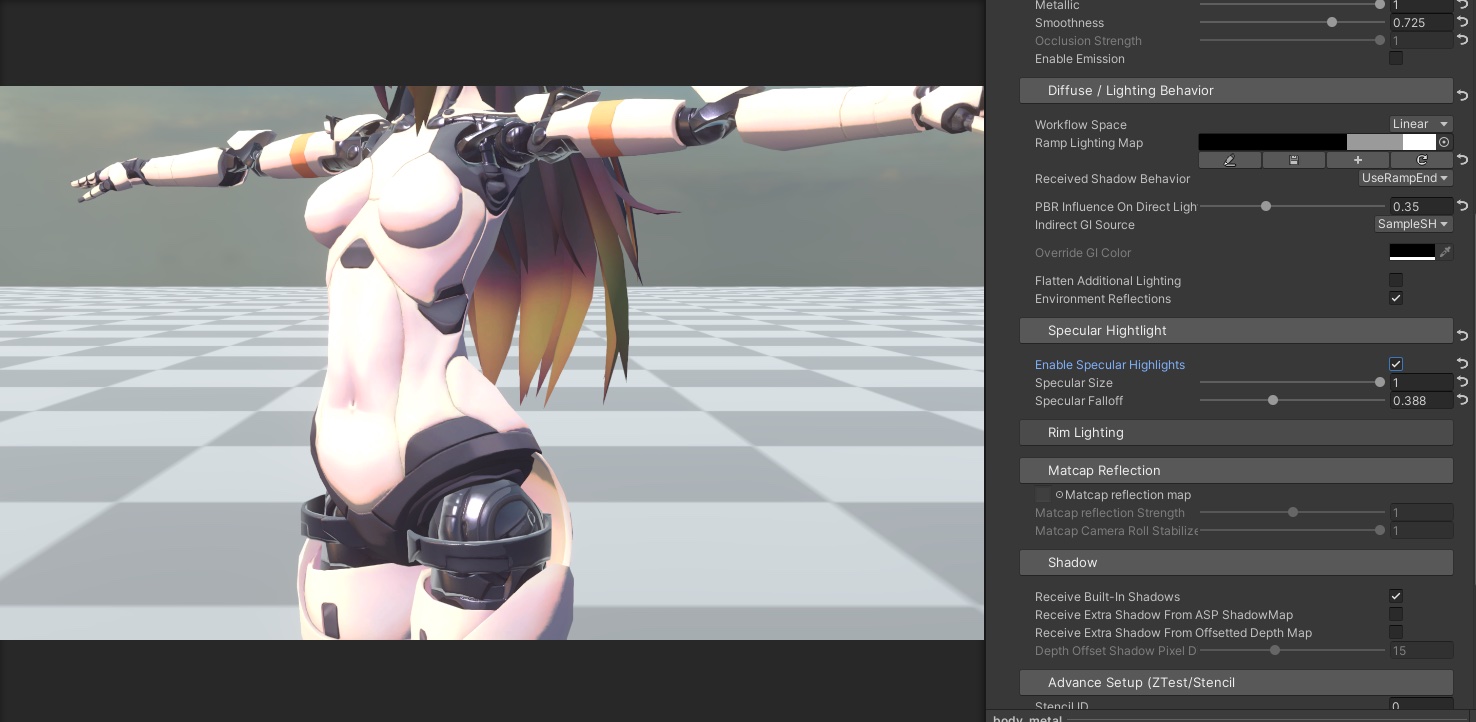
At this point, we already have a stylized metal material based on standard PBR.
Finally, to add a layer of customized environment reflection effect, apply a MatCap texture under the MatCap Reflection category.
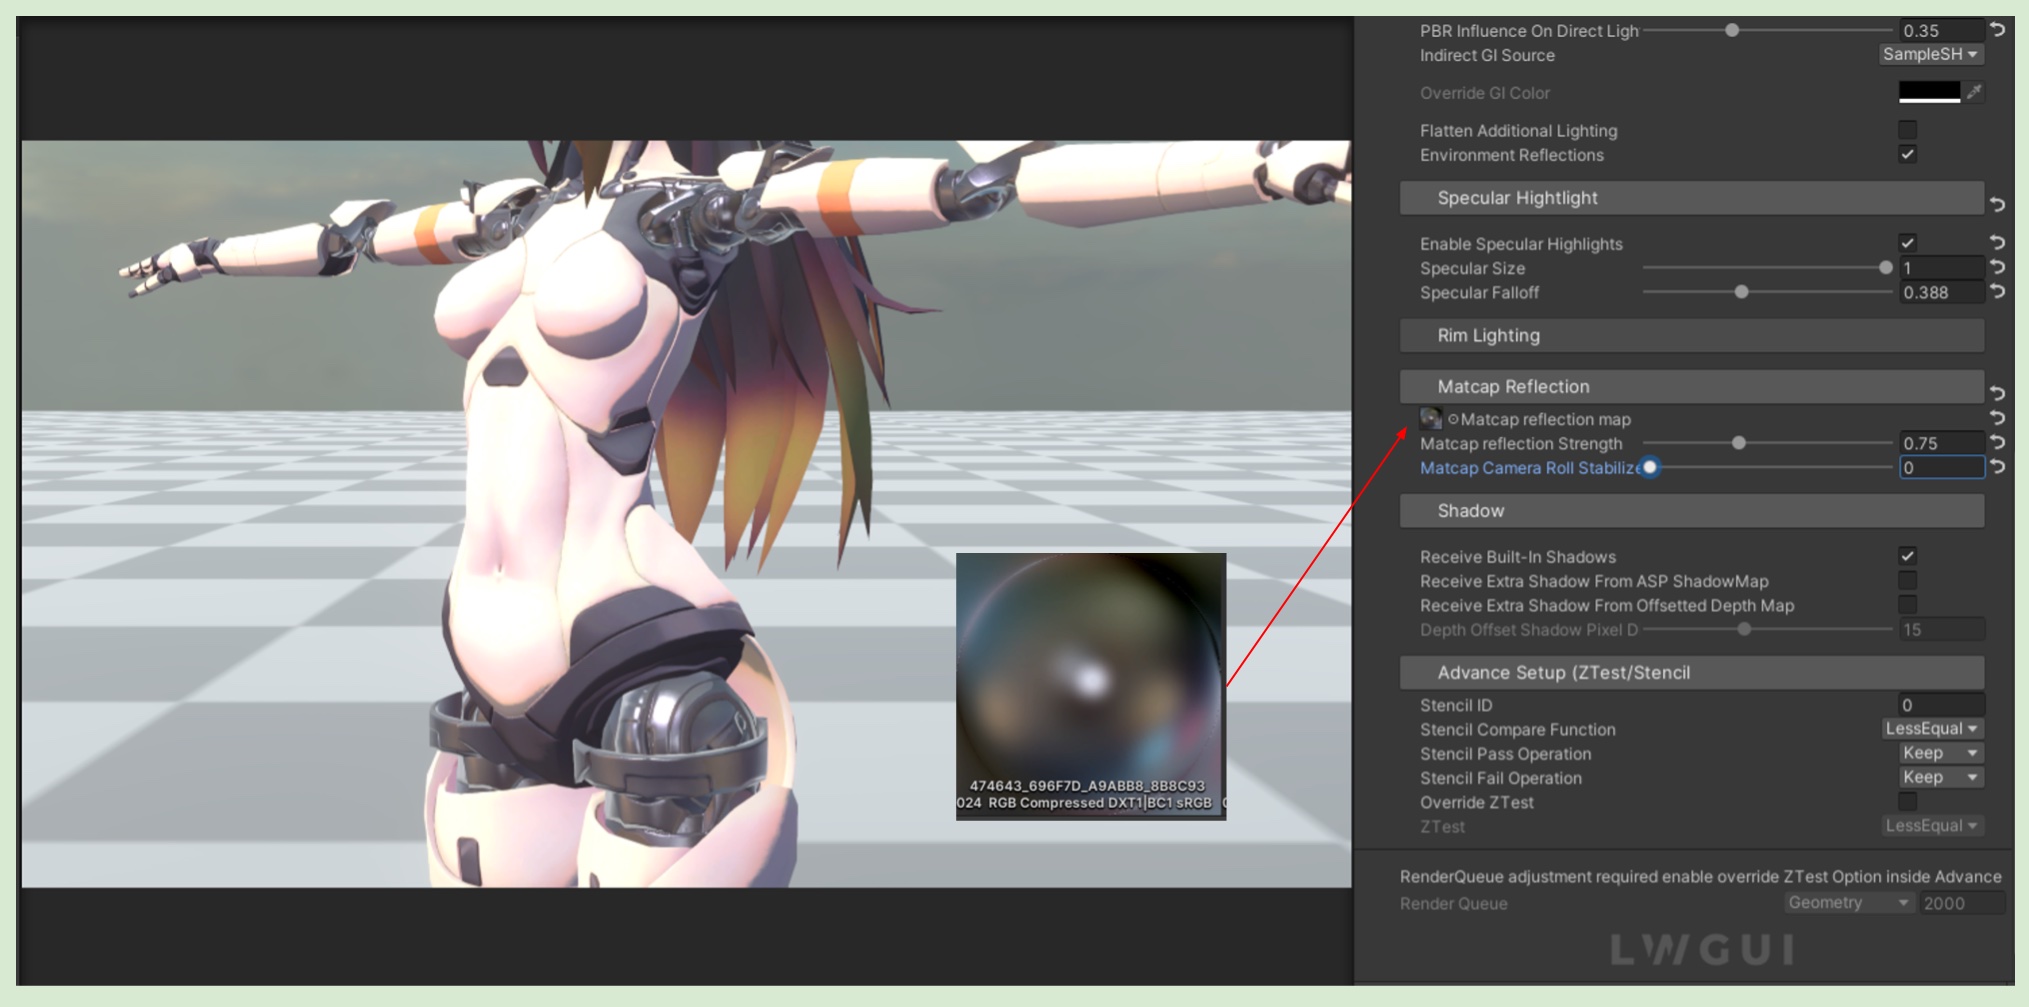
✨ In CelShading Mode, you can still create cartoon-style metal reflection with a appropriate MatCap texture.
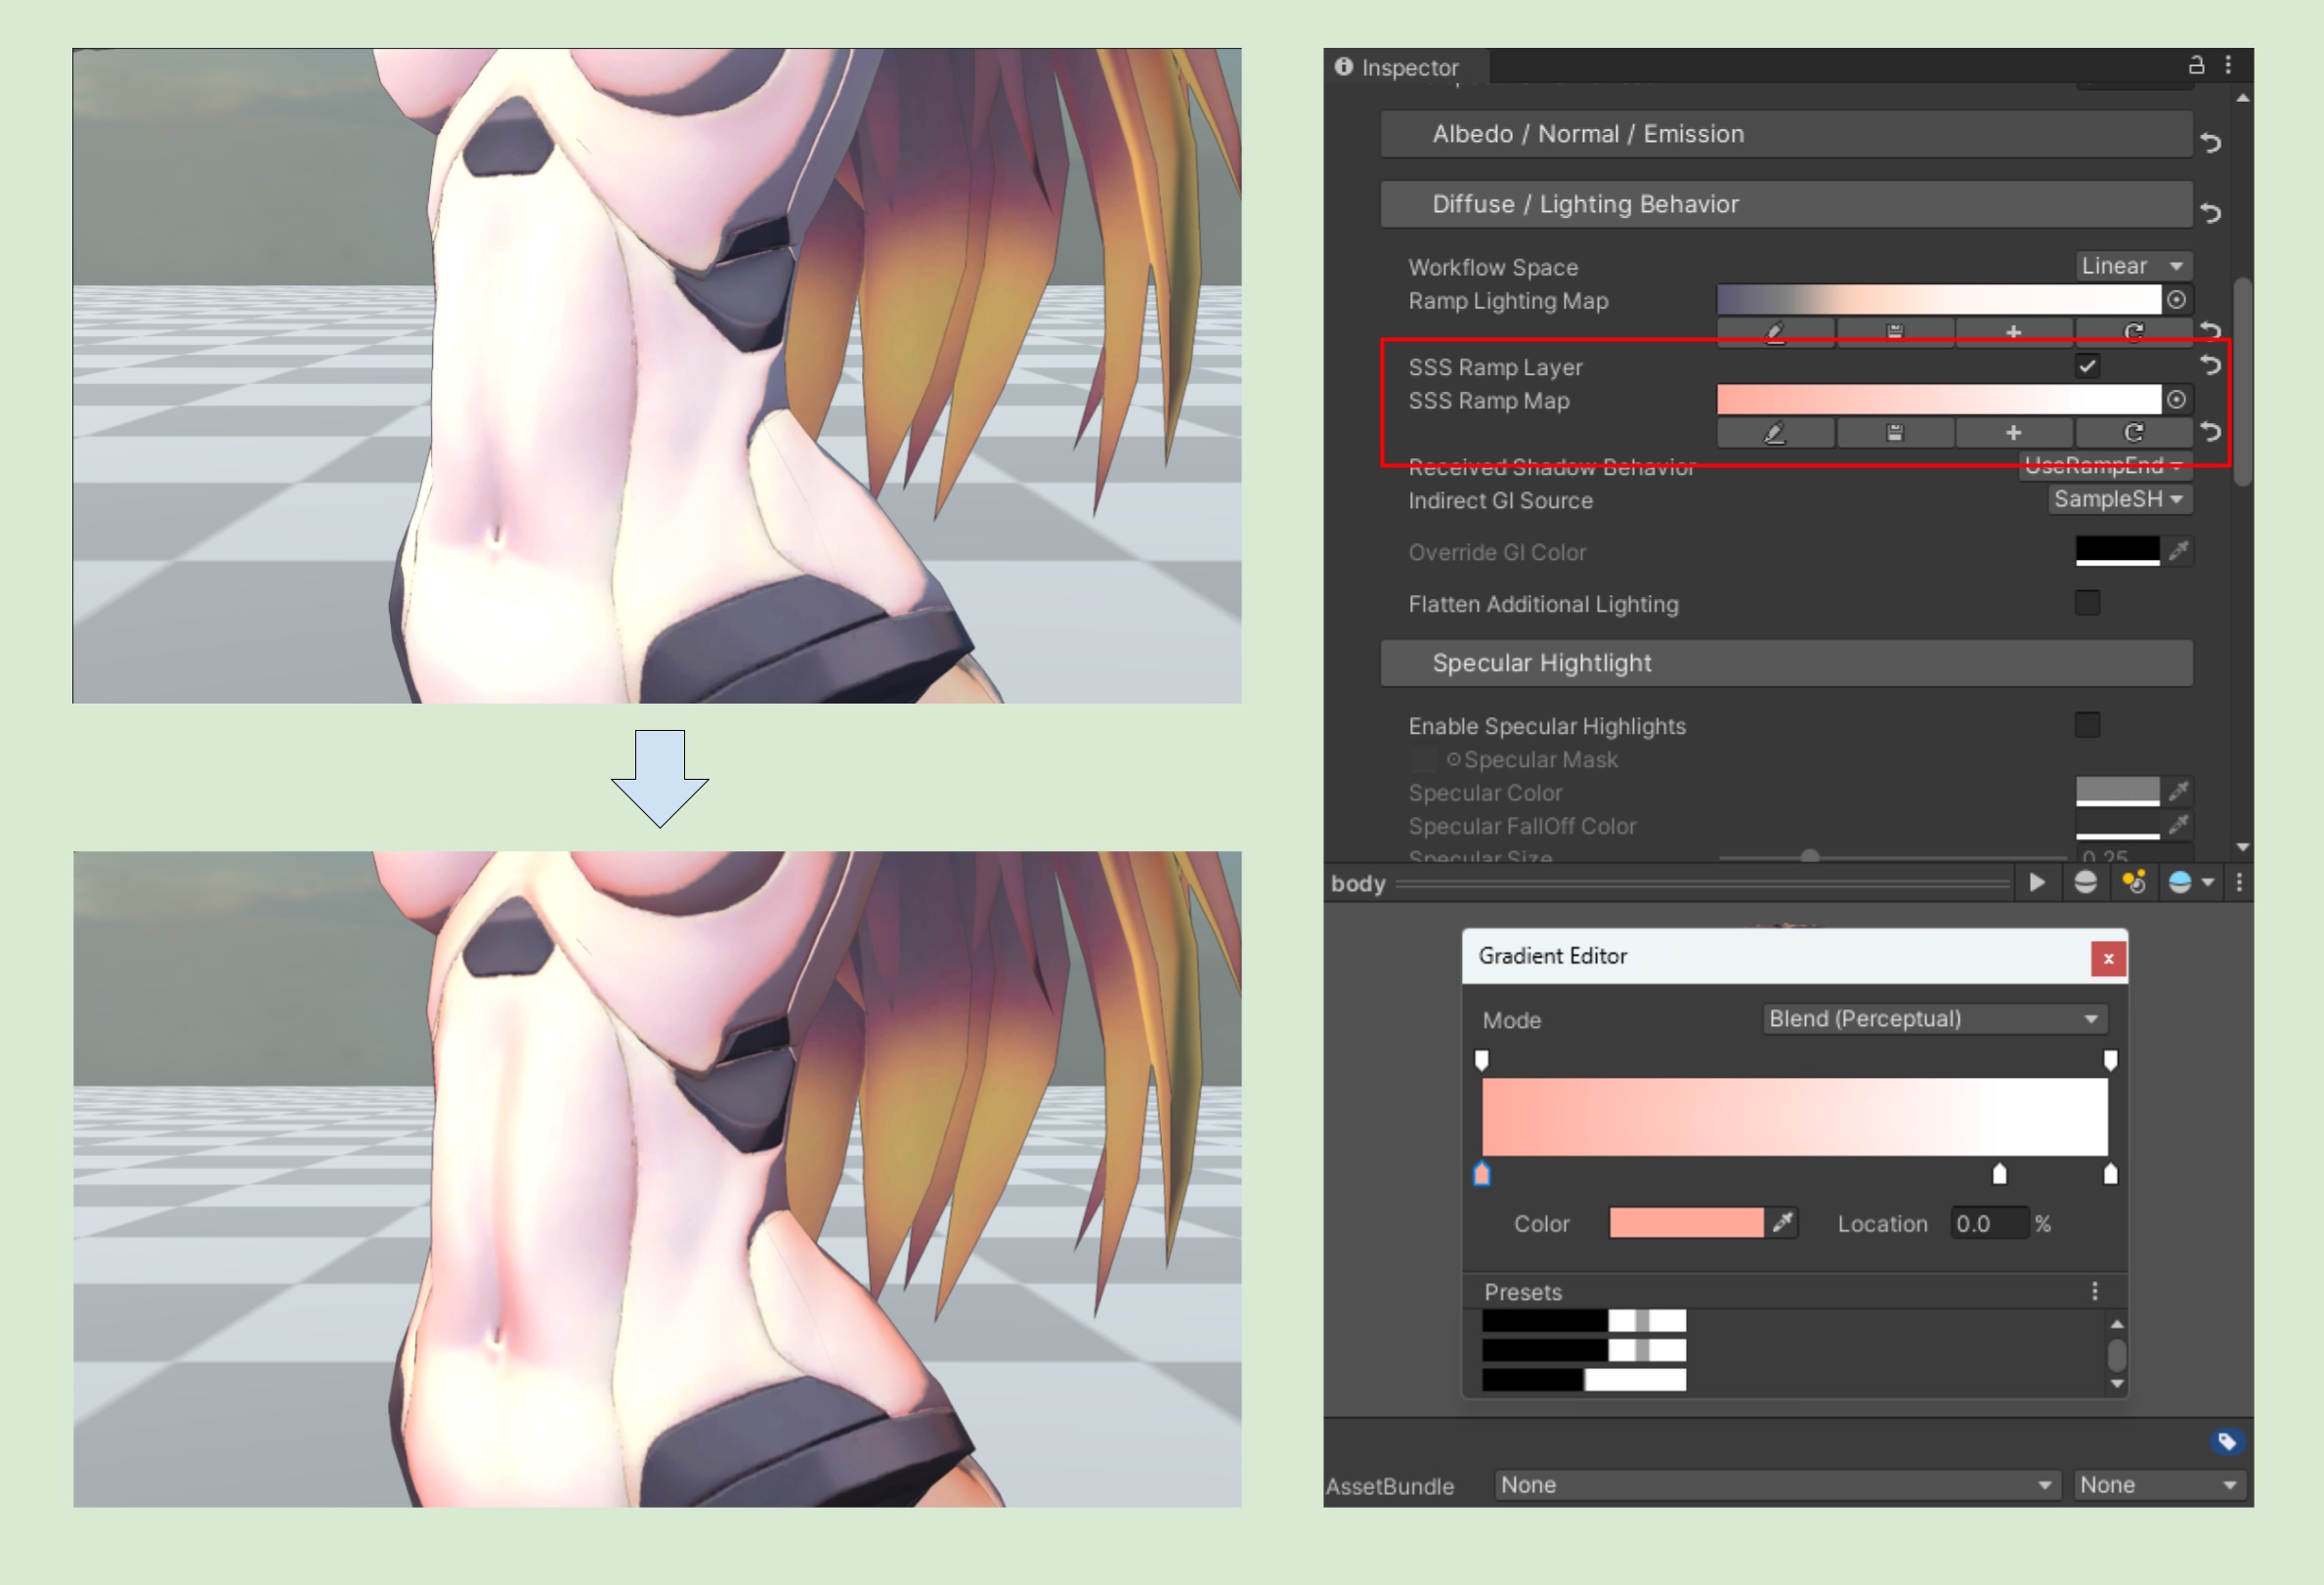
4. Configure Subsurface Scattering for the Body (Non-Metallic Material)
On the body's non-metallic material, you can set an additional layer of subsurface scattering effect under the Diffuse/Lighting Behaviour category. Enable the SSS Ramp Layer and add a SSS ramp map. The shader will sample the SSS ramp map based on the object's normal information and view angle, which will give the material a red translucent feel caused by indirect light passing through the skin and then scattering back into the eyes from the blood vessels. In general, the color of this ramp map should be very light (as shown in the figure below).
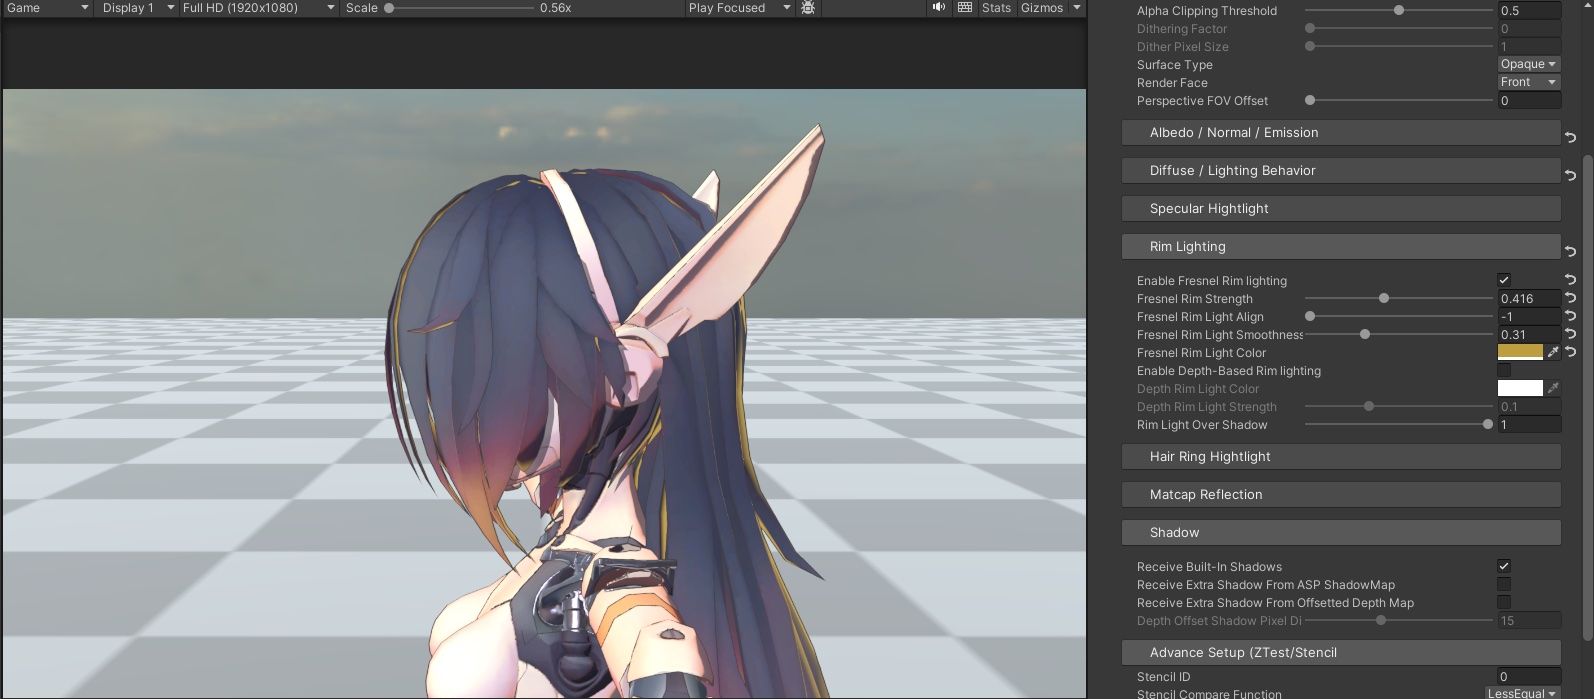
5. Rim Lighting
Rim lighting is often used in photography when the subject is backlit. To achieve this effect, select the hair material and enable Enable Fresnel Rim Lighting under the Rim Lighting category. Then, adjust the parameters accordingly. In this example, I set Fresnel Rim Lighting Align to -1. This will cause the rim light to only appear at the edges of the object when it is backlit by the main light.
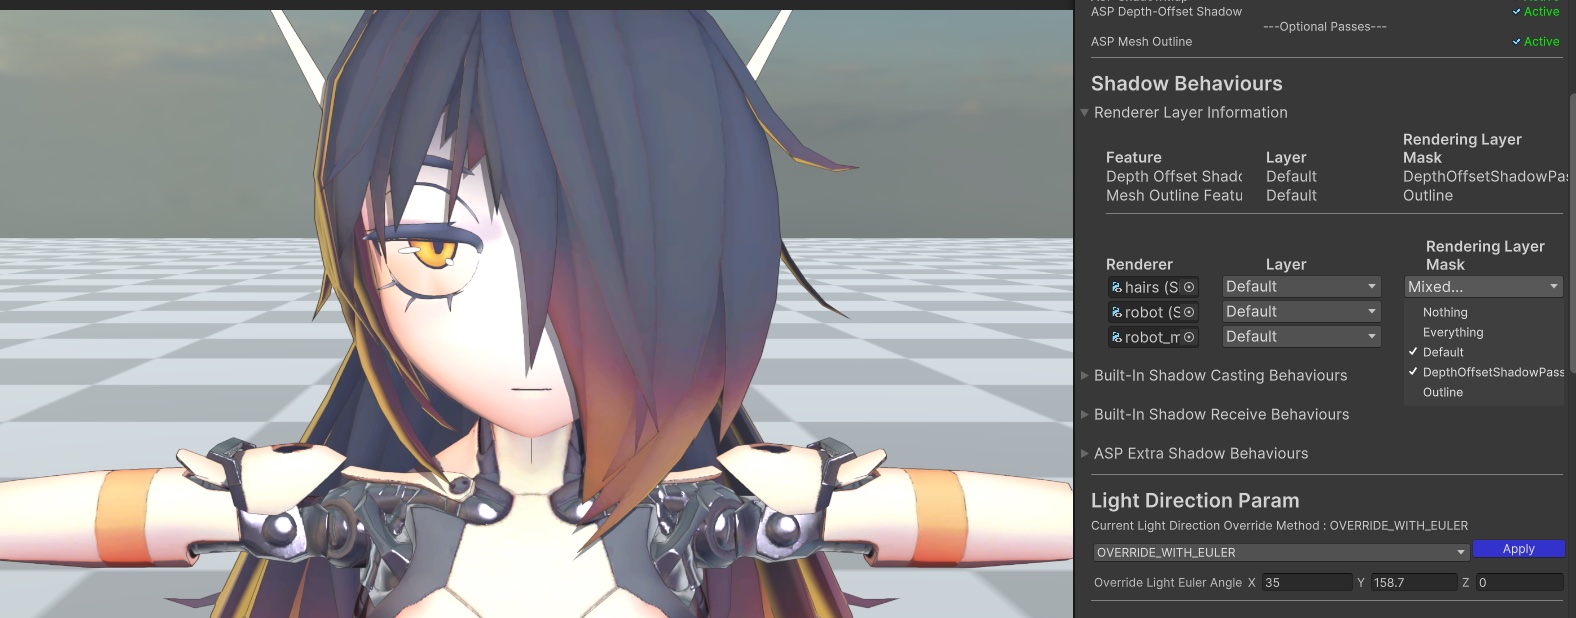
6. Using Depth Offset Shadow to Create Hair Shadows on the Forehead
Follow the depth-offset shadow tutorial in the 🦇 7. Character Shadow Setup Guide (1.3 Update 2025/11/15) (section 2-4) to set up the rendering layer mask for depth offset shadow and hair renderer of the character.
7. Screen Space Outline & Post-Processing (Tone Mapping, Bloom)
Follow the instruction of 〰️ 14. Screen Space Outline Setup Guide to setup screen space outline,
Follow the instruction of 🎨 17. Tone Mapping For Cel-Shading Characters to setup ASP Tone Mapping, Then, adjust the Bloom(anime character usually has higher scattering for the bloom effect).
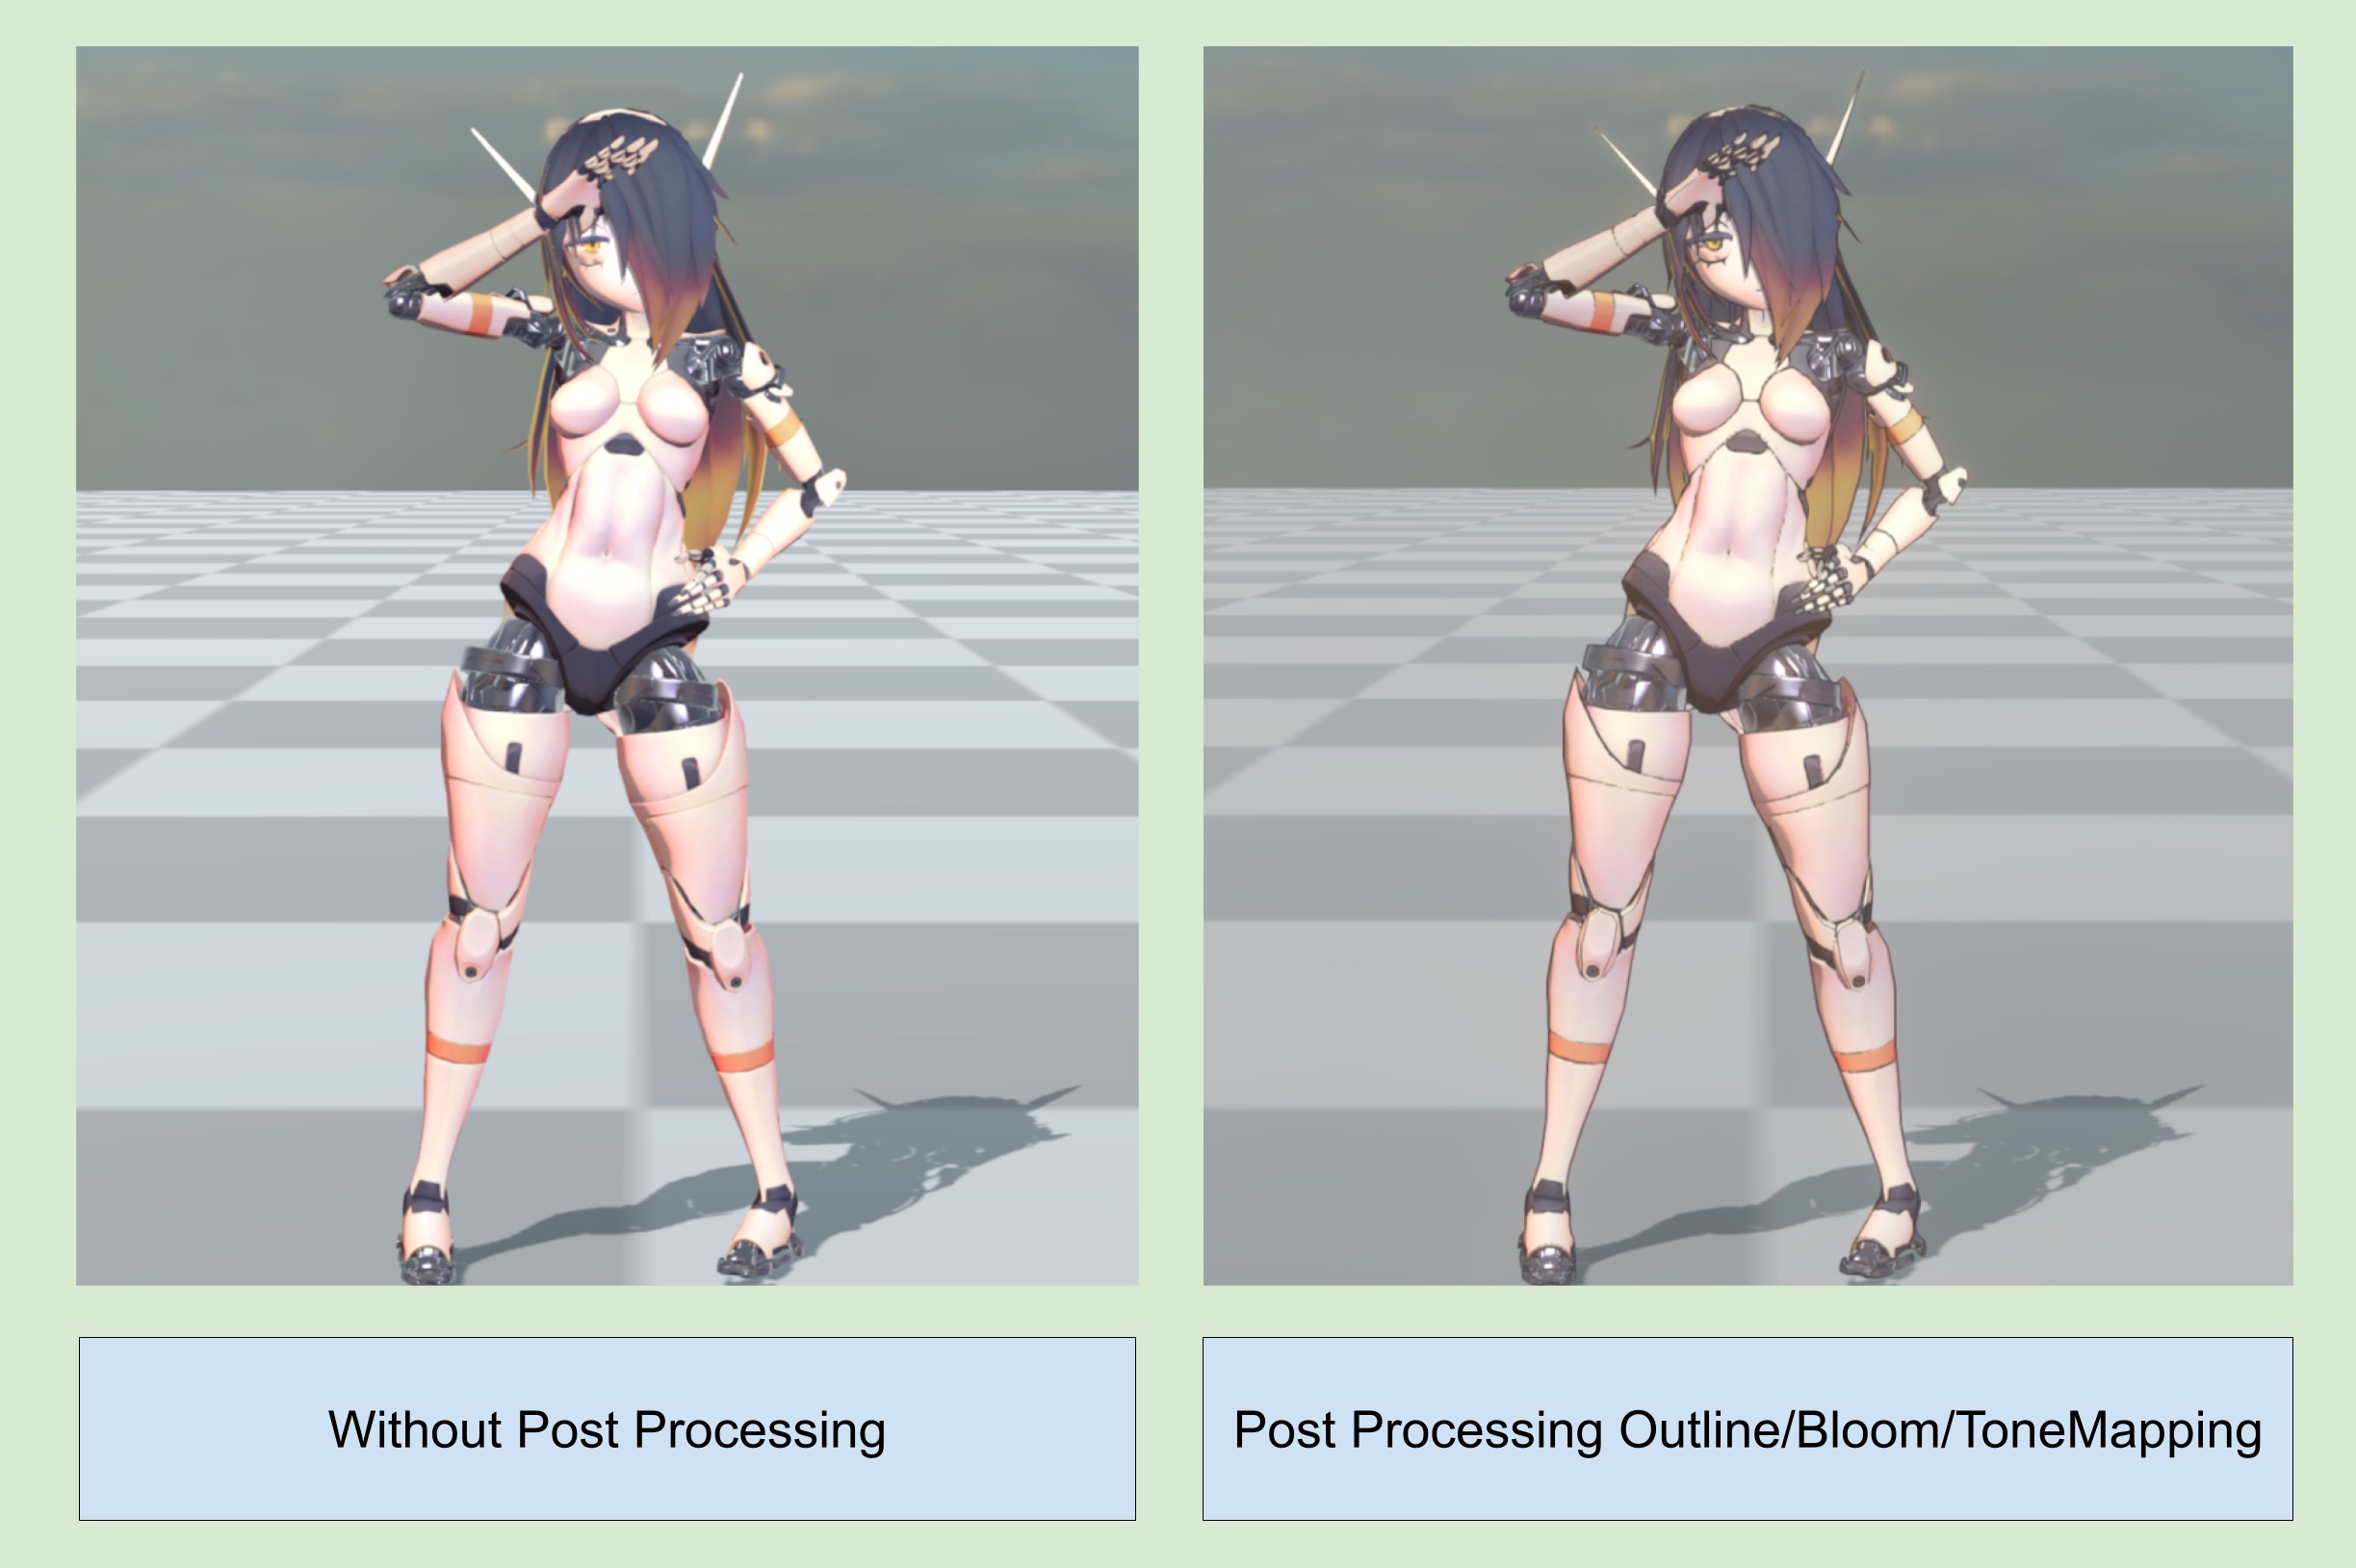
8. Render Result
💡 Go to next page → 🙃 9. Face Shadow Map- Creation & Baking Workflow